Our community is constantly adding cool new widgets to the App Store. If you’re unsure what exists, check out our previous reviews on UI building blocks, the feedback widget, and other top favorites and monthly reviews.
This week, I’m highlighting the newly updated Notification Widget, produced by our own Bailey Everett. The widget uses the jQuery notification protocol to display helpful text to users and has recently been updated to Dojo’s AMD standard. This widget is easy to install and configure and provides a cool new layer of user interaction. I’ll run through how you can set it up and start using it within your models.
Setting up the widget
First, you need to download the widget from the App Store. You can do this from inside the Business Modeler by searching for notification. This will bring the widget directly into your project. All you have to do is drop it onto a page for the functionality to be displayed.
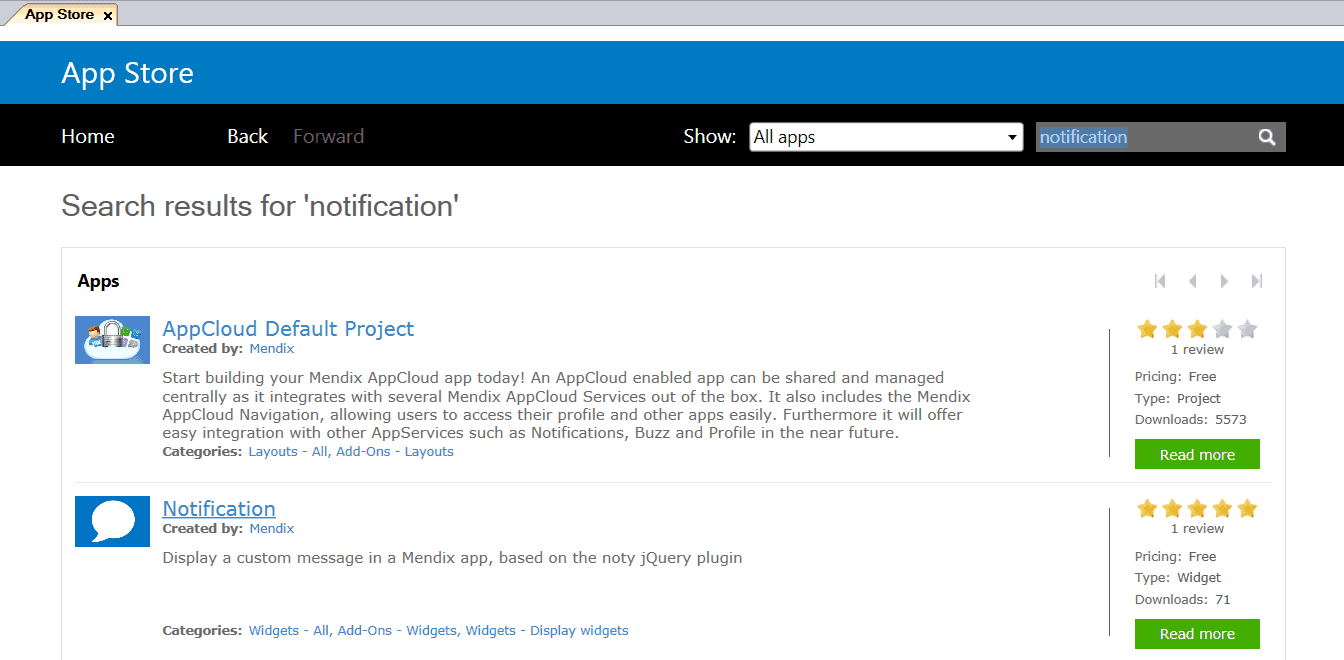 1. Download the Module from the App Store
Once you’ve acquired the widget, you can achieve a basic configuration very rapidly. The widget must be placed inside a data view. To do this, create a new, non-persistent entity called ‘Notification’ that has a string attribute called NotificationText and a Boolean name ShowNotification.
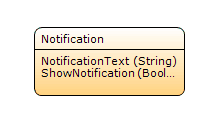
2. The simplest of entities
Next, set up your main page to contain a data view that is populated by a Microflow.
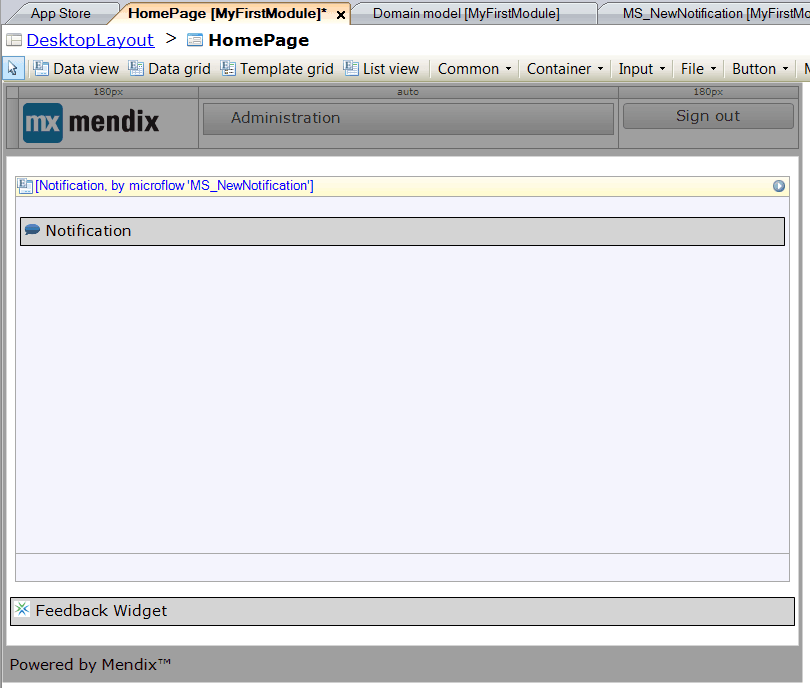
3. Home page with data view
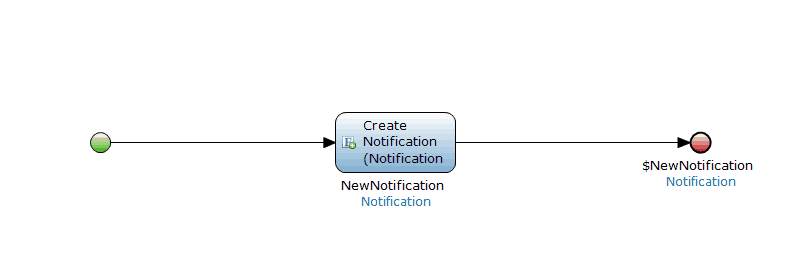
The Microflow datasource could be as simple as a create action and a return of that created value to the data view.
For some extra spice, let’s have this notification display a welcome message for all users after they log into the application. You can create this by using the following value for ‘NotificationText’ in our new entity.
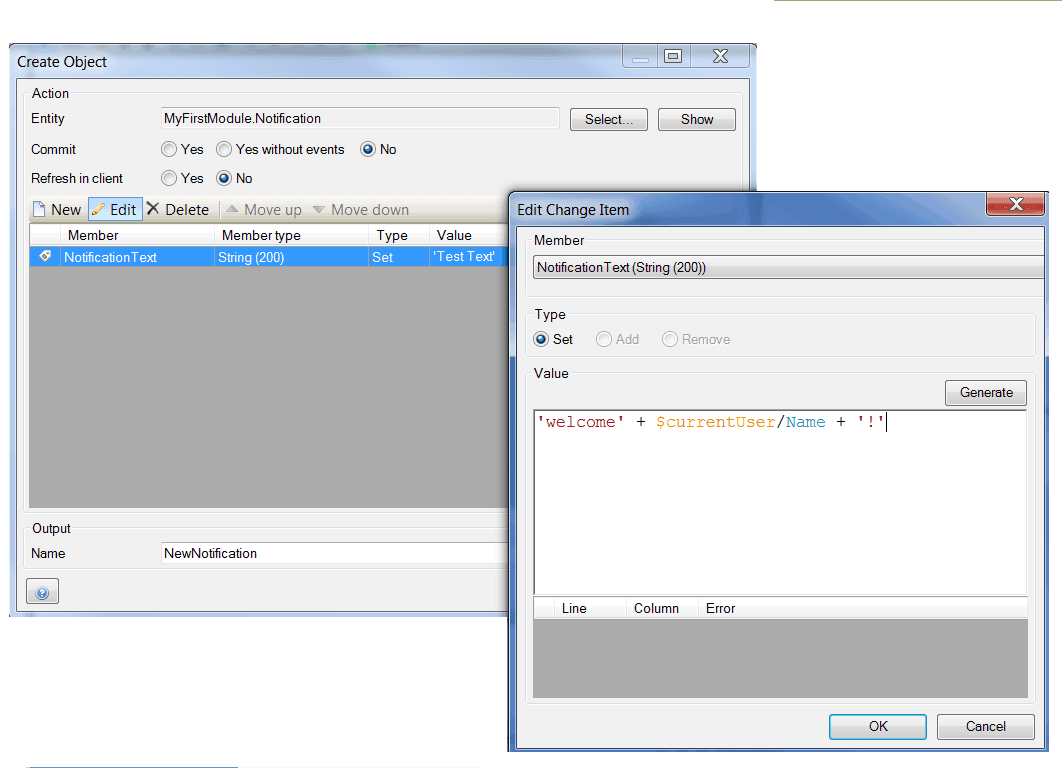
4. Create a welcome message
To configure the widget to display our message, double click the widget within the home page data view. Select ShowNotification Boolean to determine if the notification should be displayed, and set the NotificationText to be the display text. At this point, you can also select default options for styling and auto-closing the popup.
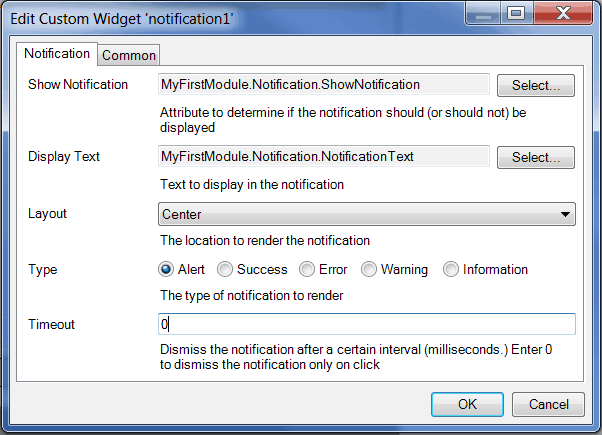
5. Configure the widget settings
Once all of this is done, we now see a notification when starting our app.
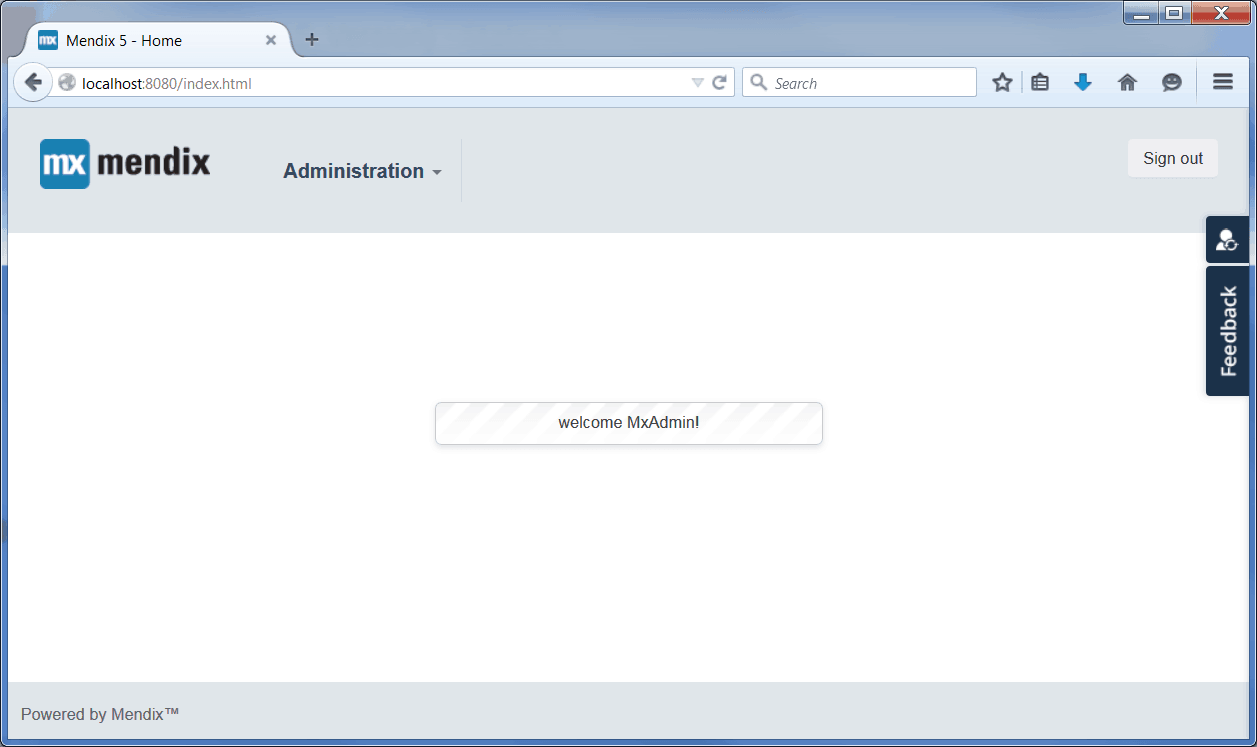
6. A very simple notification
A more advanced use case
Hopefully this shows just how easy it is to enable notifications within your application. However, chances are you will want something slightly more complex than a welcome message. Let’s take a more realistic situation and modify the Notification Widget.
Let’s say users have a series of tasks that they need to accomplish within the application. To ensure each task is reviewed, the business wants a highly visible alert that notifies the user if a task is missed. To enable this notification, use the Microflow MS_NewNotification to retrieve all overdue tasks.
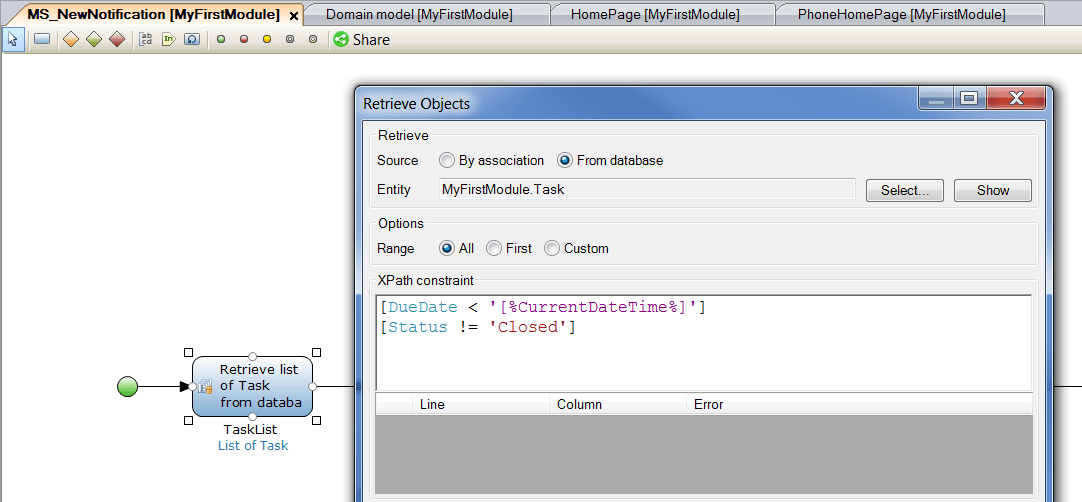
7. Retrieve past-due tasks
Then create an error text variable string and iterate through all tasks. For each missing task, iterate through and add that task name to the notification text.
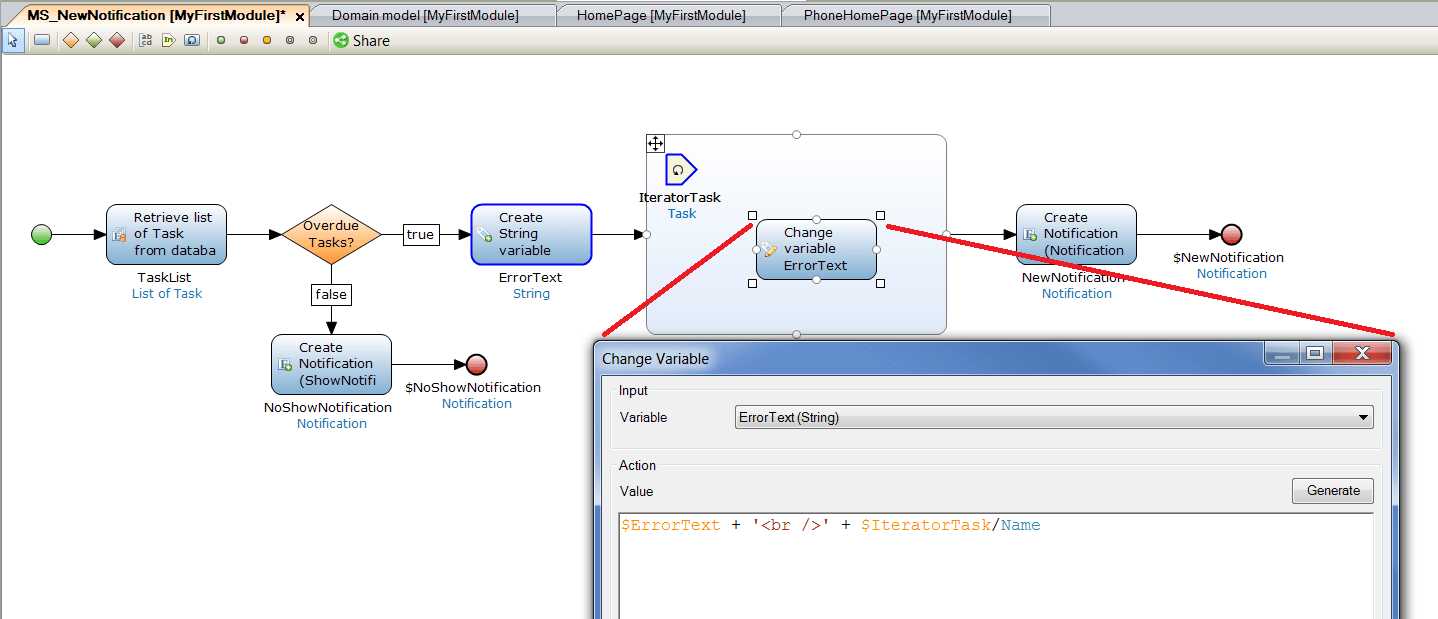
8. The complete notification Microflow
The Navigation widget renders HTML text, as the line breaks (<br />) above indicate. With a change to the coloring of the widget, users will now see a visible popup of all tasks that they need to accomplish.
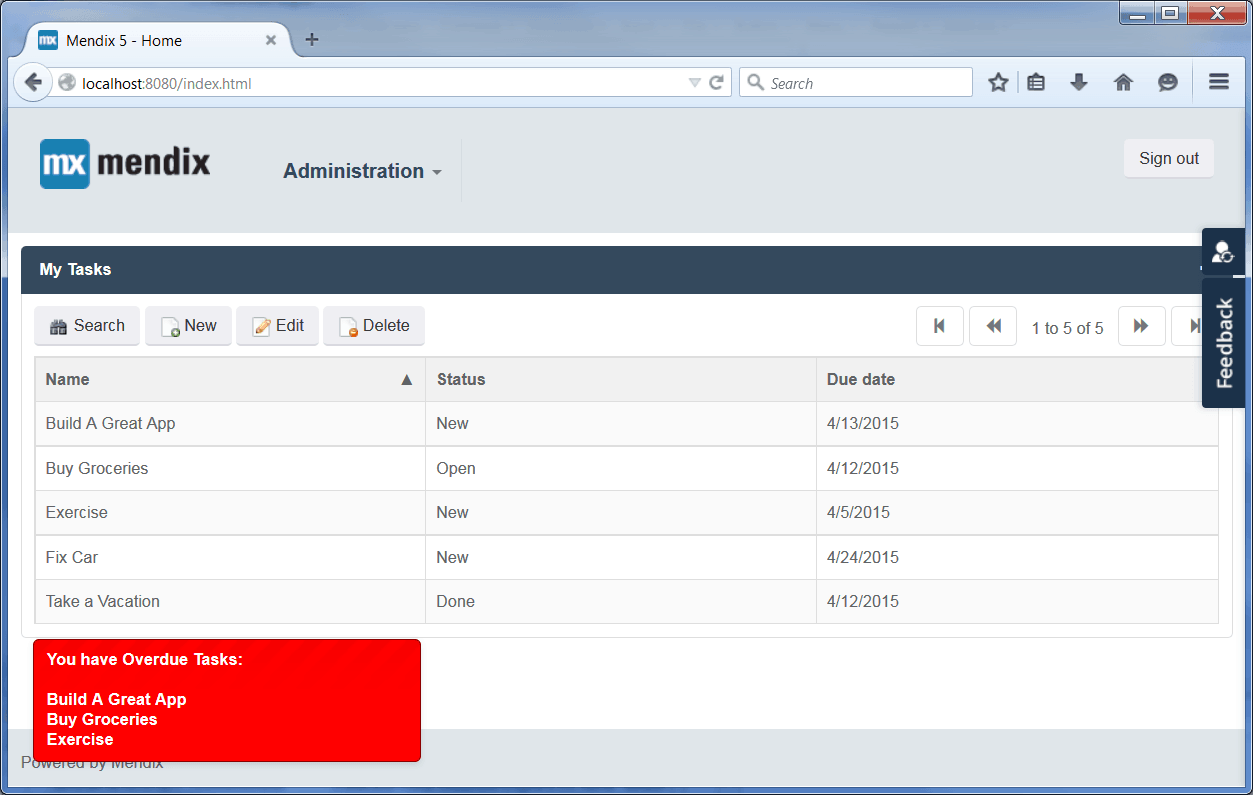
9. Pulling it all together
Find it on GitHub
Like much of our new App Store content, the Notification widget has a GitHub repository. Our active open-source community is constantly working to enhance existing widgets and create great new content together. Keep an eye on this widget in the future as additional functionality is on the way, including timer-triggered notifications and on-click Microflows. You can also download the repository and add new features yourself!
Happy Modeling!