
Mendix 7.11 introduces new REST publish enhancements, new capabilities to the Mendix Web Modeler, and Mendix Cloud availability in the UK. Learn all the details below.
REST Publish
REST Publish Enhancements
Mendix 7.10 included the first public release of REST publish support in the Desktop Modeler. In the 7.11 release, we’ve included some additional features that will accelerate your ability to develop, test, and document REST APIs built with Mendix.
REST is the de facto standard for communication between services these days, especially for services that can be consumed by external applications. REST Publish is the easiest way to create APIs using Mendix. It allows you to generate XML and JSON messages from domain models, documents the resources and operations of the API, and include OpenAPI/Swagger contracts out of the box. This output enables you to test and share the APIs you create fast. In addition, it simplifies communication between Mendix Apps that rely on each other for services.
How It Works
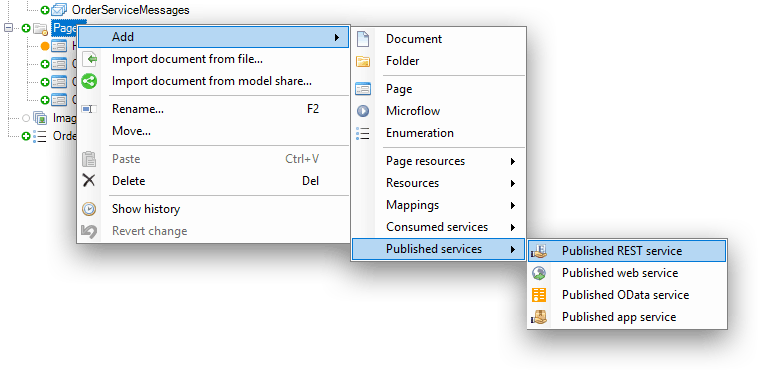
In the Desktop Modeler, we’ve reorganized the context menu to make it easier to work with Mappings, Consumed services, and Published services.
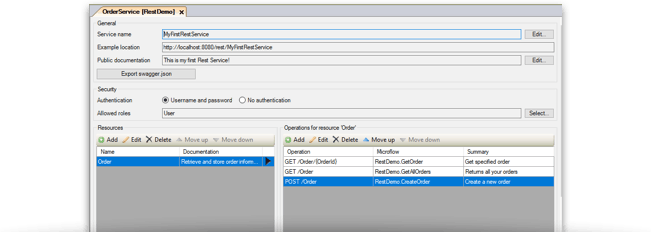
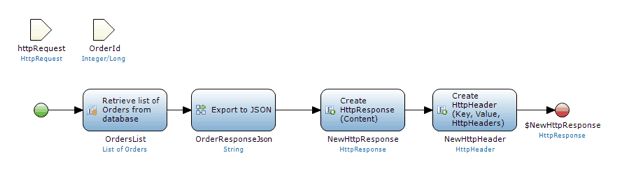
The Published REST service document, illustrated below, allows you to specify resources (data structures), and REST operations per resource (endpoints). Your documentation, editable in plain text or markdown, will be included in the Swagger contract, making your API readable and consumable for users.
Looking at the screenshot below, the General section displays basic information for the API. The Security section specifies the authentication requirements for connecting to the API. Depending on the purpose of the API, you can bypass Mendix authentication and implement alternatives like tokens specified in HTTP headers. The bulk of the screen is dedicated to resources and operations. This REST API has one resource named “Order”, and three operations to communicate with the API.
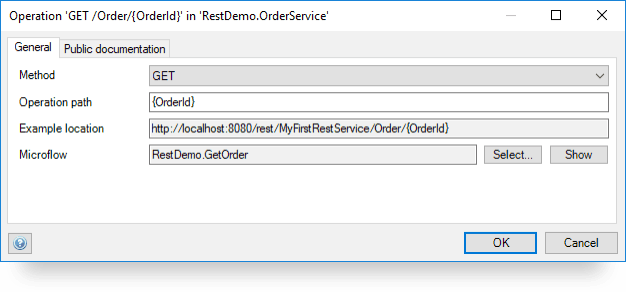
The Operations dialog window provides a powerful and flexible way of working with parameters. Mendix will automatically detect parameters from the selected microflow and include them in the path of the operation. Alternatively, you can generate a microflow for each operation and Mendix will automatically add the required parameters in the Operation path. By default, all parameters will be treated as query parameters (for example, location?par1=val1&par2=val2).
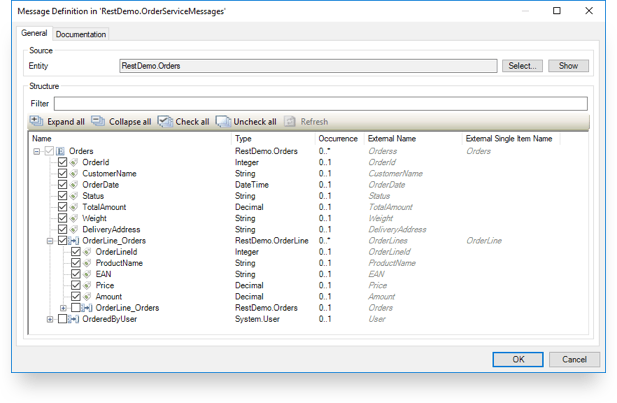
By default, REST APIs exchange JSON or XML messages. To define these messages, the Desktop Modeler contains a Message Definitions window. Here you select one entity or a hierarchy of entities as the basis for your messages: no need to manually define XML schemas or JSON snippets!
You can use regular mappings to import and export JSON or XML documents in the microflow. This enables you to reuse a single definition of messages throughout your APIs, and even in custom connector kit actions. The microflow provides direct access to the HTTP request and response so you can get and set the request payload, and optionally other aspects of the request or response, like header values.
Testing the API
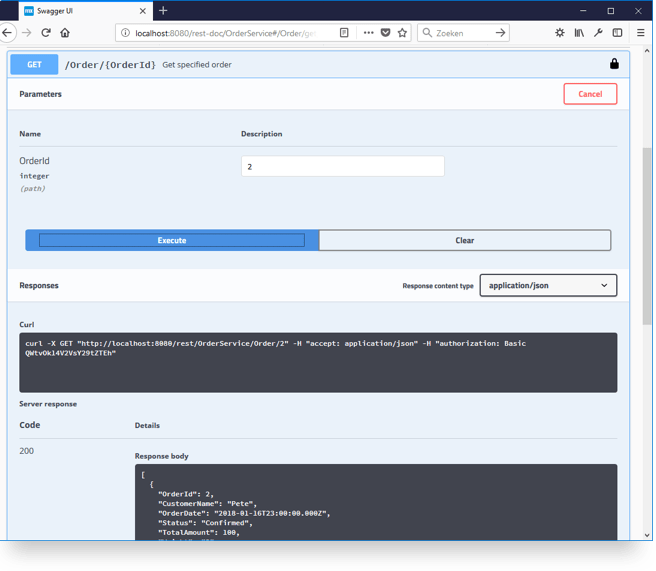
Once you’ve deployed the REST API, you can open a browser and navigate to http://localhost:8080/rest-doc and inspect the Swagger contract. Observe the fully documented REST API for your users to refer to and consume.
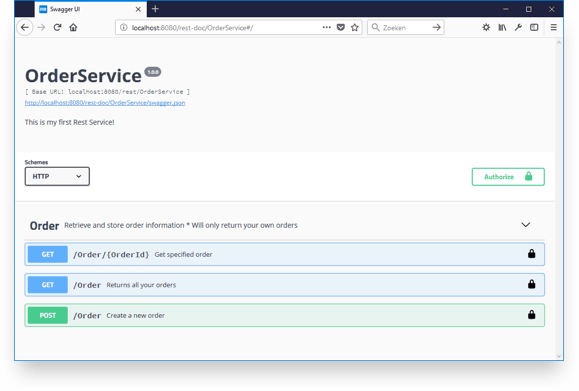
A great feature of the Swagger contract is the ability to test the API straight from the documentation. If the API has parameters, you can specify them on this page, click Execute, and instantly see the results. Another useful feature is that the Swagger documentation shows the required curl command, so you can easily automate API testing using a script or REST clients.
This is only the beginning of REST publish. Expect more features and productivity enhancements in the upcoming months!
Web Modeler
Introducing the Guided Product Tour
The 7.11 release adds some cool new capabilities for the Mendix Web Modeler, our web-based development environment for business developers. The Web Modeler is great for designing and building beautiful apps using a “What You See is What You Get” page editor in conjunction with Atlas UI, our flexible design system for creating engaging user experiences, and a web-based Microflow editor to add business logic to your app in a visual way.
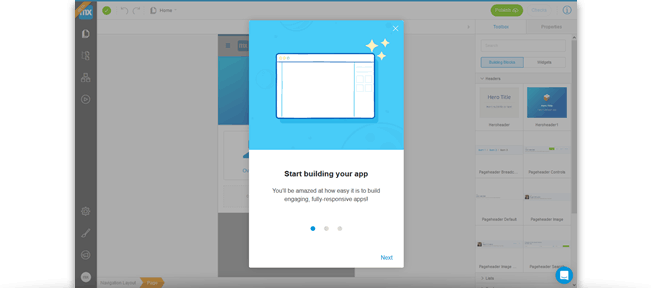
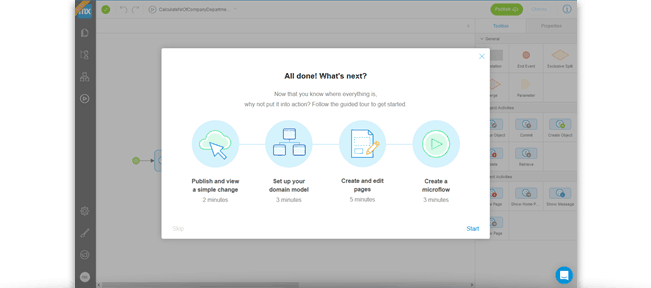
If this is your first time working with the Mendix Web Modeler, you will be up to speed building apps in no time thanks to our guided product tour. This tour will take you step-by-step through the basics of using the Web Modeler, and start you on the journey to building and deploying an actual app. Within 15 minutes, you will have built and deployed your first app! To begin the guided product tour, create a new app using the app template named “Start Your First App” under the “Introduction Tour” tab of the Create New App page on the Mendix Portal.
Microflow (Visual Business Logic Modeling) Updates for Web Modeler
In this release, we’ve added subtle intelligence to the Microflow editor to help you create Microflows easily, fast and error free. When hovering over an activity, blue dots will appear on the activity indicating where other activities can make connections. To connect one activity to another simply drag an arrow from the illuminated end of the first activity to the blue dot of the next activity. What’s cool is when dragging an arrow the editor will highlight suggestions on activities to connect.
![]()
In addition, we’ve added an end event preview feature highlighting missing end events in a Microflow. The preview pops up when you drag an end event onto the canvas.
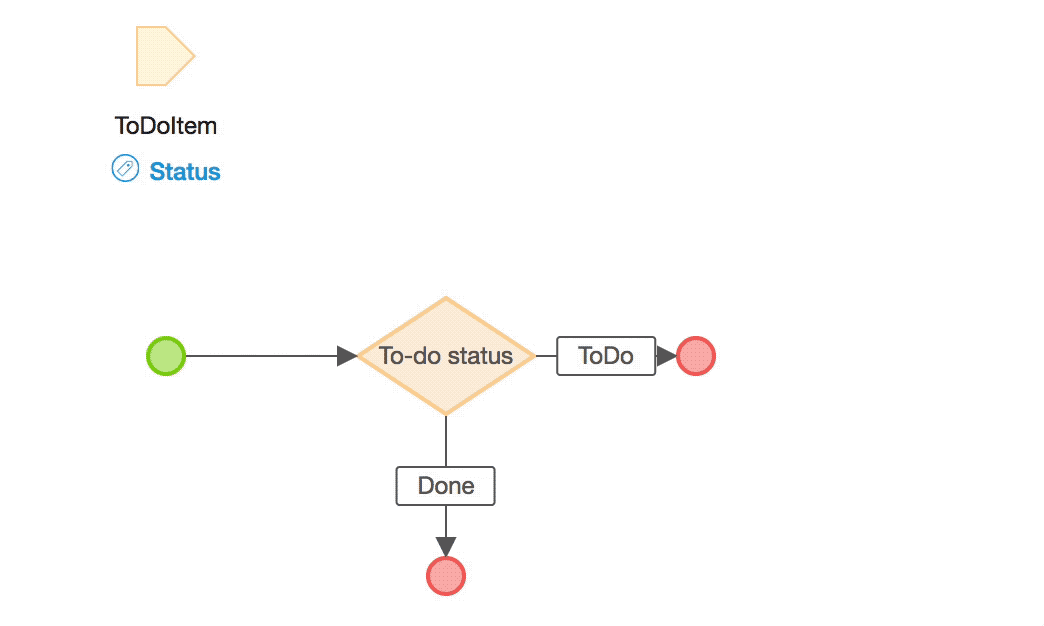
Lastly, Exclusive splits (conditional logic) work with Enumeration variables (options) along with Booleans. What this means is Microflow logic can be controlled by the current state of a variable in the application. For example, consider a To-do app where it is possible to archive tasks. With conditional logic, it’s possible to build a Microflow that will automatically archive the task when the task is complete.
One more thing on Microflows is the addition of Merge and Message activities to the Microflow toolbox. These activities enable Business Developers to add sophistication to their applications like displaying messages to users within apps.
Prefill newly created form-based pages
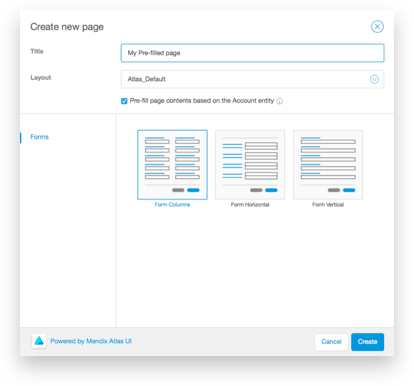
One more thing to note on the visual side of modeling is the new data pre-fill checkbox in the page creation dialog. When you create a new page containing a Data View from an Atlas UI template, page content will pre-fill automatically when the checkbox is checked. This speeds up the initial app development by automatically adding and wiring the appropriate widgets for the entity specified.
Mendix Cloud Expands to the UK
As we begin 2018, we’re happy to announce the general availability of the Mendix Cloud for app deployments in the UK. We added this region to help our UK government customers meet compliance requirements, and to enable our customers seeking minimal latency in the UK region to deploy applications. The region is available for new applications immediately.
See You Soon
That’s it for updates this month. Make sure to check out our full complement of blogs for all the latest and greatest low-code app dev knowledge drops, visit our community website and contribute to the conversation, and follow us on twitter @Mendix. For a full list of the changes in the 7.11 release please review the release notes. See you soon!