Add Google SSO to your Mendix app using the OIDC module

These days no end user has the time to complete a lengthy sign up process, we’ve all filled out enough “confirm your email address” boxes for 10 lifetimes. That’s the reason why almost every website or app out there now comes with options to “Continue with Google” or some other commonly used platform such as facebook or Microsoft.
Beyond streamlining your app’s UX there are also other advantages to SSO. Having 1 password or account for multiple applications limits the number of vulnerable points in the system, increasing security, as well as making it easier for registered user’s to remember their credentials. It’s a proven fact that people are terrible at password management, and usually people will actually re-use the same password for multiple accounts (a very bad idea).
So in this blog I will show you how to add a login with Google SSO to any Mendix app in just a few minutes using the OIDC market place module(Open ID Connect Single Sign On)
What do we need?
Before we start take a moment to check you have everything you need. Make sure you have created a google cloud platform account.
You will also need to have some Marketplace modules to your Mendix App:
- Community Commons
- Encryption
- Nanoflow Commons
- OIDC Module
Getting started
On the Google Cloud Console, go to your project overview which looks like this.
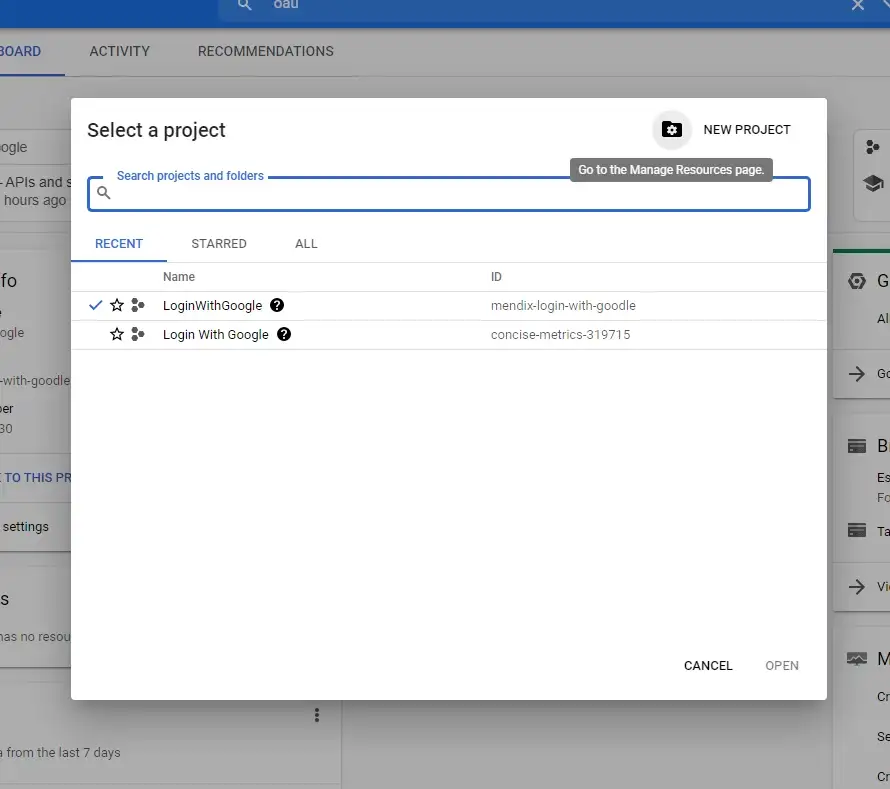
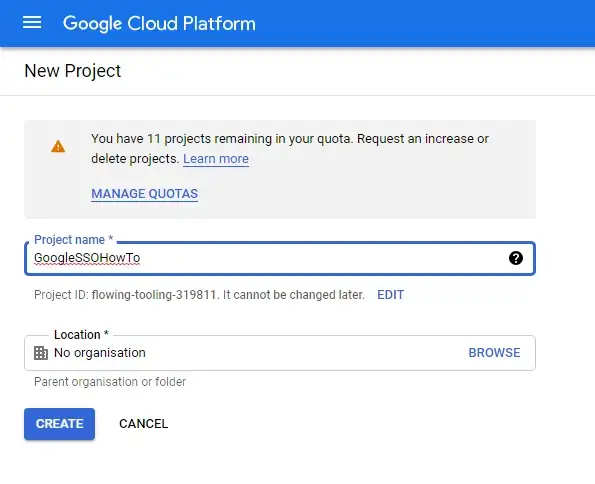
Click to create a new project, give it a name (This can be anything), and then click Create
Open your project, and once on the dashboard in the search bar at the top of the page search for OAUTH Consent Screen.
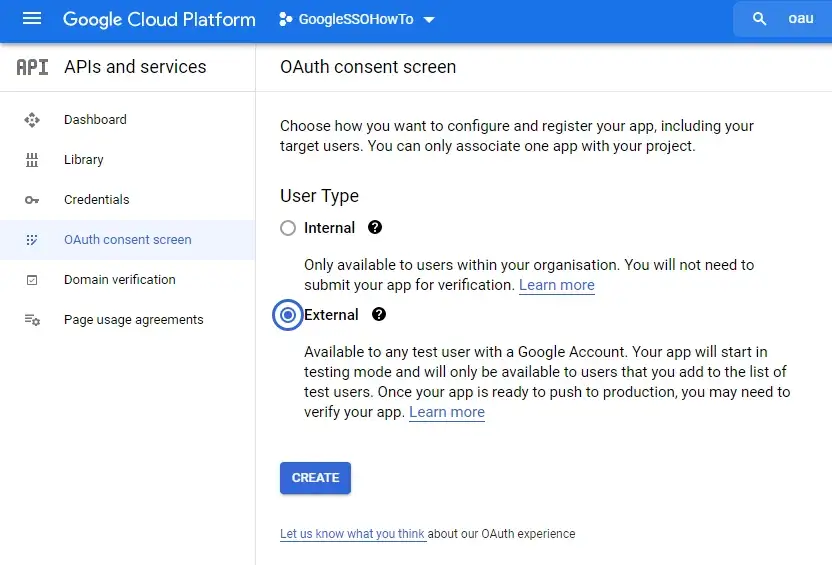
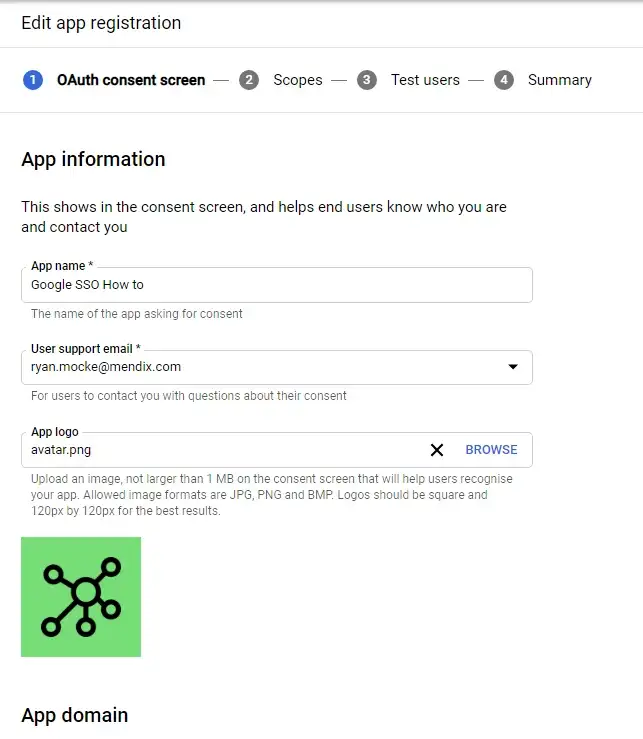
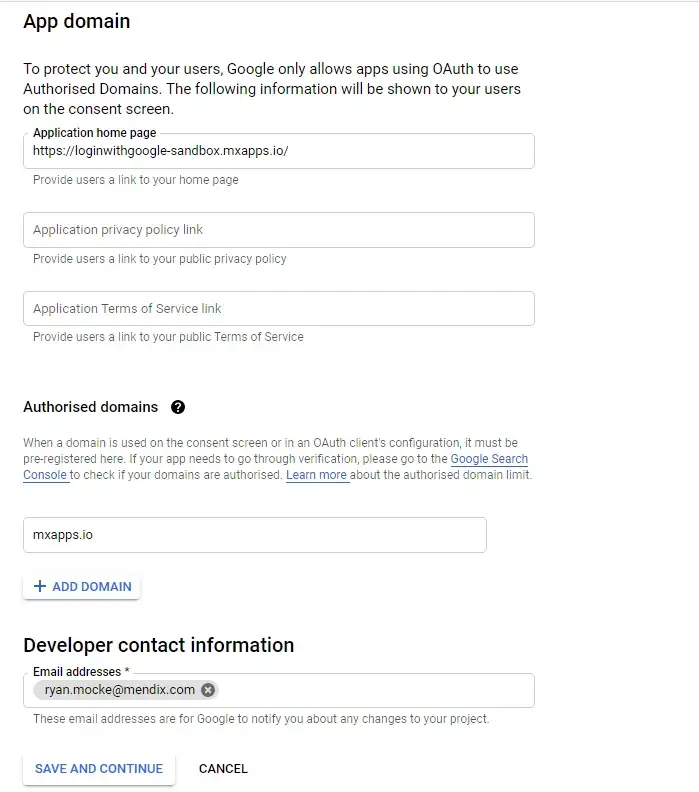
For User Type choose External (This will allow any user with a google account to create an account and access your app. Click on create to proceed. On the next page, fill out all the details required with your own information as shown below.
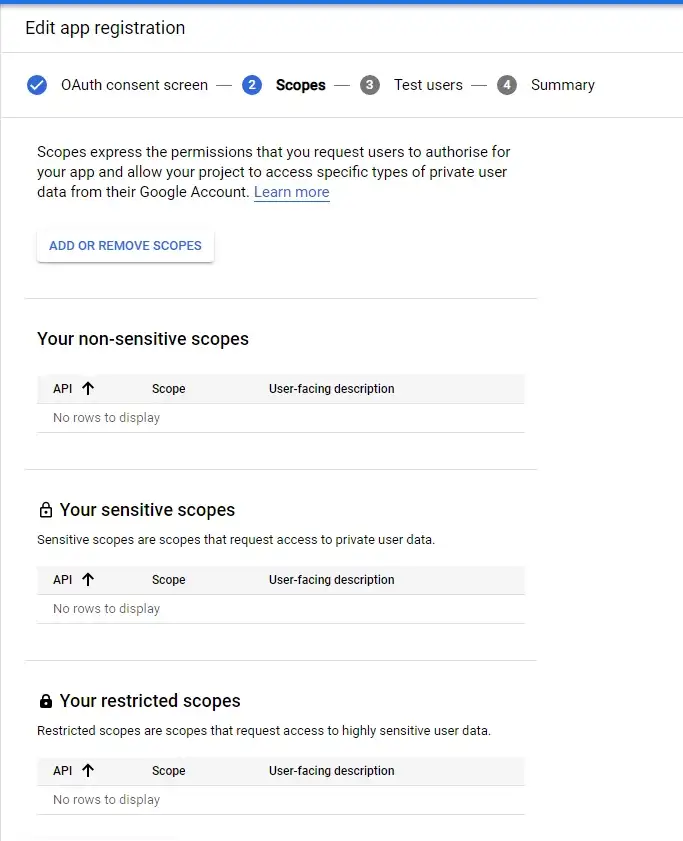
On the next screen “Scopes” you do not need to fill in anything. Simply click Save and Continue at the bottom of the screen.
On the final screen titled “Test Users” you can specify a list of users who are permitted access to the app while it is still in testing. While your app is still in development this generally isn’t needed, unless you need more than 100 test users (as this is the limit). Decide wether you need to specify users or not, and click Save and Continue at the bottom of the screen in order to proceed.
Now we can navigate to the credentials page (On the left hand menu) and click on Create Credentials, from the dropdown which appears select OAuth ClientID
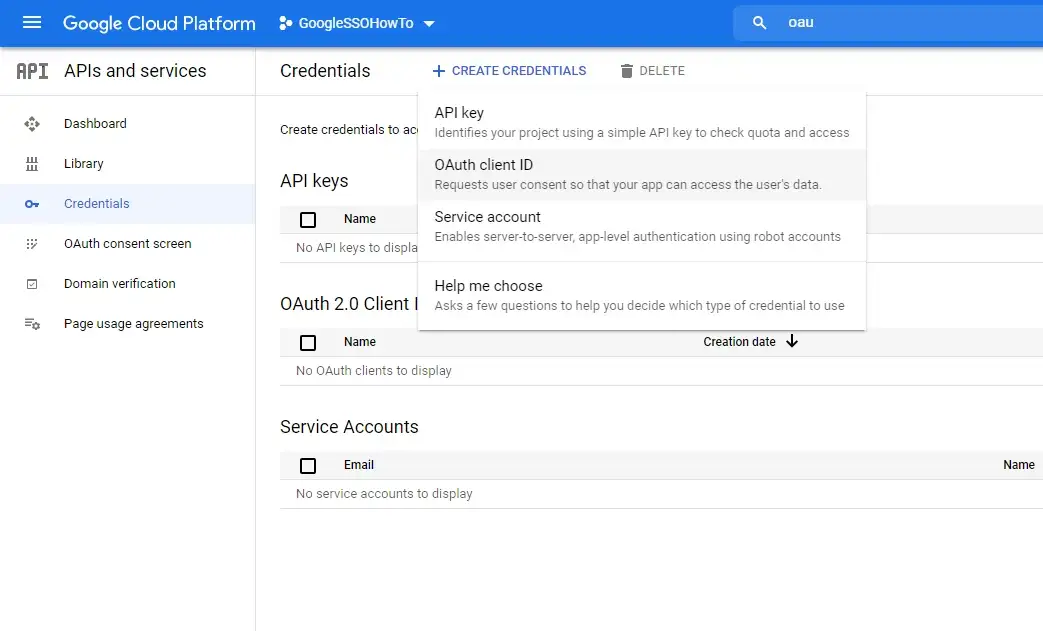
On the next page select your application type, in my case I selected Web application

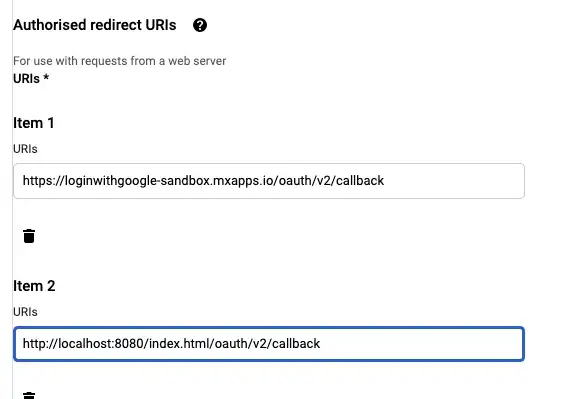
Give your Client a Name, and add 2 “Authorized redirect URI’s”. The first one to add is your app’s cloud URL (Free app URL or any cloud URL) and the second is your Local host. We add the local host option so we are able to test this locally. Remember to add “/oauth/v2/callback” to the end of any app Redirect URL. Click on Create when you’re done.
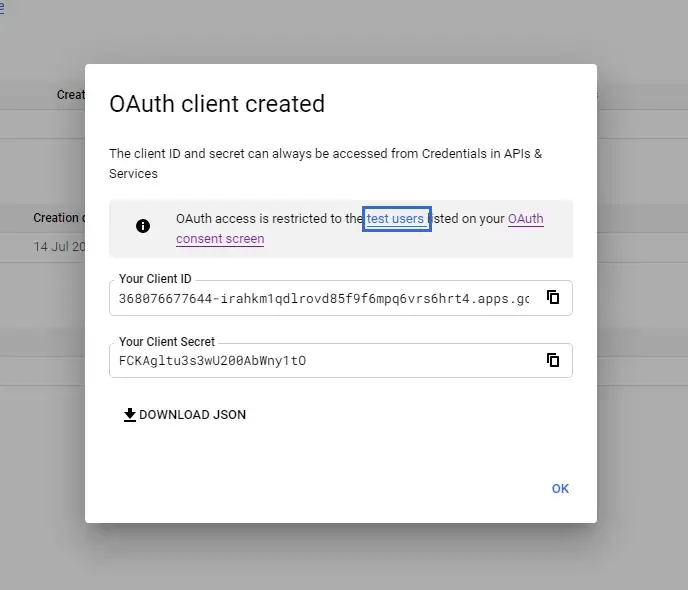
All done! make sure to save your client ID and Client Secret somewhere secure for reference later.
In Studio Pro
Now for the Mendix section of this build! In order to ensure anonymous user’s can access the required pages, we need to ensure our app is configured to have security on and also to allow anonymous user’s access. For this we will need a Guest user role which we can select as the anonymous user.
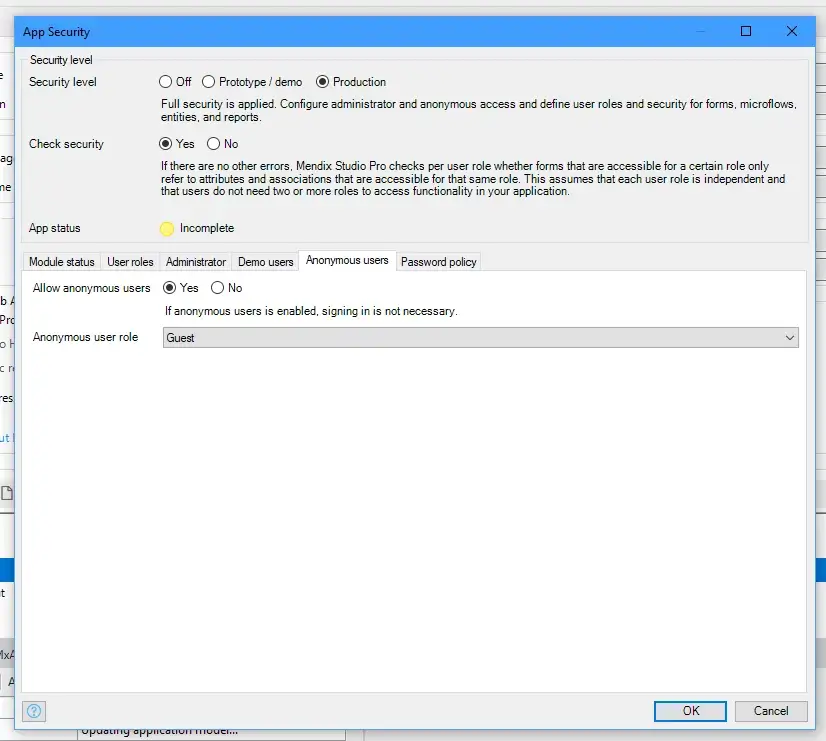
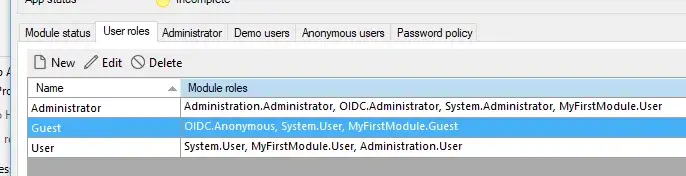
Also make sure your Guest user role is assigned to the OIDC module as the Anonymous module role, as well as the Admin needs to be assigned the Administrator user role for the same OIDC module.
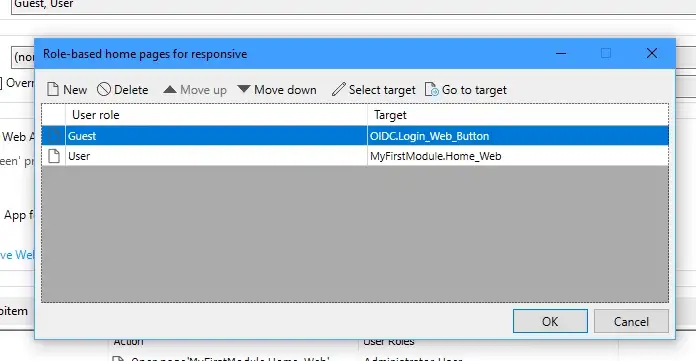
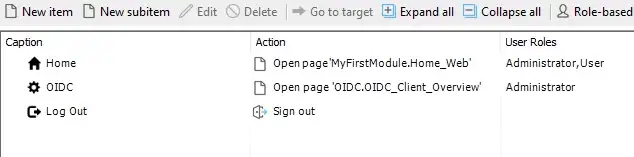
Now that we have security and user roles setup, we will need to also allow the user to reach the sign in page. Go to your projects Navigation and add a role-based home page for Guests. For this, you can select the page provided by the OIDC module, “OIDC.Login_Web_Button”. Also provide a role based home page for the User.
Finally, we have to allow the Admin to access and configure the SSO client credentials. Once again there is a page already provided in the ODIC Module called “OIDC_Client_Overview”. Add this to your navigation and ensure it is reachable by your app’s admin.
Run your app locally, and login as the admin. I used the demo switcher widget to easily login here. Next navigate to the OIDC Client Overview page. Click on new to create a new config.
Fill in the Alias to be what ever name you want, I simply called it Google.
Enter your client ID, and set the status too Active. Most importantly, you need to add the automatic config URL for google (https://accounts.google.com/.well-known/openid-configuration) and click “Import configuration”. This will automatically populate the rest of the required fields. This URL is specific to Google, other providers will have their own version of this, so make sure you have the correct import URL for the Provider you are using.

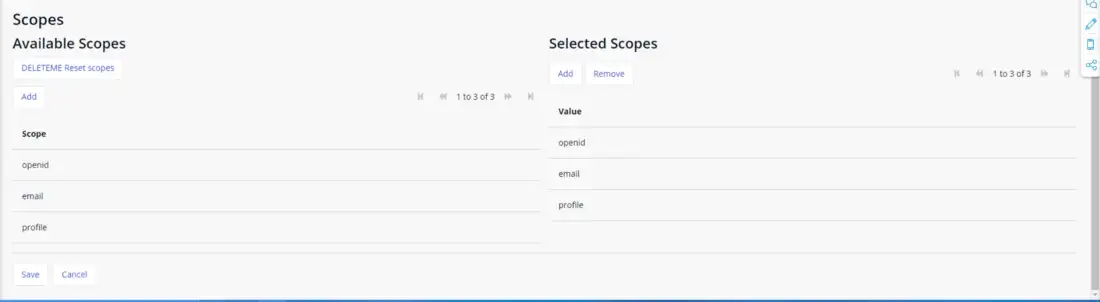
The final step is to select your scopes, which are the properties provided by the client about your user. Make sure to select OpenID, email and profile (profile is where most of your user’s information is stored.
Testing the login
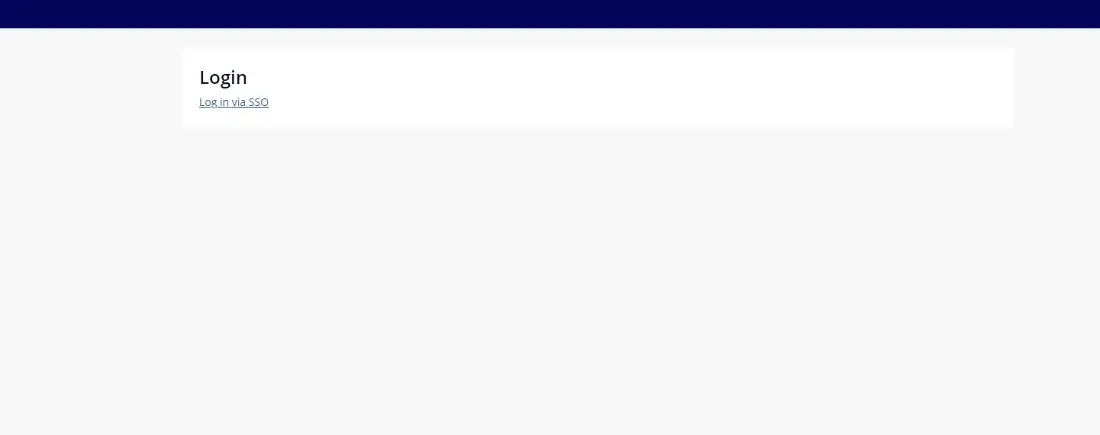
When a guest user lands on your site they will now see the following page, the user should click “Log in via SSO”
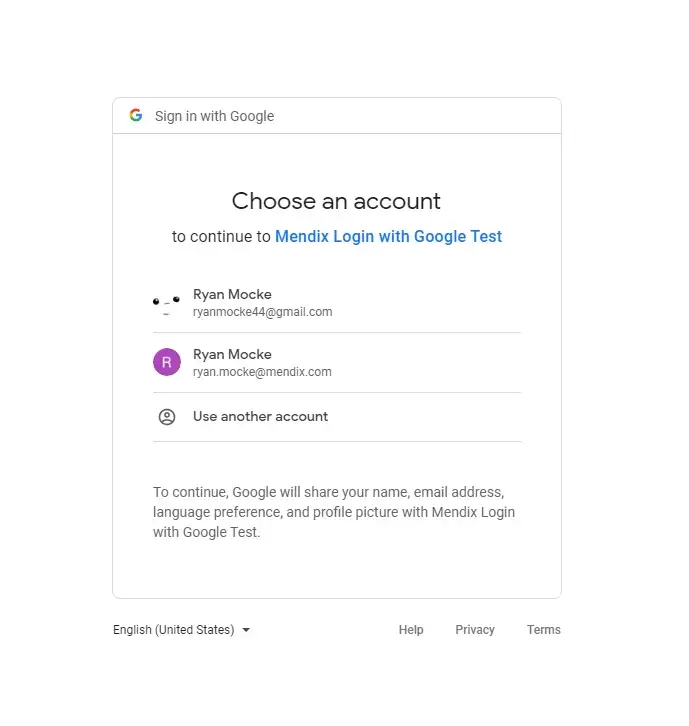
Next they will see this screen which prompts the user to select the google account they would like to login with.
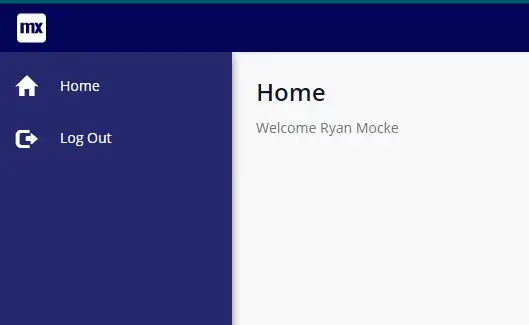
If you configuration is successful the user should land on the home page as an authenticated user. In order to be sure this setup was working I added a data view to the home page which returns the logged in user’s account, and I displayed the $Account/FullName attribute using a label.
One last thing
Although in this blog I focused on using Google as the SSO client, it’s important to remember this module can support other Platforms such as Salesforce and Microsoft but this setup should work for any OIDC compliant client. Finally this module also works in Native Mobile, so have fun experimenting and trying new implementations of it!
Special thanks to Eric Tieniber, the creator of this Marketplace Module, and for his help in writing this piece!