3 Simple Steps to Build Your Data Model in Mendix
In this post, we explain each of the main components of a Mendix domain model and how they contribute to creating your application. We’ll use a test case throughout this post: A product ordering application. Customers need to be able to place orders which have several order lines, each of which is connected to a product.
Let’s dive in!
What are data models?
The foundation of many software applications is often its data model. A data model defines what data is going to be used and interacted with within an application. This data is either stored temporarily in memory or stored permanently in a data store such as a database.
Data models in Mendix are built using a visual language known as a domain model. Inside a domain model, you can define the following components:
- Entities: These can be persisted or non-persisted and allow you to store data temporarily or permanently. A persisted entity is the equivalent of a database table, which comes with a unique primary key (i.e., a location entity or financial transaction entity).
- Attributes: These are like columns in a database table (i.e., the name and address in a location or the date and type of the financial transaction).
- Associations: These define the relationships between two entities, like a join between two database tables.
When a Mendix application is run, the runtime will compare the model to the chosen database and perform all the necessary update scripts required. Mendix supports a range of database types, including:
- PostgreSQL
- Microsoft SQL Server
- MySQL
- Oracle
- HANA DB
The choice is yours!
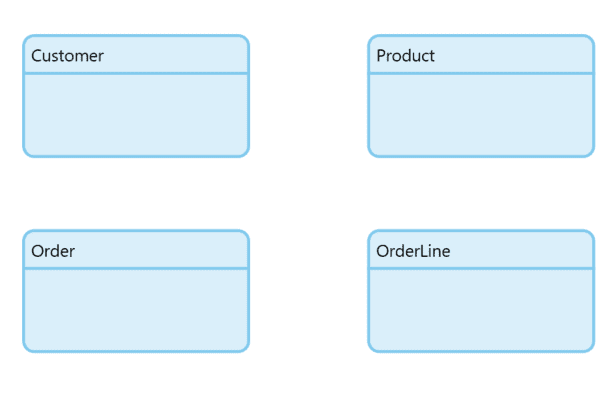
1. Define your entities
Whenever you start a new project, the first thing you need to define is your data structures. You need to think of the entities that you need to create to build your application. In this example, we’ll build an application to allow customers to order several different products.
For this application’s domain model, you’ll need to have a customer, an order, and an order line persisted entity. This will allow us to keep track of what orders a customer has placed for what products. Each persisted entity results in a table in the database with a unique key. The diagram below showcases our four entities:
2. Add your attributes
After you have created your entities, you need to add more details to each entity, which is where attributes come into play. In our example, the customer might have a name or an account type such as VIP or general. The product might have a name or description.
As we fill out the entities, the details of the application will come to fruition. It’s very easy to go back and add any other attributes that are needed. The diagram below illustrates how attributes are listed within our four entities:
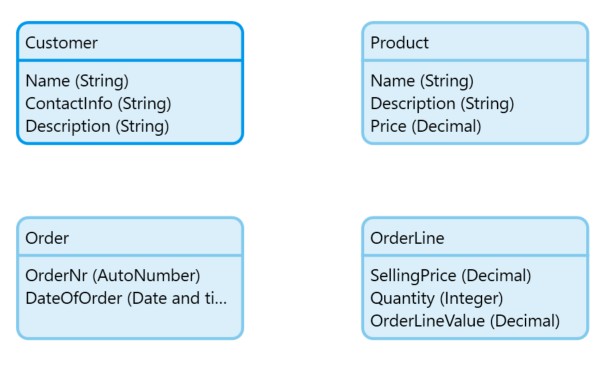
We added names and an auto-generated order number, as well as a date of when the order was placed. The attributes are the equivalent of table columns and have an attribute type and size, such as string, integer, Boolean, and all the typical data types you need to build the application.
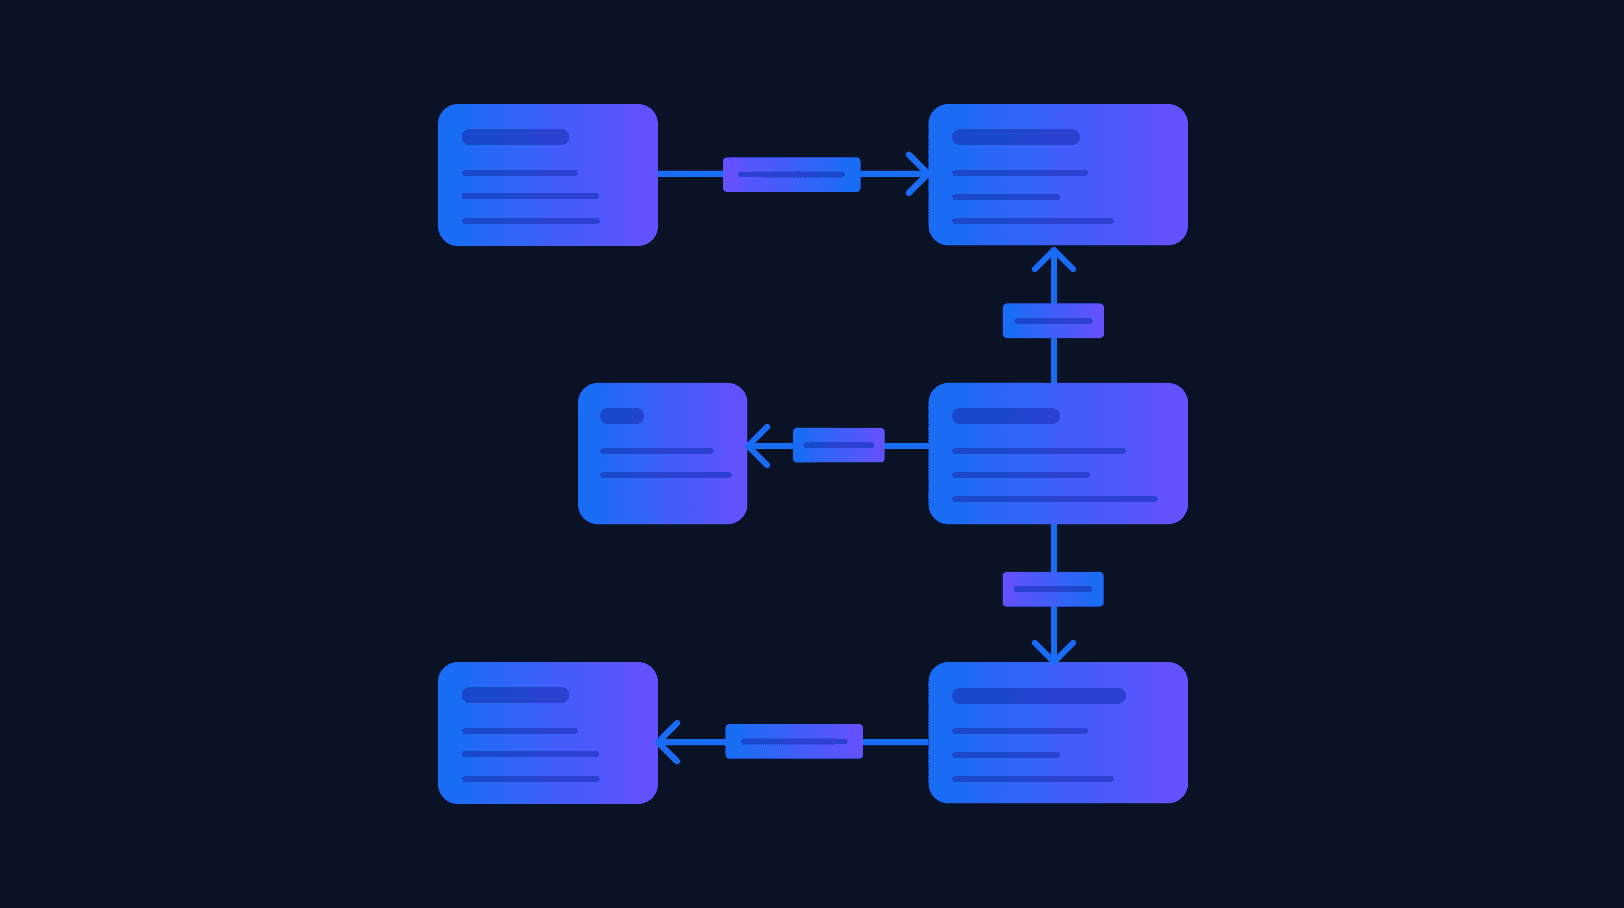
3. Create associations
After we have determined the entities and their attributes, it’s time to determine how they are all related. In this example, a customer can have multiple orders, an order can have multiple order lines, and each product can be ordered multiple times. The figure below represents the relationship between the entities.
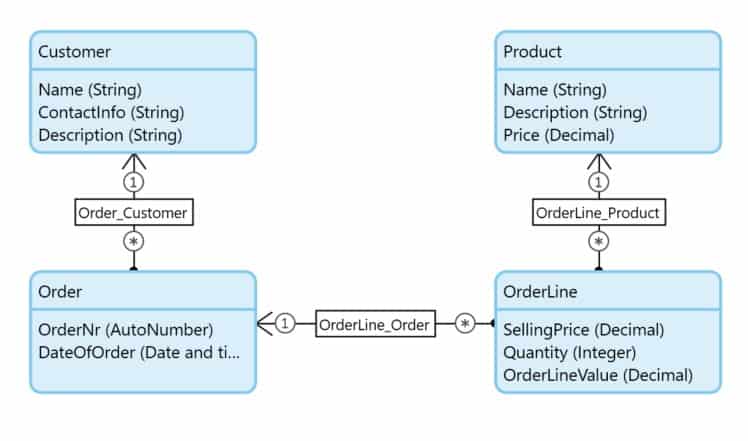
You will notice how the relationships are visually represented through the associations. The customer-to-order relationship is one-to-many as indicated by the asterisks. To take this example one step further, we can also delete behaviour between the relationships.
For example, if a customer has orders, should I delete all the orders associated with the customer (known as a cascading delete)? Or, if a customer has orders, should we prevent the user from deleting an order (known as a prevention delete)?

Double-click on the associations to see the behaviour and how the delete option is configured. The delete behaviour should depend on business needs. Consider the following questions: Is it important to keep the customer when they have orders? Or it is more important to clean up the database and not have orphan orders when deleting customers?
These are good questions to ask the business users and will help craft the right business rules. The visual representation of this is either blue (for prevention deletion) or red (for cascading delete).
See what’s possible with Mendix