How to make a Slack bot with Mendix
Hello everyone and welcome. As a developer evangelist who works for Mendix, a large part of my role here is spending a lot of time monitoring the Mendix Community Slack Channel (Click here!).
Naturally, we have a few amazing tools installed to our workspace, which got me thinking — what exactly goes into making a Slack bot, and can it be done using Mendix alone?
After researching online, every example I found was extremely complicated and required extensive coding skills in either Java, Python or Javascript. While I could’ve proceeded down that route, I was committed to doing this in a low-code way. I’m glad I persevered though, as I can now tell all of you just how easy it actually is and that all of you too can make a Slack bot using Mendix and nothing else!
What are we making today?
In this tutorial we are going to make a Slack bot which can send messages using a RESTful api. It will also be subscribed to events within the channel, so the bot will be able to reply to mentions or certain keywords sent in a channel.
Getting started
Before we get started make sure you are signed up to Slack and have a Slack workspace setup, with a channel you can add the bot too. In addition, as Slack will post messages to your app’s published REST services, to test your app locally while in development I recommend using a tunnelling tool to expose your localhost to the web (I use NGROK for this).
Setting up the bot on Slack
To get started you can go to https://api.slack.com/apps?new_classic_app=1 and click “Create new App”.
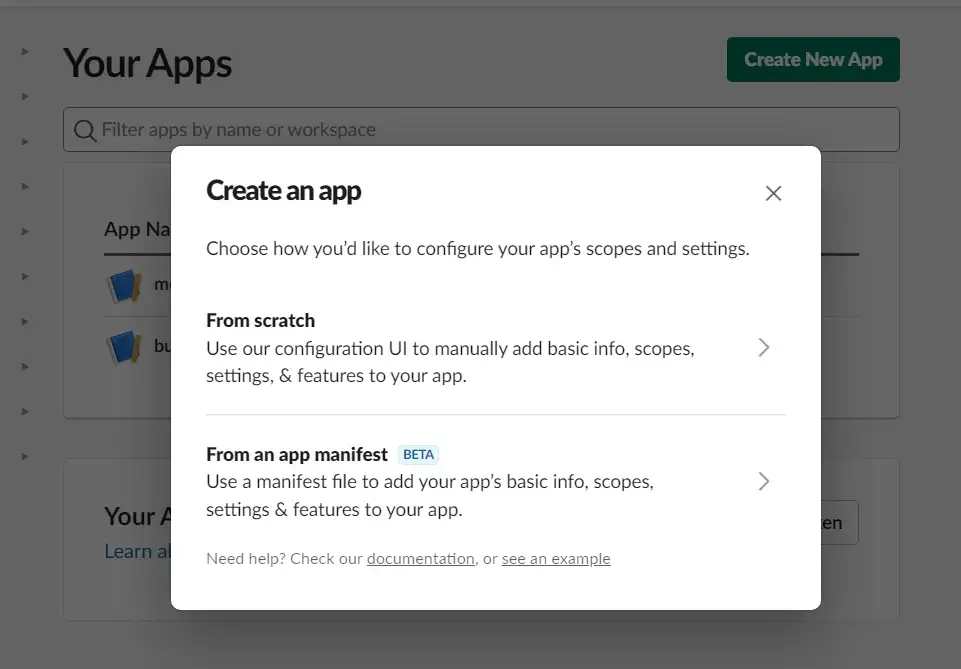
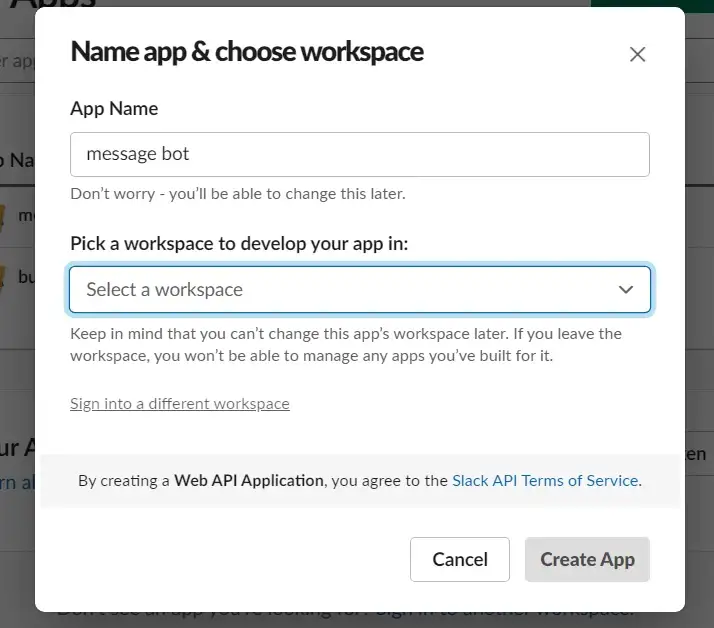
Choose “From Scratch” and give your bot a name, I’m going to create a new one and call it message bot. Select the Slack workspace you created for this to develop your app in and click “Create App”.
Once your app has been created, you can go to “OAuth and permissions” and what we want here is a token for our bot, so under “OAuth Tokens for Your Workspace” click “Install to workplace”. Now it’s going to say we need to add a scope for our bot. Go down the page and you’ll see a section titled “Bot token Scope”. Thats what we need, so click “add an OAuth Scope”, the one we want is Chat:write, or for public channels you can add Chat:write.public.
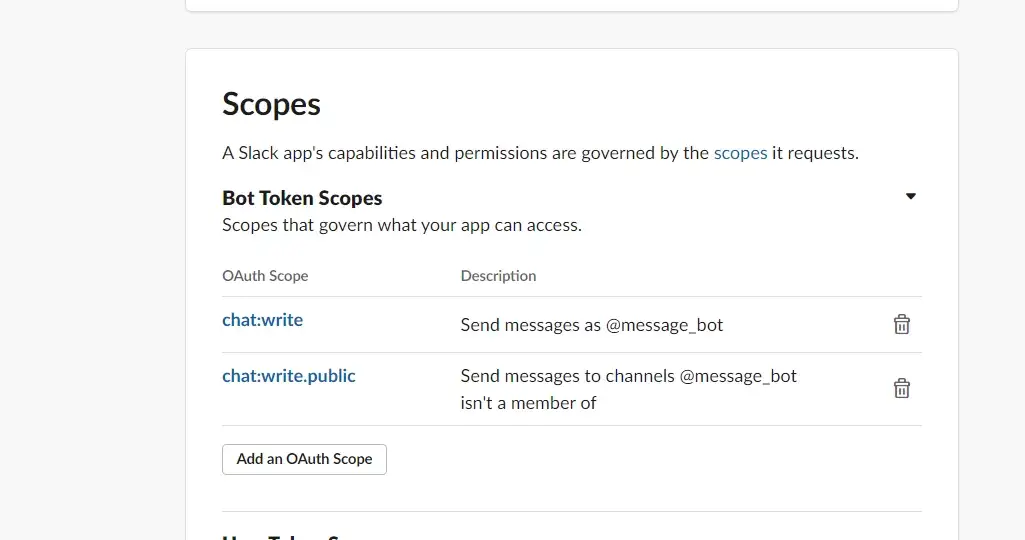
This will allow the bot permission to actually post messages in a chat. Now depending on what you’re trying to do you may have to add other scopes, so if you run into any errors have a look at these, you should be able to figure out the scopes needed by the actions you want the bot to do.
Now go back up to OAuth and click “Install to workplace” again. Then click allow and it will generate a bot token for you.
You will know its a bot token if it starts something like “ xoxb-Your_Token_Vaue”.

Once you have that we can use it, along with the channel ID, to send a message to the channel as the bot. To do this I have a simple app prepared, and what I will build out here is add a method here to send a message as the Bot using Slack’s API
Sending messages as the bot
This build will work in most any traditional programming stack capable of using HTTP methods or REST calls (Java, JavaScript, Python etc) — you can even try it out in Postman before you start developing your app. All we need to do is create an authentication system for our app with Slack, we then need to integrate the API for posting messages and then we need to publish a REST endpoint which Slack can post messages for events in the channel
Events can be messages, reactions, mentions in the channel and more, think of Slack Events as similar to a web-hook
To send your message to the service, you will have to provide the service’s End point. In this case it’s https://slack.com/api/chat.postMessage
As the endpoint describes the type of HTTP Method as POST, we need to make sure to use POST here as well.

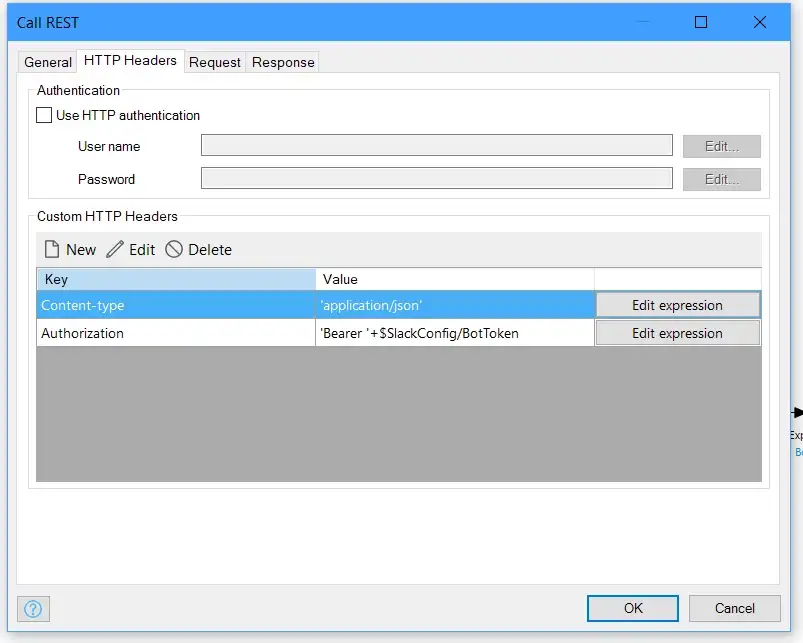
You are also going to need some headers. We want to add a header for Content-type and this needs to be ‘application/json’. Next we need another header called Authorization, and this is were we can use our bot’s token we got earlier. You want the value of this header to be ‘Bearer’, then a space ‘ ‘, and then your token value.
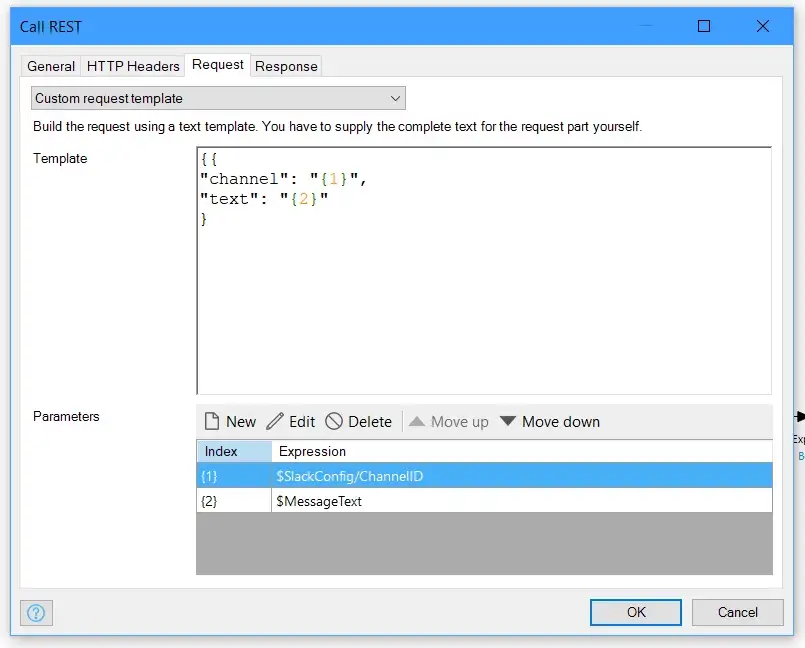
Now to send a message we have to provide a JSON body to this as this is a POST HTTP method. Here’s a simplified structure we’re going to use, you can check the full API documentation page here.
{
  “channel”:”{1}”,
  “text”:”{2}”
}
Note that in Studio Pro you may have to provide an additional curly brace { before the request.
This request has been stripped down to the bare essentials —it only has channel which is a string, and text which is also a string. There are a lot of other options you can use, such as attachments and icons and lots of other cool stuff. So go check out the docs pages and play around. You can see I’m using place holders here, just to pass my values from the microflow into the request using the standard Mendix REST action.
It does send us a response back but i’m not handling that in here, instead you can run your app and test it out, if it’s successful you should see a message in the channel when you call this microflow!
To test the message sending you will need your channel ID which you can get from the URL of the Slack channel (The final value after the final ‘/’ in the URL for your channel) and then then you can send your first message as your bot! Remember you will need to make sure that your bot is added to the channel first, to do this simply use the bots @ mention in the channel and add them.
Your messages should now send from your Mendix app to Slack and appear in the channel as if the bot sent them, whenever you run this microflow.
Subscribe your app to events in the channel
In order for Slack to post messages to our Mendix app, we need to enable events in our Slack bot’s settings. By enabling this feature, Slack will post updates to our app’s published REST service. We can use this to implement logic to handle different types of events a user might trigger when using the channel. You can subscribe to specific events, for which you can set up specific end points, or you can post all updates to the same endpoint, and build in your own logic for handling each unique event. For example a good use this for is to make the bot do something when someone reacts to a message or when a new user joins a channel. For my build, I added just one event endpoint and then handled all logic in the microflow called by the Published REST service in my Mendix App.
To do this go to “Event Subscriptions|” in api.slack.com.
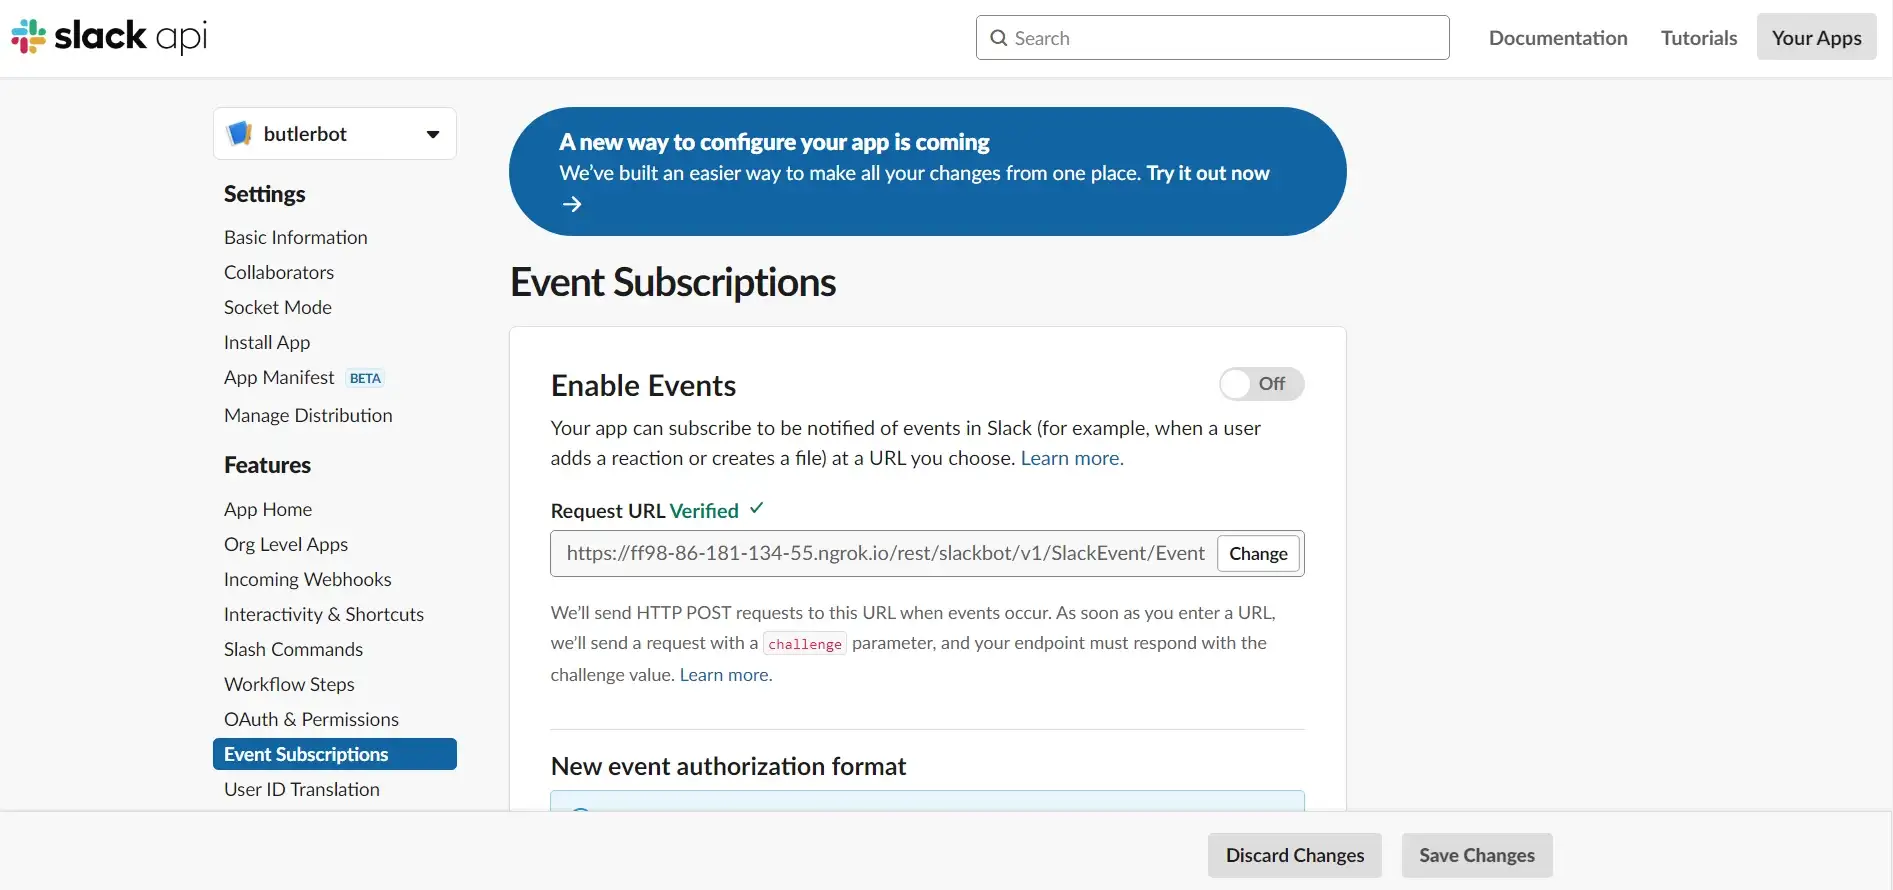
Turn “Enable Events” to On, and you will see a field for Request URL. This is the point where we need to open up a tunnel using that tool I mentioned earlier. The tool NGROK opens up a secure connection from your local host and exposes it to the web as an available endpoint in a secure way.
Open up your file explorer and locate the ngrok.exe file you downloaded. Now open this exe in your terminal or command prompt. You can also just click open on the exe file to open it in your terminal. Then type “ngrok http {YOUR MENDIX APP PORT NUMBER}”, I normally use port 8080 as my default Mendix app config, but this will work using any port number you prefer for example “ngrok http 5000” would work so long as your Mendix app is also set to run on port 5000.
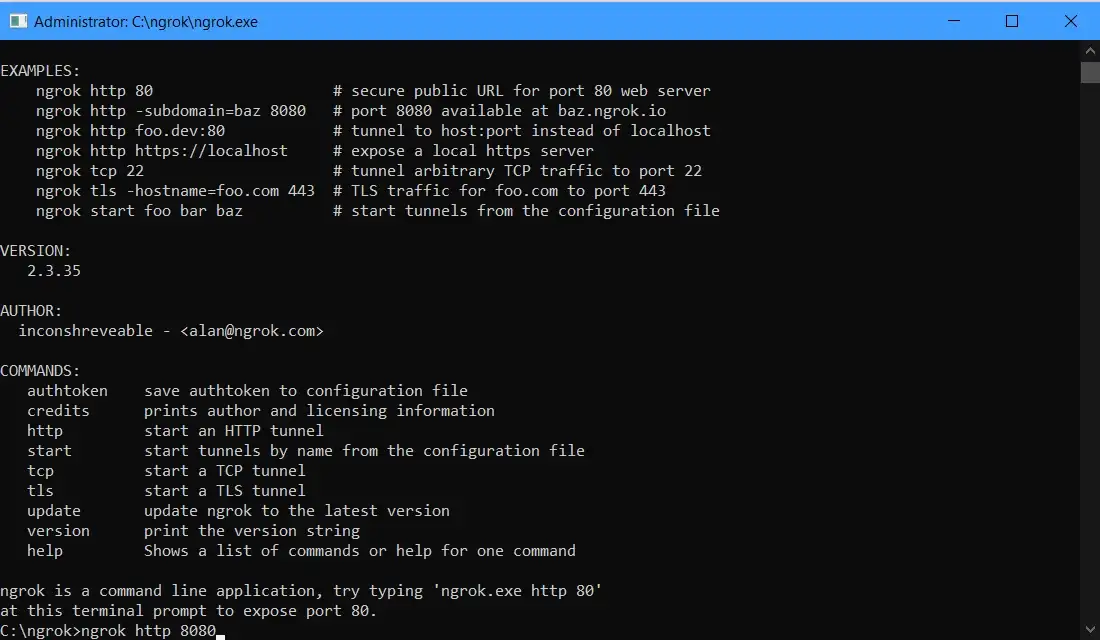
Hit enter and ngrok will open up the endpoint, you should see something like this :
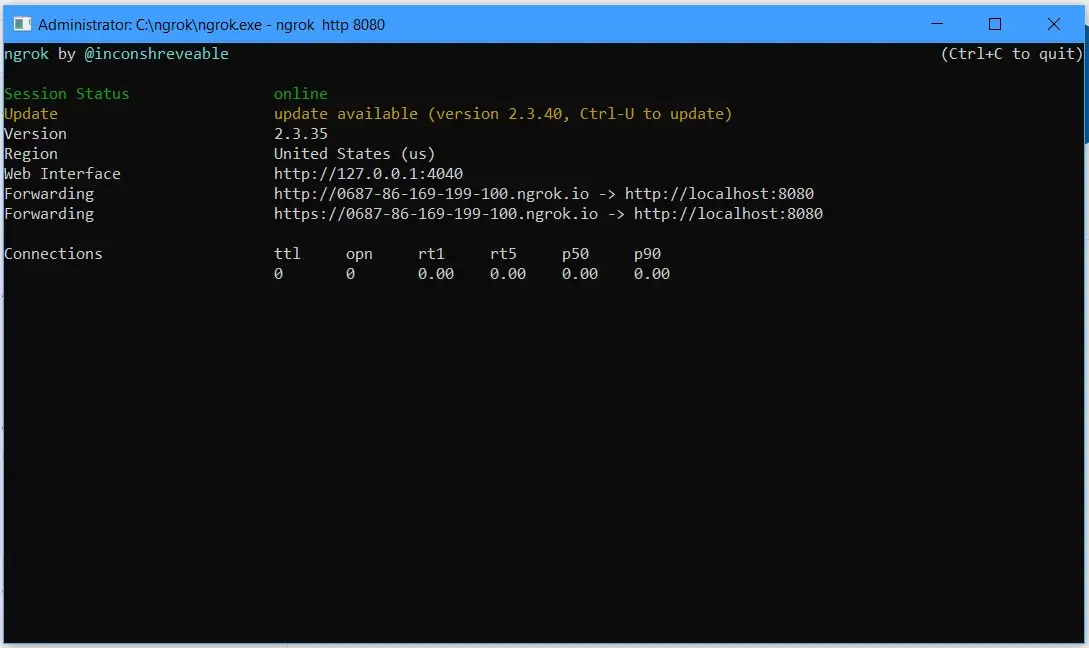
You should know this opens up both HTTP and HTTPS endpoints, Slack requires the use of HTTPS.
Handling Events in Mendix
We now have a live endpoint we can use in Slack, but we need to come back to this after we setup our published REST service.
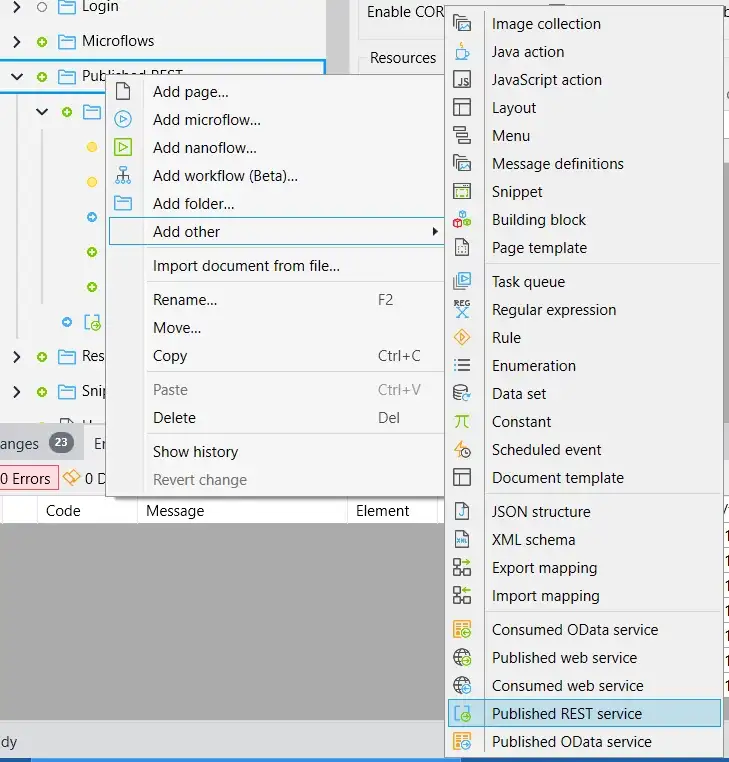
Switching back to Studio Pro, right click in your project explorer and choose to add a Published REST service underneath “Other”.
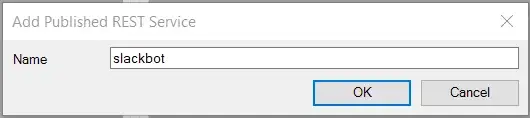
Give your service a name, I named mine “SlackBot”, and then click OK
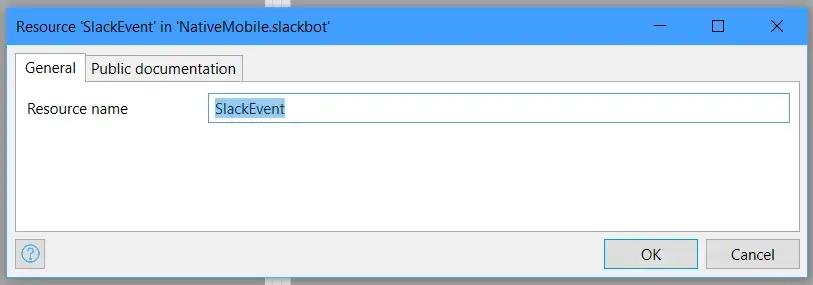
Next add a resource to the service called “SlackEvent” and click OK
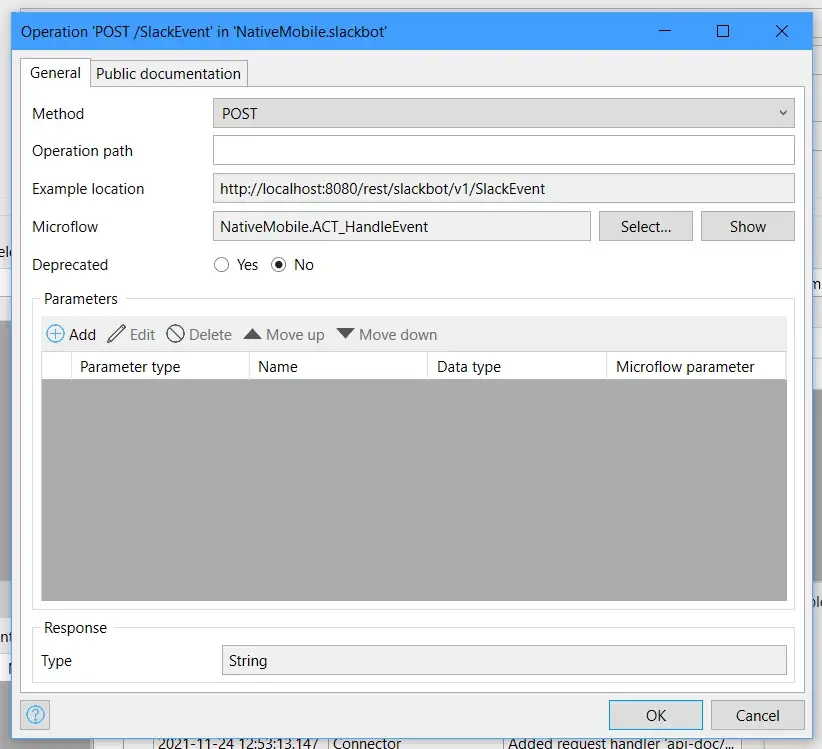
Then add an operation to the service, this is where we define our API’s method (GET,POST,PUT,PATCH,DELETE), configure it’s own operation path, and configure a microflow to handle the logic for the endpoint.
It’s not required to set an operation path, by default the endpoint will be something like :
https://{LocalHost}/rest/{Service_Name}/{Version_Number}/{Resource_Name}/{Operation_Path}
Here’s an example of how you could setup your operation :
We now have a valid URL which can accept requests, but there is more work to do before we can handle every event type ….. authentication.
Authentication
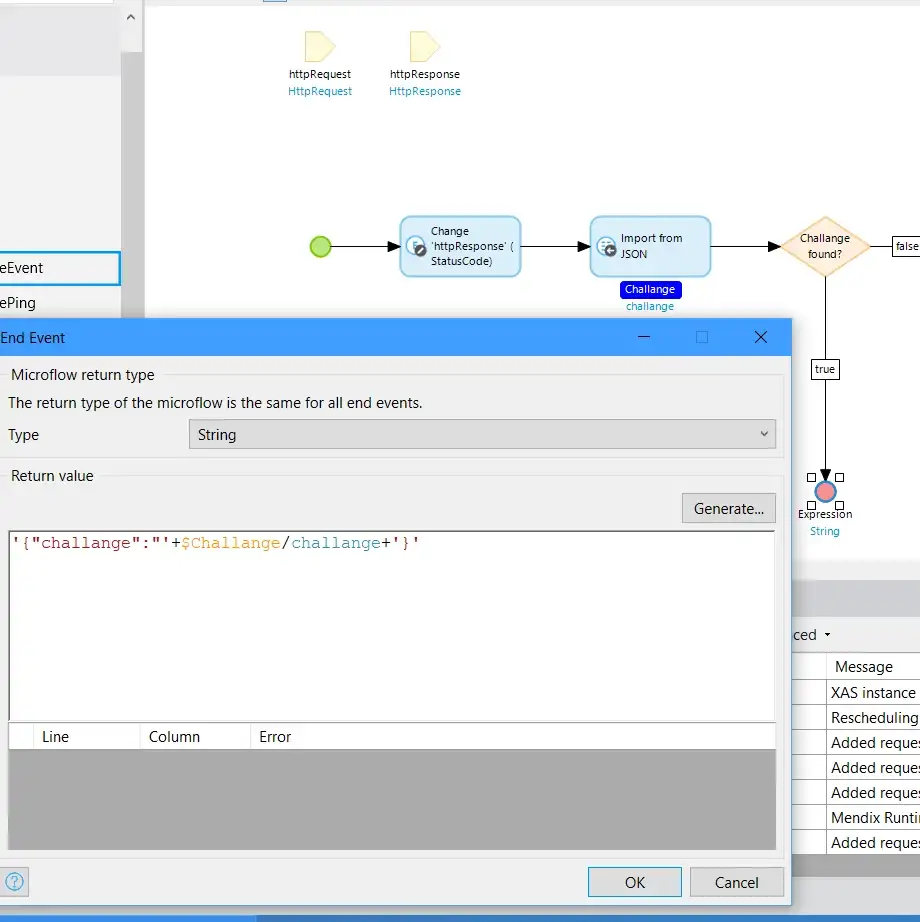
At the start I was a bit confused here, but it’s actually rather easy. When we add the event end point in Slack, their api will send a challenge to the endpoint with a “challenge” value in their request body as shown here :
{
  "token":"your_token",
  "challenge":"your_ChallangeValue",
  "type":"url_verification"
}
All you have to do is send back this challenge string to them at the start of your flow the first time it’s called
Setting the RequestURL for Events in Slack
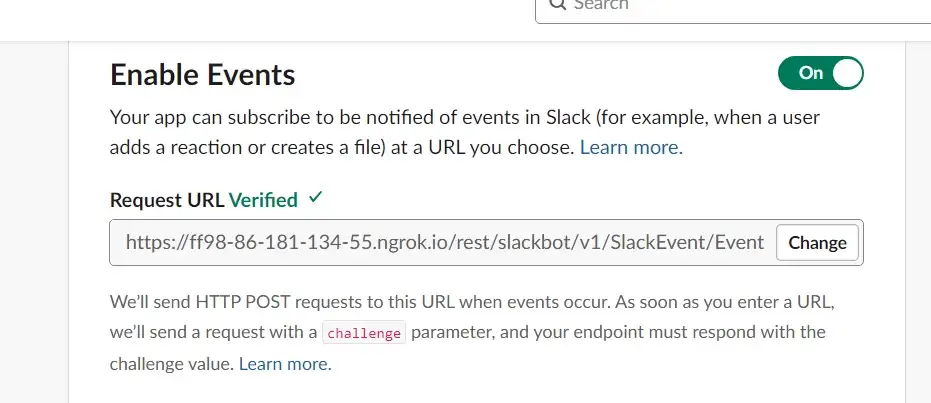
If everything is correct we can formulate a URL which we can add in the Slack Events Subscriptions page. The URL should be a combination of your NGROK https endpoint, and the rest will be the service endpoint for your published service.
Something like: https://{NGROK_HTTPS_URL}/{Your_Published_Rest_Operation}
Here’s what mine ended up looking like:
https://ff98-86-181-134-55.ngrok.io/rest/slackbot/v1/SlackEvent/Event
Remember NGROK is meant for development only, and therefore it will time-out every 2 hours, after this you will have to generate a new URL for your localhost. Once in production this will not be needed, you can simply use your cloud URL.
You can set this value as the request URL on the events page. If you were successful, Slack will tell you it has verified the end point.
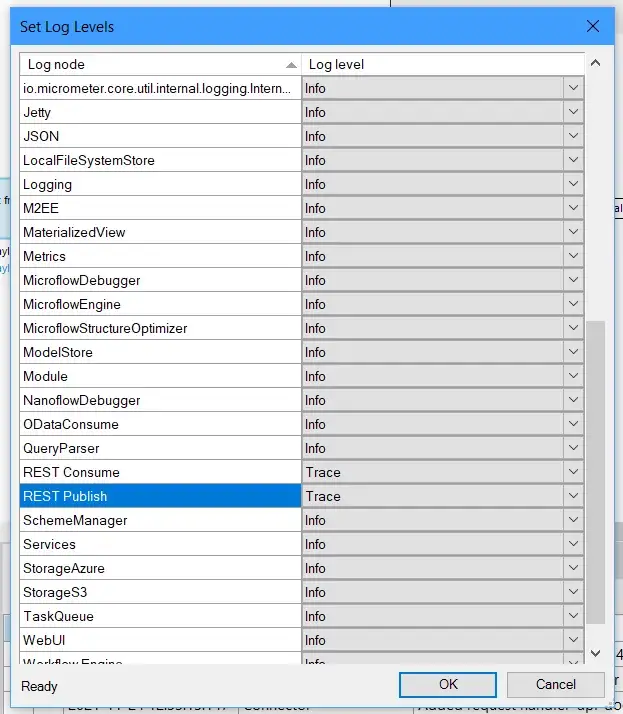
If something goes wrong, you can debug your microflow as normal, setting your REST consume and REST Publish log levels might also help to give you more insight into what is breaking, via the console.
The final thing we need to handle before you can customize your bots actions is to make sure it recognises itself, or else you can create an infinite loop, The bot can trigger itself when ever it posts a message to the group, if we don’t filter out it’s own activity in the channel.
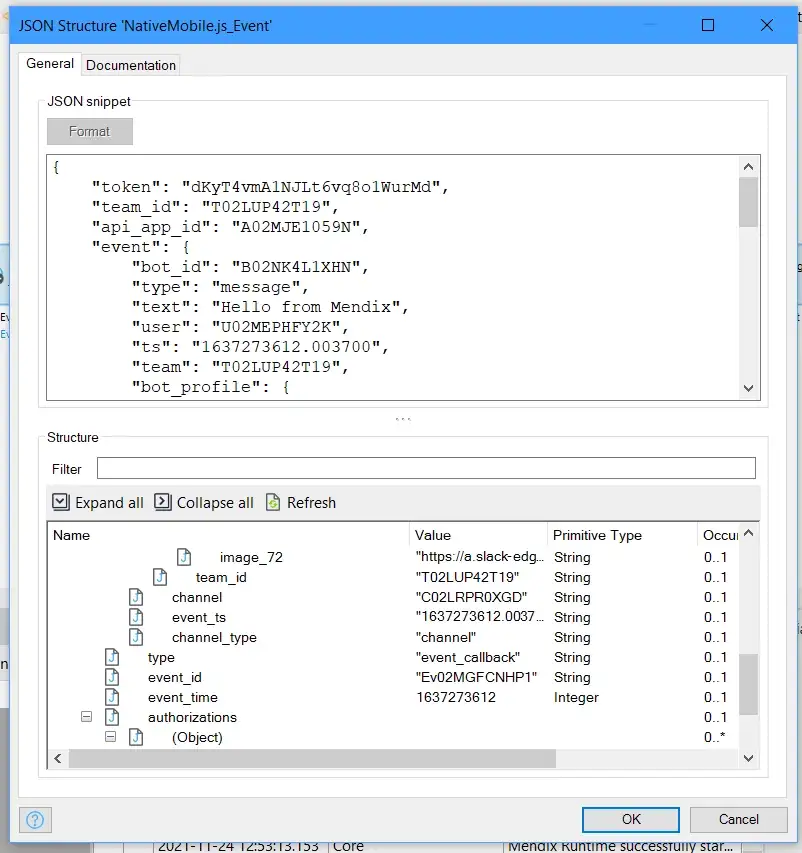
To do this we have to import the request payload Slack provides our app’s REST service. The payload will look like this :
{ "token":"dKyT4vmA1NJLt6vq8o1WurMd",
"team_id":"T02LUP42T19",
"api_app_id":"A02MJE1059N",
"event":{
"bot_id":"B02NK4L1XHN",
"type":"message",
"text":"Hello from Mendix",
"user":"U02MEPHFY2K",
"ts":"1637273612.003700",
"team":"T02LUP42T19",
"bot_profile":{
"id":"B02NK4L1XHN",
"deleted":false,
"name":"message bot",
"updated":1637253238,
"app_id":"A02MEP8D37Z",
"icons":{
"image_36":"https://a.slack-edge.com/80588/img/plugins/app/bot_36.png",
"image_48":"https://a.slack-edge.com/80588/img/plugins/app/bot_48.png",
"image_72":"https://a.slack-edge.com/80588/img/plugins/app/service_72.png"
},
"team_id":"T02LUP42T19"
},
"channel":"C02LRPR0XGD",
"event_ts":"1637273612.003700",
"channel_type":"channel"
},
"type":"event_callback",
"event_id":"Ev02MGFCNHP1",
"event_time":1637273612,
"authorizations":[
{
"enterprise_id":null,
"team_id":"T02LUP42T19",
"user_id":"U02LUPJ8T4J",
"is_bot":true,
"is_enterprise_install":false
}
],
"is_ext_shared_channel":false,
"event_context":"4-eyJldCI6Im1lc3NhZ2UiLCJ0aWQiOiJUMDJMVVA0MlQxOSIsImFpZCI6IkEwMk1KRTEwNTlOIiwiY2lkIjoiQzAyTFJQUjBYR0QifQ"
}Create a JSON structure, paste in the JSON, and click Refresh In the Structure section, before you can click OK to close the window.
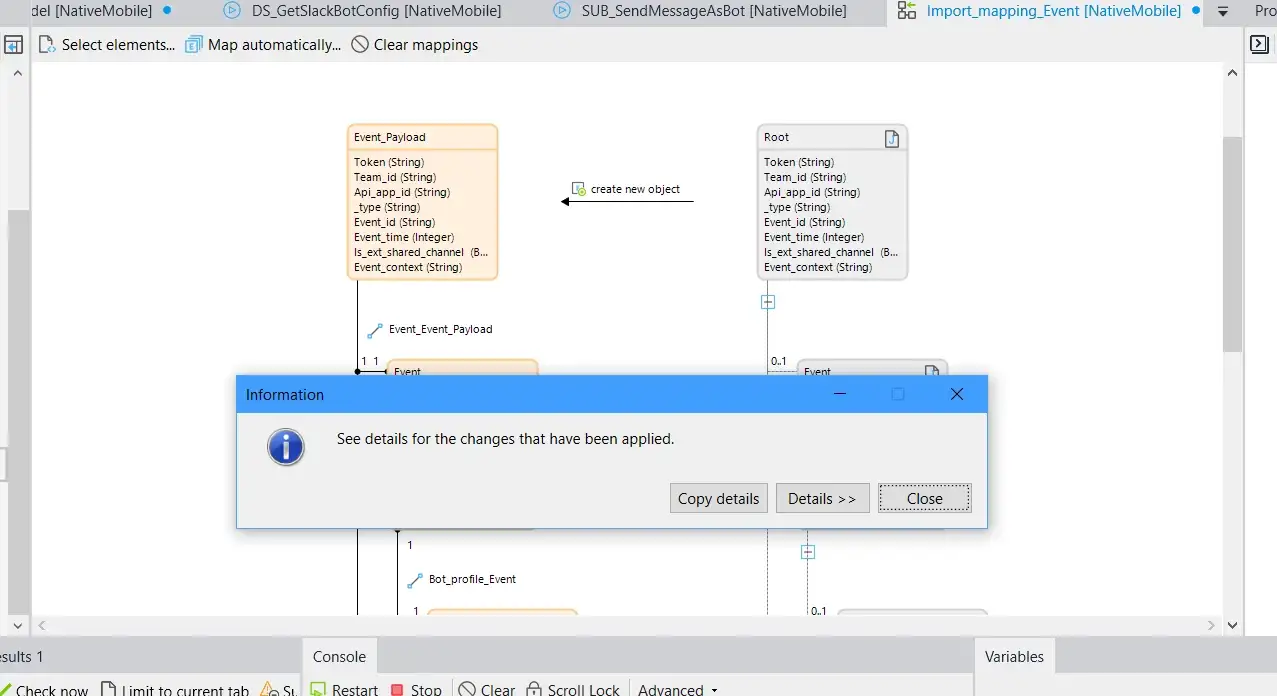
Next create an import mapping, and under Schema source, select the JSON structure you created. Make sure all fields are selected to get all the details you want, or pick and choose what is needed for you.
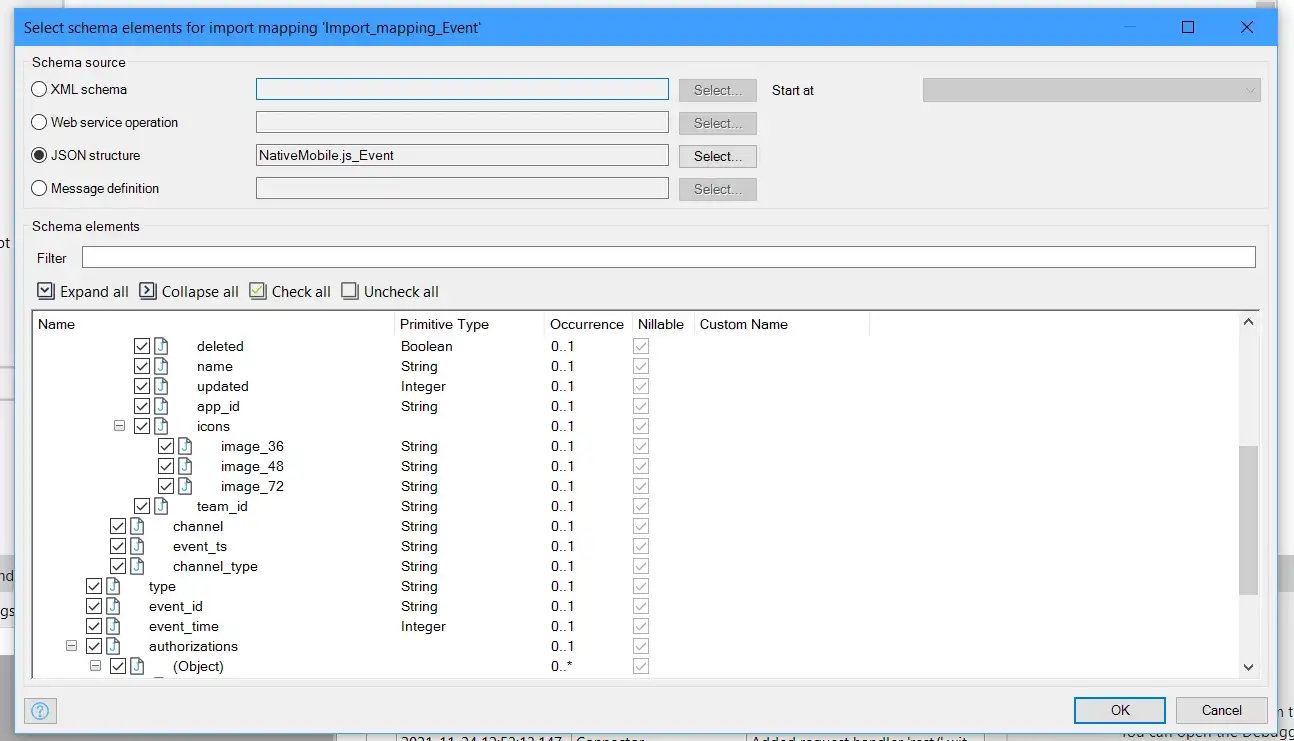
Click OK to close the window, and then in the top left of the mapping editor choose to “Map automatically”.
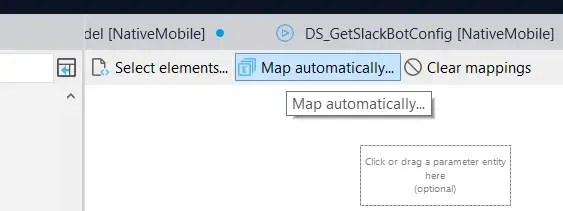
You should now see something like this:
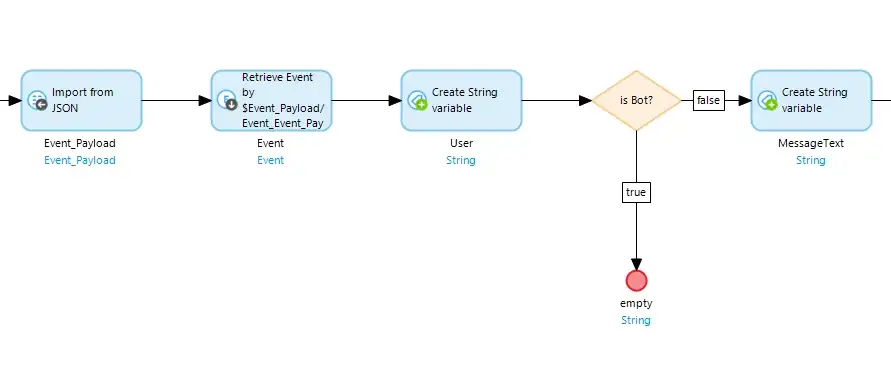
Finally, use this mapping to import the HTTPRequest and add a check to see if the user posting the message is a bot, if it is the bot do nothing and return empty.
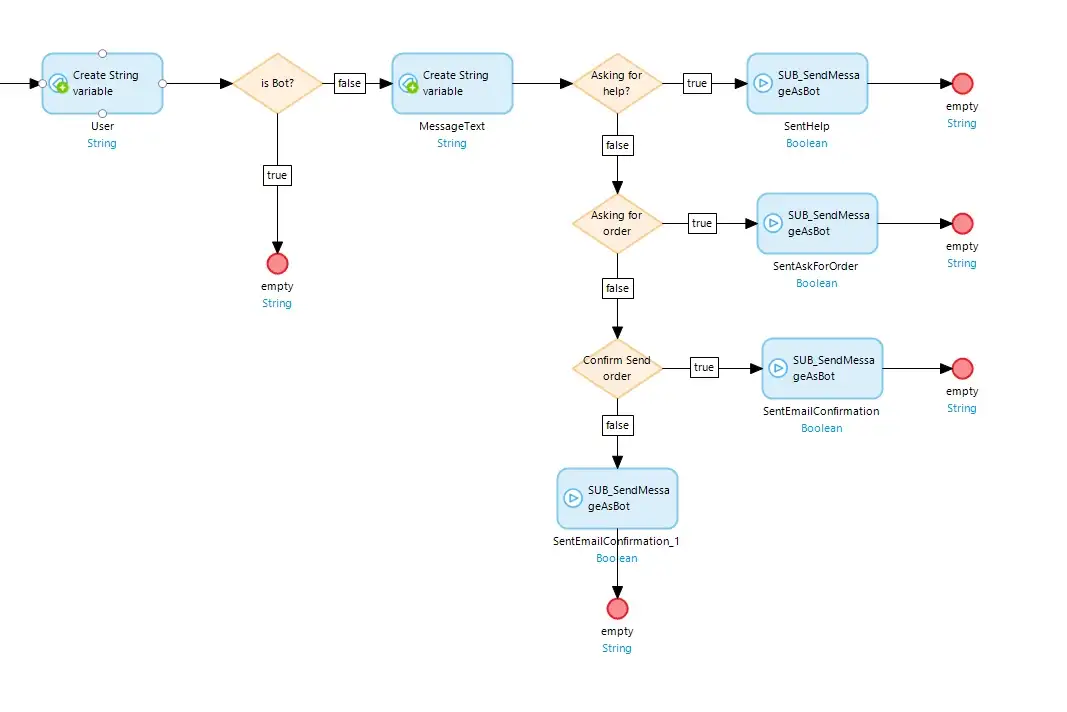
You are now free to handle any events, any which way you wish. My quick approach to this was to use Contains and Find key words to check the content of the message. This method allows you to add as many exclusive splits as you want, and by doing this you can create a conversation tree in the microflow, a simple way to do things (but you could take this further and store each response in the database which would make this setup configurable at runtime). To send this response, simply reuse the postMessage API we used earlier to send test messages.
Here’s what my example looks like
Slash Commands
What the heck are slash commands? Simply put they’re similar to web-hooks. When the user enters a certain keyword (Setup in Slack) with a proceeding slash ‘/’, Slack will push updates to a unique endpoint.
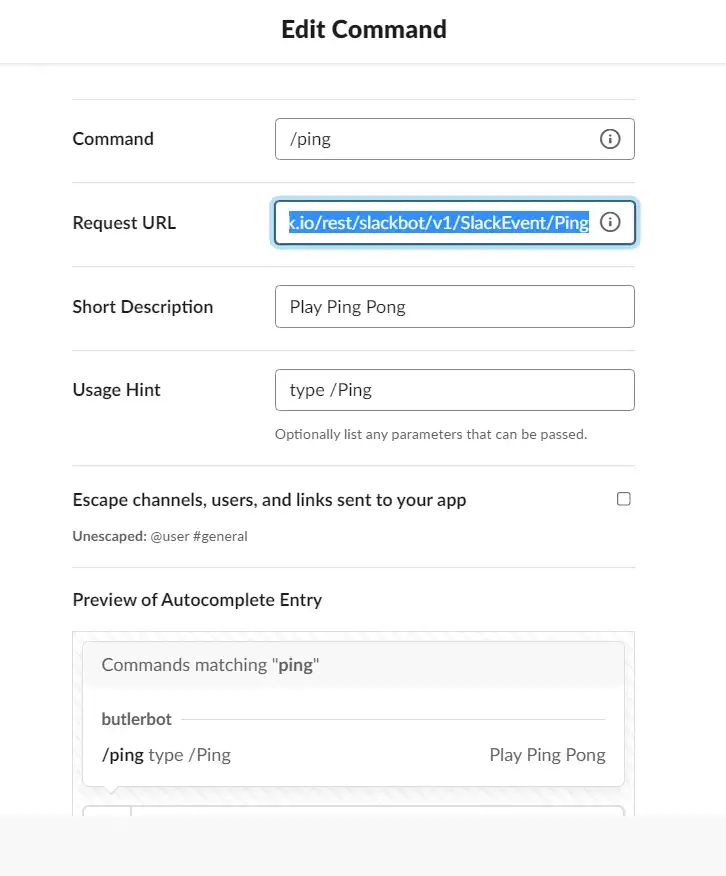
That’s really the biggest difference between events and slash commands. Simply add a new method on your published REST service, for my example I kept it simple. When the user types /ping — the bot will respond pong. A little bit “Hello world” I know, but I was mostly playing around here.
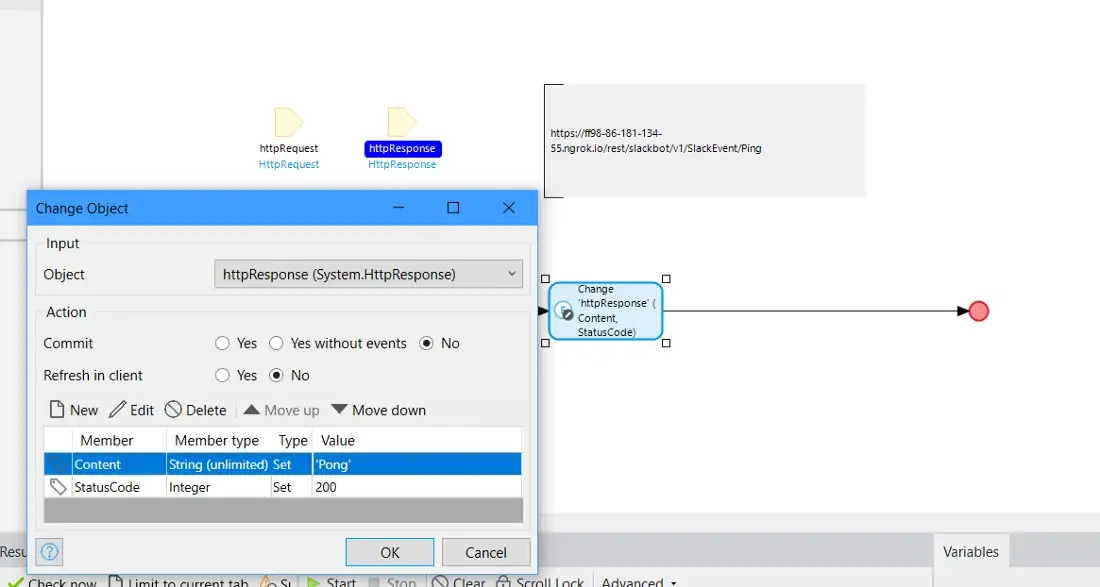
Add a new end point, and for operation path enter Ping, also this is a POST method.
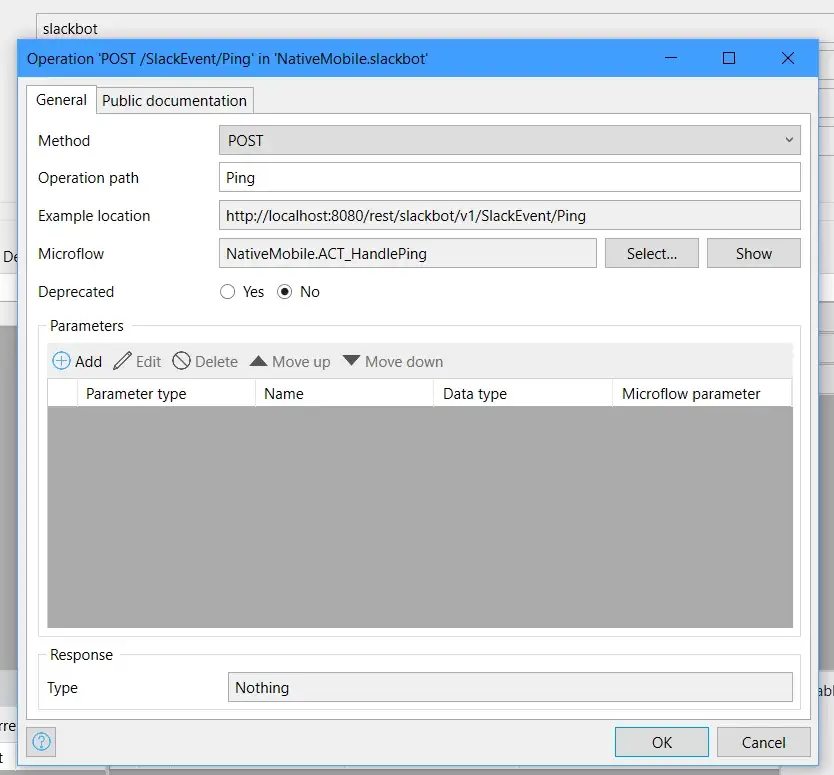
Then in the microflow which handles the logic, simply set the Content attribute for the response to be ‘Pong’.
Finally in Slack go to Slash commands in the left hand menu and click “Create New Command”

Your endpoint will once again be a combination of the URL from NGROK and the URL of your HTTP Method.
All done
Congrats, you’ve made it all the way. You can now test your app and get to know your bot! Don’t forget, you will have to add your bot to the Slack channel, for them to get updates sent to the event endpoint. Just send @YourBotName in Slack and it will ask to add the bot for you. As Slack’s API has so any other features to use, please let me know if you would like a piece on something more specific.
Before you go, here’s a brief conversation I had with my bot –
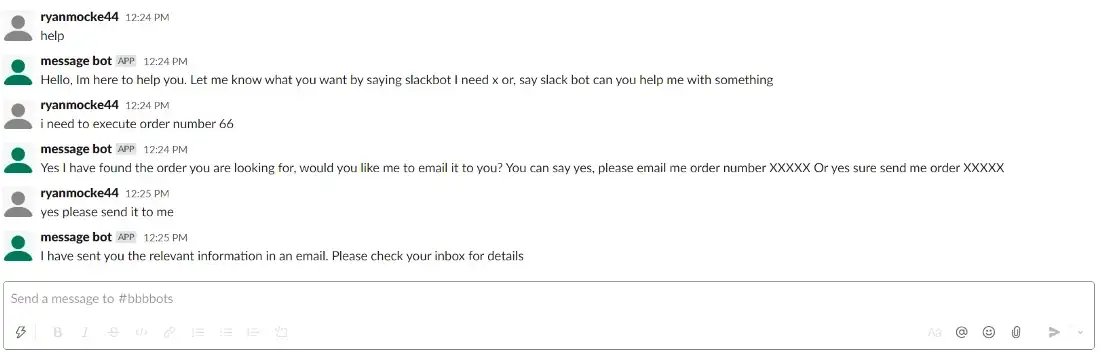
Happy Coding!