What makes OData so special?
OData is a form of REST API, except it has standardized certain features REST APIs do not. For starters, OData supports Querying and Filtering the requests themselves. OData also creates a functional audit trail of changes to your app’s data once implemented. When trying to summarize OData in a sentence: OData is a best practice for building REST APIs, so you can greater leverage the capabilities of REST.
Below is an extract from the official OData.org webpage where they explain in their own words what OData is:
“OData (Open Data Protocol) is an ISO/IEC approved, OASIS standard that defines a set of best practices for building and consuming RESTful APIs. OData helps you focus on your business logic while building RESTful APIs without having to worry about the various approaches to define request and response headers, status codes, HTTP methods, URL conventions, media types, payload formats, query options, etc. OData also provides guidance for tracking changes, defining functions/actions for reusable procedures, and sending asynchronous/batch requests.” — OData.org
OData datasets can be used in other tools like Microsoft Excel and Power BI. Mendix supports OData version 3, which returns data in Atom XML format, and OData version 4, which returns data in both JSON & XML format, depending on the format requested by the client.
How do we use OData in Mendix?
In Mendix Studio Pro, it is relatively easy to create an OData API. Similar to regular REST services Studio Pro also gives us the option to Generate an API directly from our domain model.
Once we have created an OData service, we can publish it to Datahub simply by deploying your app to a cloud environment. Datahub is an Open Metadata catalog, which basically means you can share data between your Mendix apps once you have registered the OData service on Datahub. It also helps with the discovery and understanding of the APIs themselves.
However, you don’t have to use Datahub in order to use OData in Mendix, you can still do it manually by downloading the $metadata contracts for the APIs themselves.
Once it has been registered in Datahub though, integrating the data in another Mendix app is as simple as drag ‘n dropping the Remote Entity (The Datahub registered OData service) into your domain model.
Also at the time of writing this, Mendix has just released Studio Pro 9.17.0 which has some amazing new improvements on using OData in Mendix, below is an extract from the 9.17.0 release notes:
We have extended OData capabilities in Studio Pro, allowing you to wrap services, APIs, and databases with OData and making it easier to build connectors that access external data. The OData services can then be easily discovered and used in the Data Hub Catalog. The new features include the ability to [publish non-persistable entities as OData resources](](https://docs.mendix.com/refguide/wrap-services-odata/#npe-published-odata), and to use microflows to define how resources should be retrieved and stored. We also provide an OpenAPI contract to easily test published OData resources.
Accessing the API Doc
A very powerful feature of OData in Mendix is that once your app is deployed or running locally, you can access an API doc for your published OData services at your app’s base URL + ‘/odata-doc/’.
For example, the location of the doc on a local app running on port 8080 would be :
https://localhost:8080/odata-doc/
For OData, both the OData $metadata contract and the OpenAPI contract are available here. You can even use the OpenAPI page to test OData calls to your API.
OData in practice
This next section will be a practical guide on how to publish an OData API in your Mendix App, register that service on Datahub, and then consume the data as a remote entity in another Mendix application.
The scenario:
Imagine you created an E-commerce Mendix app. In your App, you have an Entity containing orders which are passed onto the warehouse employees to complete the order and ship it to the customer. When the workers stock the warehouse they catalog where each product is stored in an excel sheet. Currently, the warehouse prints out orders from an Excel sheet and looks up where the items are stored in their own excel document, which is inefficient and slows down the entire process.
Your existing app contains sensitive customer information so you don’t want to expose this to the external warehouse staff. You decide to create a separate app that allows the workers to view orders and the items needed to complete them, and decide to share the information using OData and Mendix Datahub.
Generating the OData API from your Domain Model
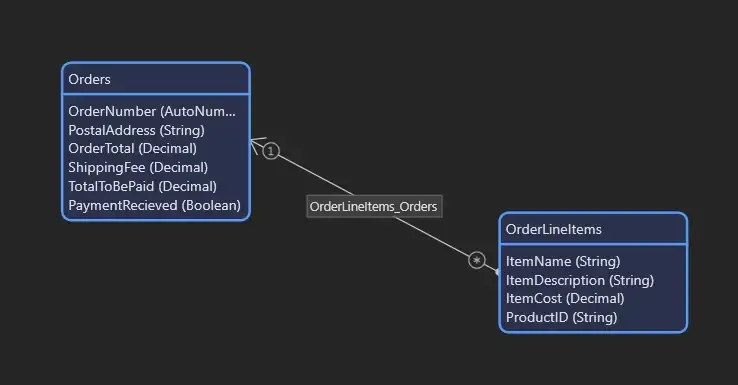
In our E-commerce app, we have the following entities in the domain model: $Order and $Orderline which have a 1 to many association.
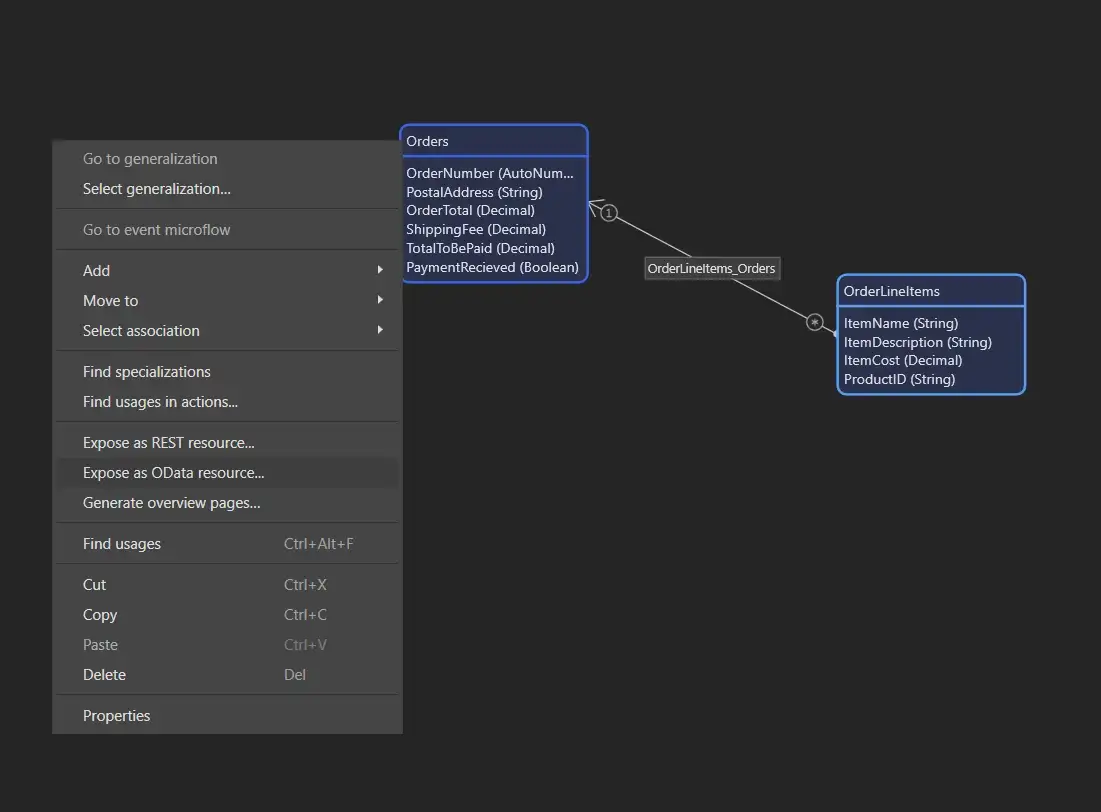
When we right-click on an entity (In our case $Orders) it gives us the option to ‘Expose as OData Resource’
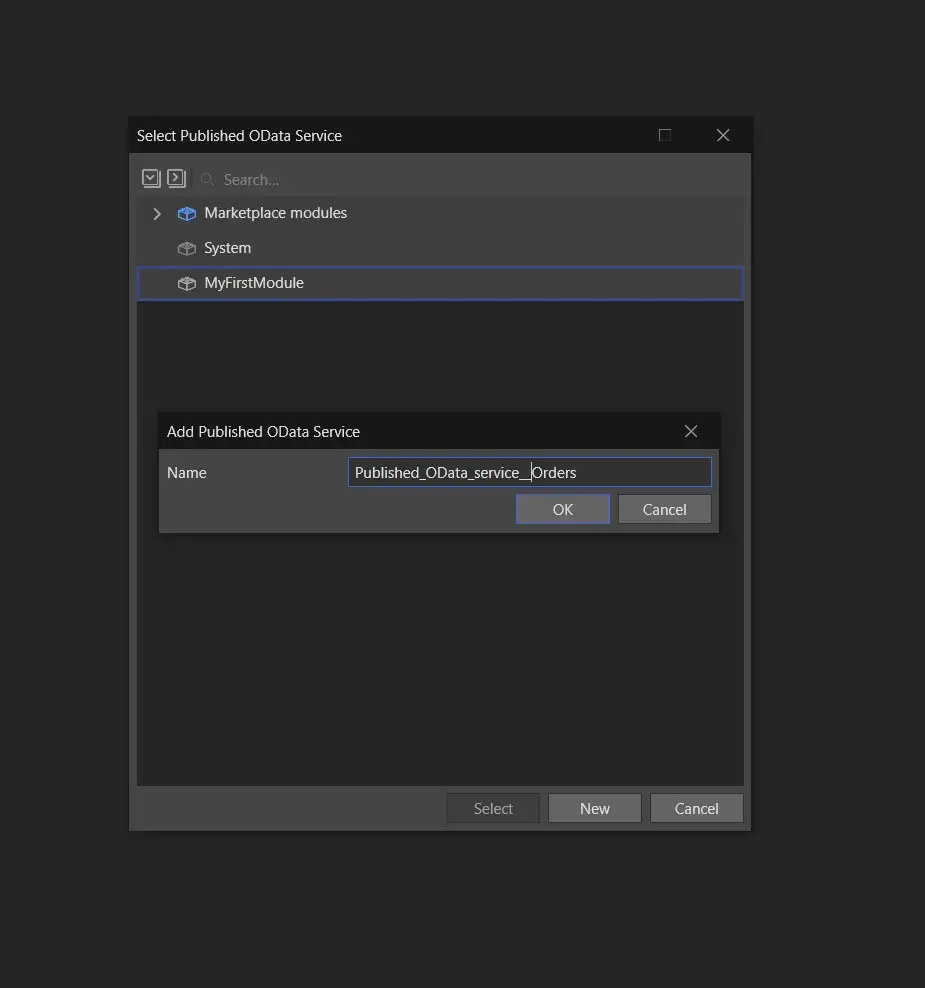
When we click this it asks us where we would like to create the new API in our project, and what we would like to name the resource.
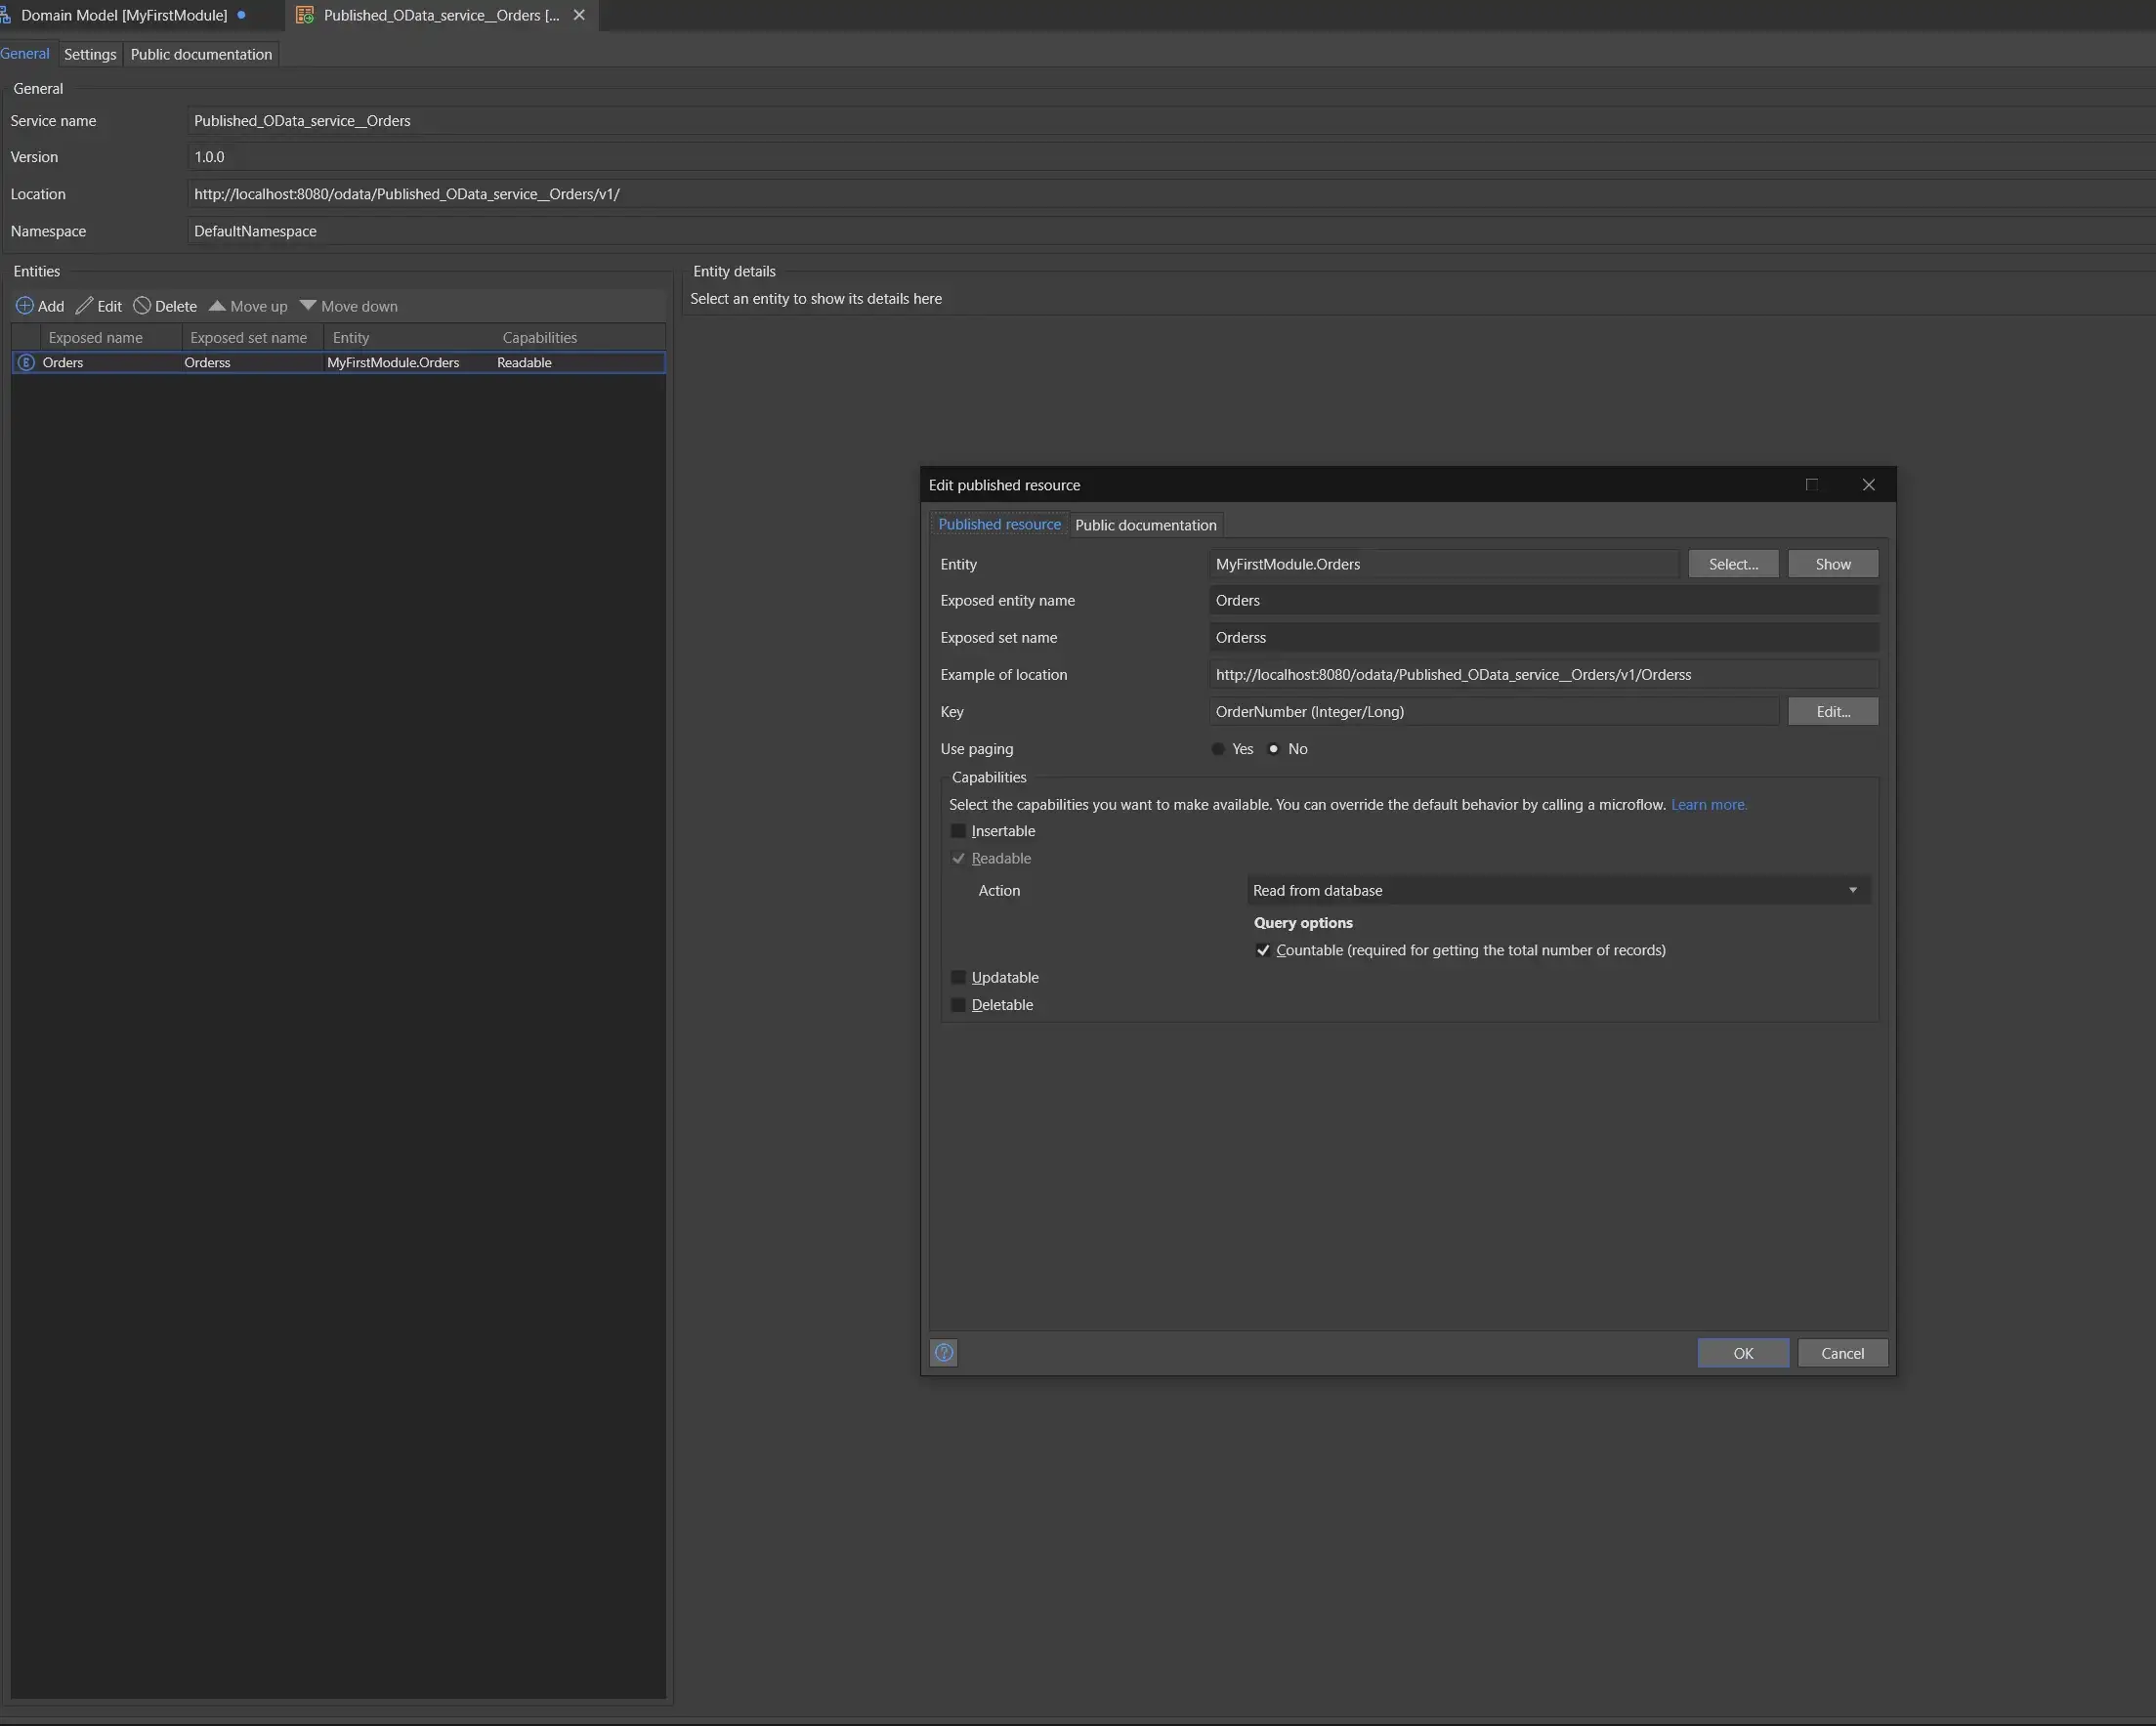
We are then automatically taken to view the Generated Resource and edit its properties. We can leave these as is because we only need the warehouse employees to view the order information, and they should not be allowed to edit order details.
Although we are not making use of these features, I think I should point out that Datahub is no longer read-only — you can now insert new records, update, and delete in addition to reading the data.
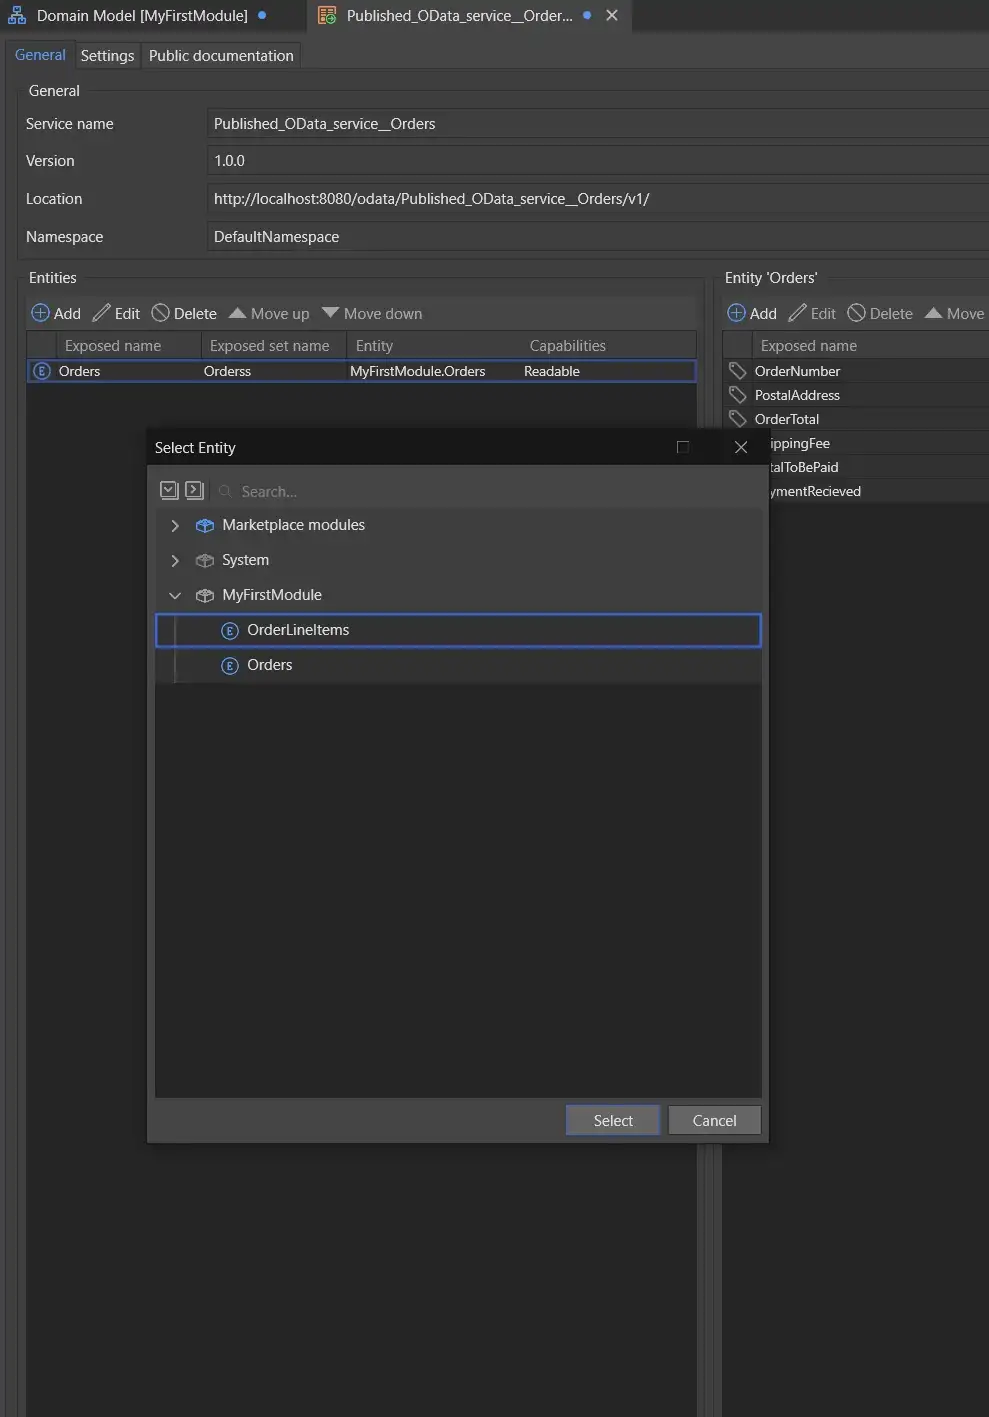
We can then add the $Orderline entity to the resource, so to do this we can click the Add button under entities, browse for $orderline and click OK
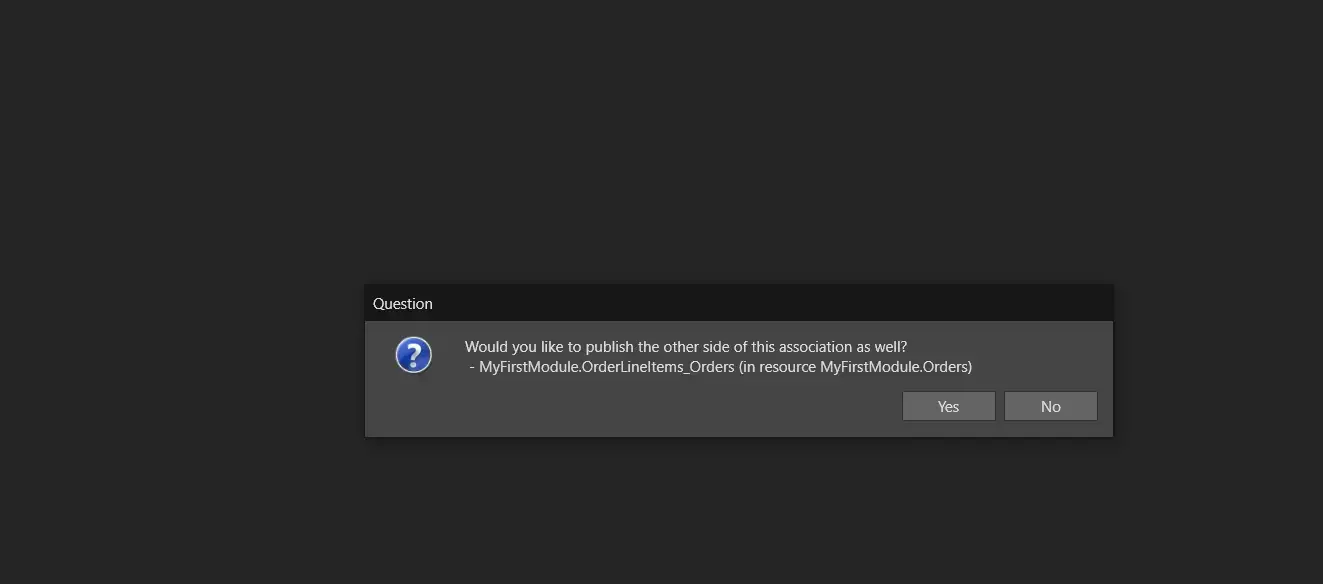
Once we do Studio Pro recognizes these entities are related and asks if you want to publish the association between them, click Yes.
Once we do you will notice some errors in the console, like this :
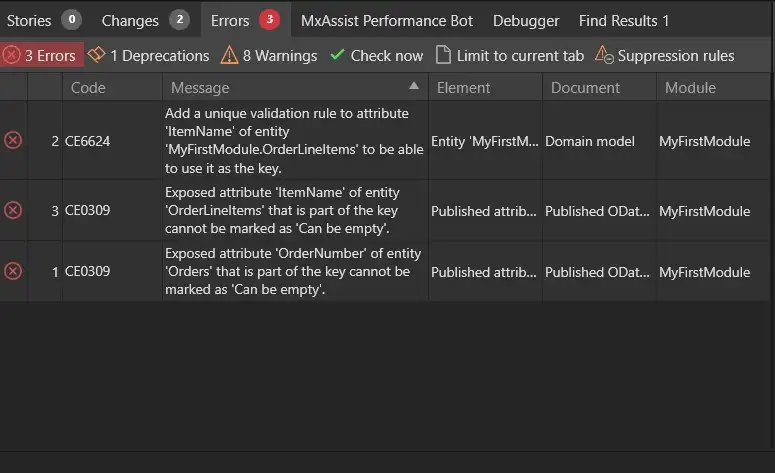
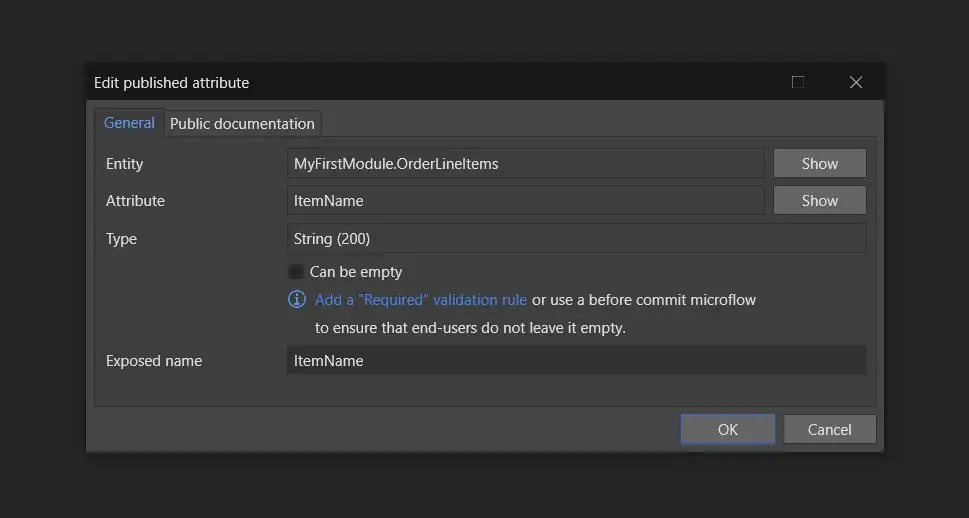
We need to ensure the $Itemname and $OrderNumber are not permitted to be empty as they are used as keys for the API.
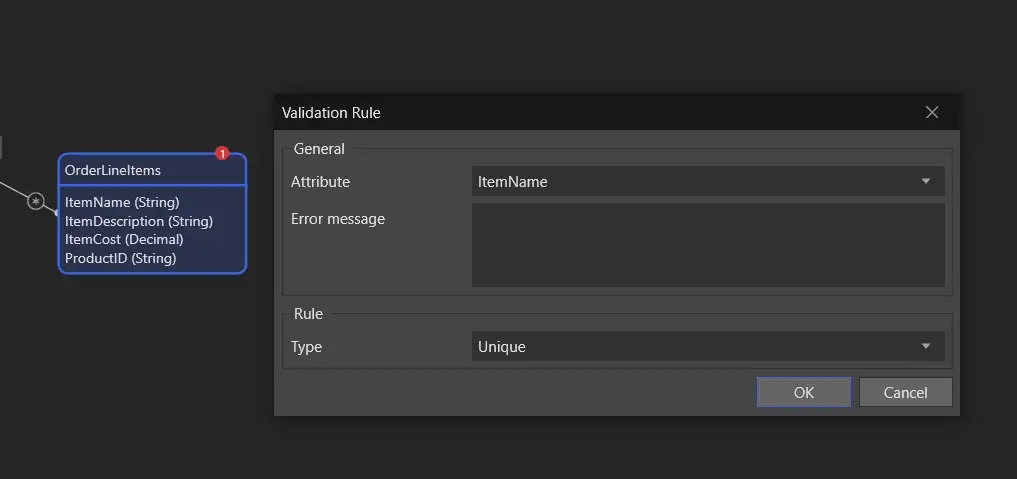
And we need to add a uniqueness validation rule to $ItemName which we can do in the Domain Model
Publishing the OData resource to Datahub
This part is really easy, just deploy your app to a cloud environment! Anyone will work, from the free cloud to any other hosting solution that Mendix provides.
Every OData API you deploy in the Mendix cloud will be registered automatically — meaning your API will be updated automatically as well. This ensures that the documentation is always up to date, and always relevant to the environment you want to connect to. The catalog will show you what version is running in Test versus Acceptance versus Production, as we provide the ability to use semantic versioning on the API.
If you’re not running your apps in the Mendix Cloud you can use the Catalog APIs to automatically register your deploys in your own CICD processes. Or you can do it manually in the Data Hub catalog.
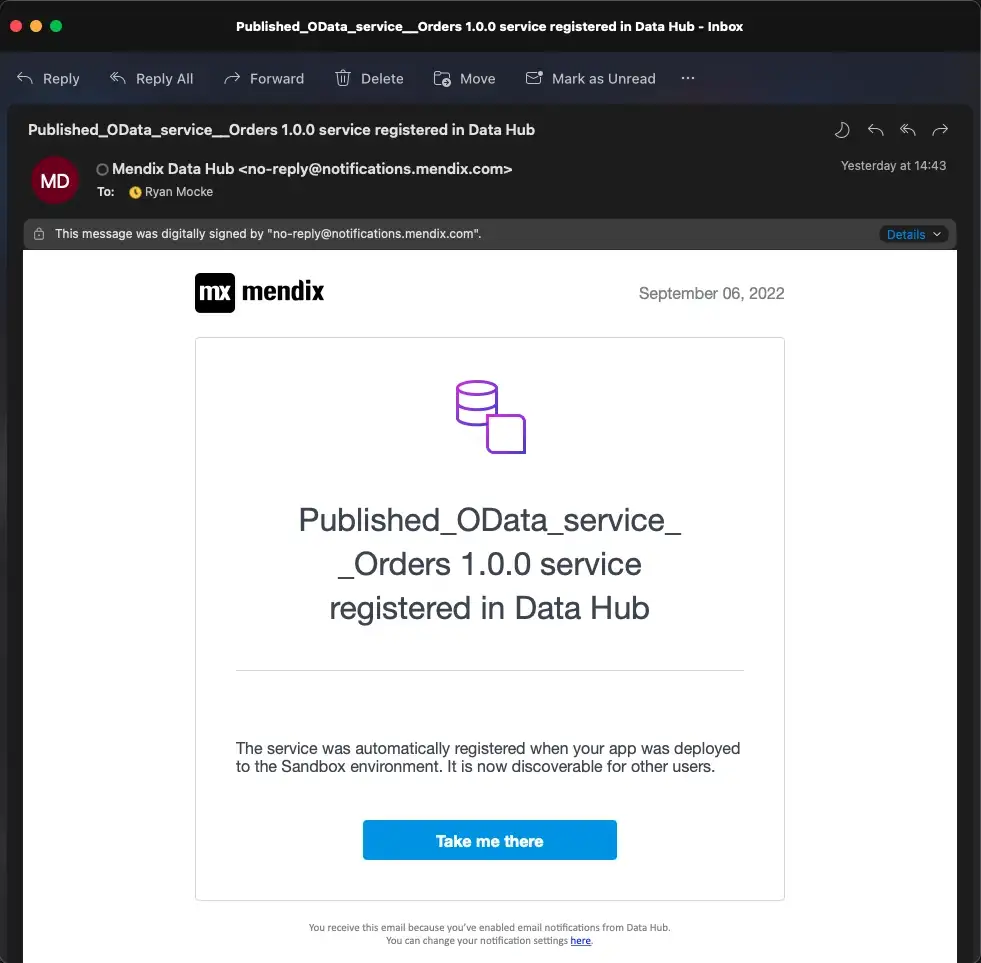
For this example, I will just be deploying to the Mendix Free cloud. Once your app is deployed you will receive an email from Mendix Datahub telling you that your new OData resource has been automatically registered in the catalog.
Consuming your External Entity from Datahub
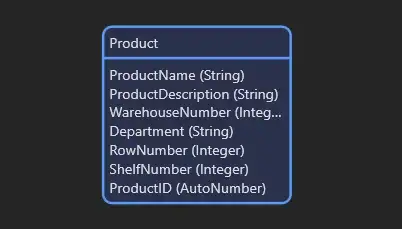
In our new app (The one for the warehouse workers) we have a table called Product
We want to include the $Order and $Orderline entities we published to Datahub here in this module.
While in the domain model, go to the Datahub pane on the right-hand side, and search for the name of your registered service (if you deployed to the free cloud, you will need to enable development environments on the filter)
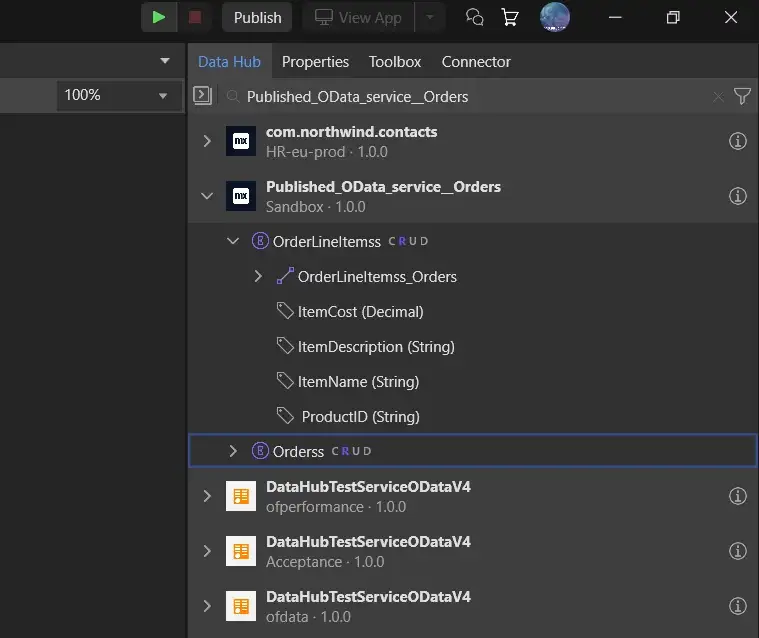
Once you have located your Service, simply drag both of the entities into your new app’s domain model and Studio Pro will take care of the rest.
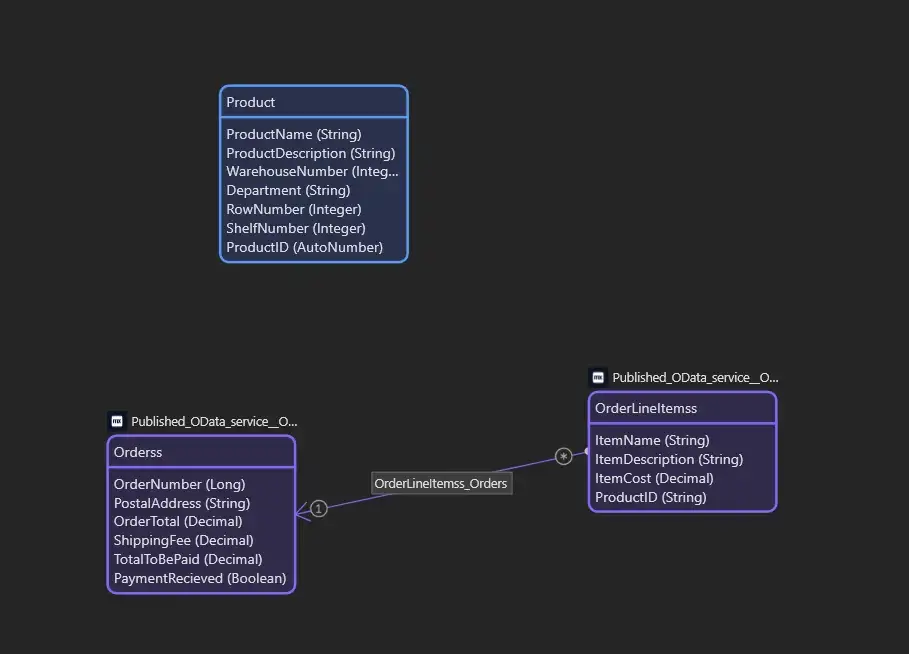
You are now free to use the $order and $orderline data however you want in your app! Well Done!
Some things to consider
It’s important to remember who should be able to access the information in your app. When using remote entities in any application make sure to check the security of your app.