
Mendix is the number one low-code platform, and one of its key strengths is the extensibility it provides. You can use React to incorporate cool third-party libraries and extend your application.
This is blog 4 in a multi-part series, the previous blogs can be found here: Build widgets in Mendix with React — Part 1 — Colour Counter, Build Widgets in Mendix with React Part 2 — Timer, and Build Widgets in Mendix with React Part 3 — Kanban.
What are we building
Recently, Ivo Sturm wrote a blog about converting an existing ArcGIS widget from Dojo to React.
I thought it would be interesting to build a simple version of the ArcGIS map widget from scratch.
Get started
As with all of the pluggable widget blogs up to this point, we begin by scaffolding our widget by running yo @mendix/widget arcGISMap and setting up a test Mendix project.
Let’s start by installing the npm package for the ArcGIS Javascript API
npm install @arcgis/coreArcGIS is an online geographic information system that allows you to display maps and add layers to display a whole range of information.

In order to access the full service you need to register and create an access token but we can press on without one for our simple example.
Getting started
Reviewing the documentation we can update our code to have two files:
A parent
import { ReactElement, createElement } from "react";
import { MapComponent } from "./components/Map";
import { ArcGISMapBlogContainerProps } from "../typings/ArcGISMapBlogProps";
import "./ui/ArcGISMapBlog.css";
export function ArcGISMapBlog(props: ArcGISMapBlogContainerProps): ReactElement {
    return <MapComponent basemap={props.basemap} />;
}
And a child
import { ReactElement, createElement, useEffect, useRef } from "react";
import Map from "@arcgis/core/Map";
import MapView from "@arcgis/core/views/MapView";
import Legend from "@arcgis/core/widgets/Legend";
export interface MapProps {
    basemap: string;
}
export function MapComponent({ basemap }: MapProps): ReactElement {
    const mapDiv = useRef(null);
useEffect(() => {
        if (mapDiv.current) {
            MountMap(basemap);
        }
    }, [basemap]);
const MountMap = (basemap: string): MapView => {
const legend = new Legend();
const map = new Map({ basemap });
const view = new MapView({
map,
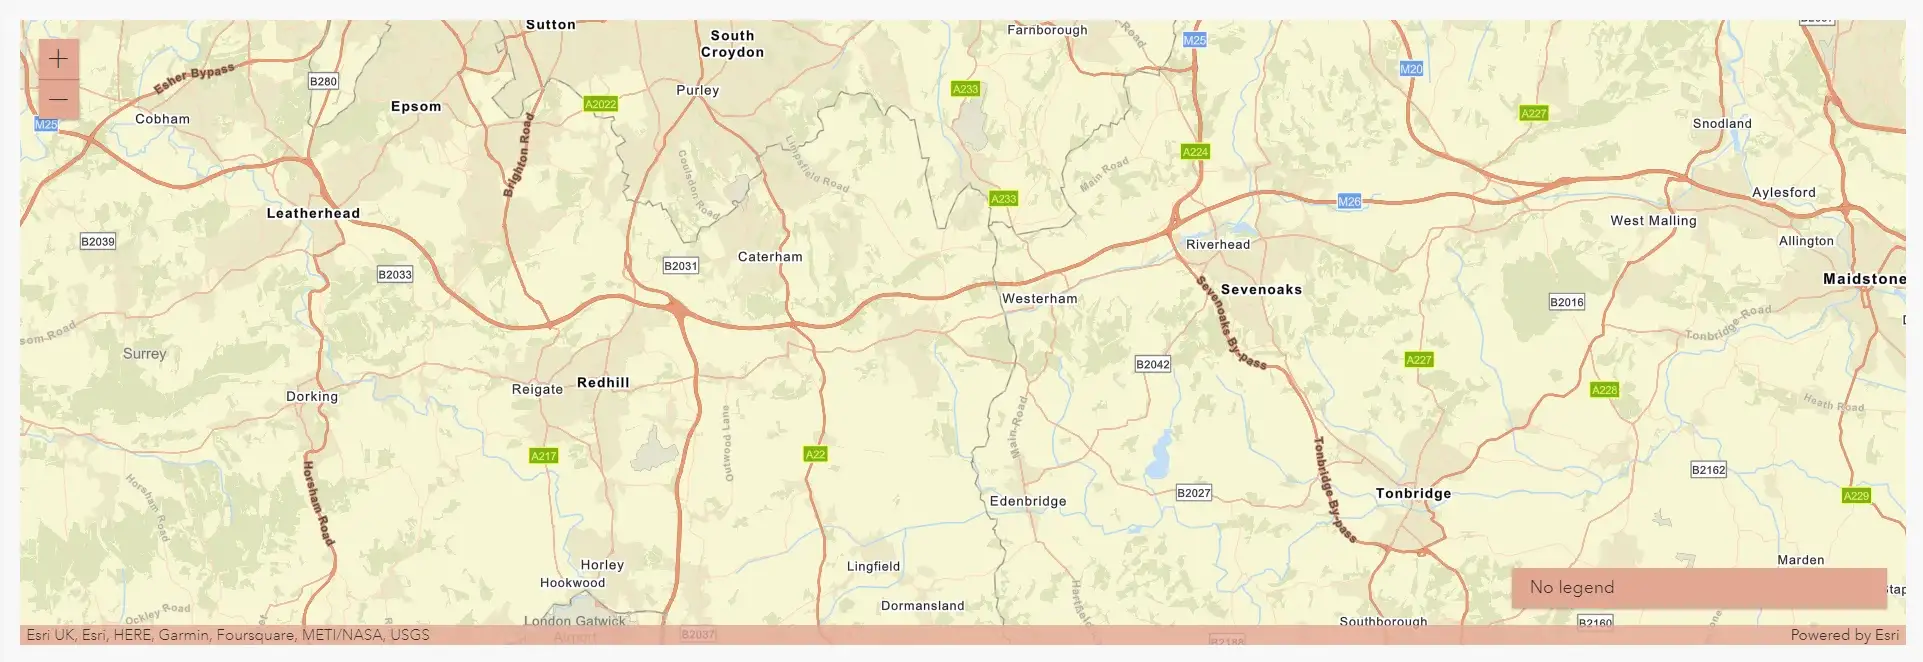
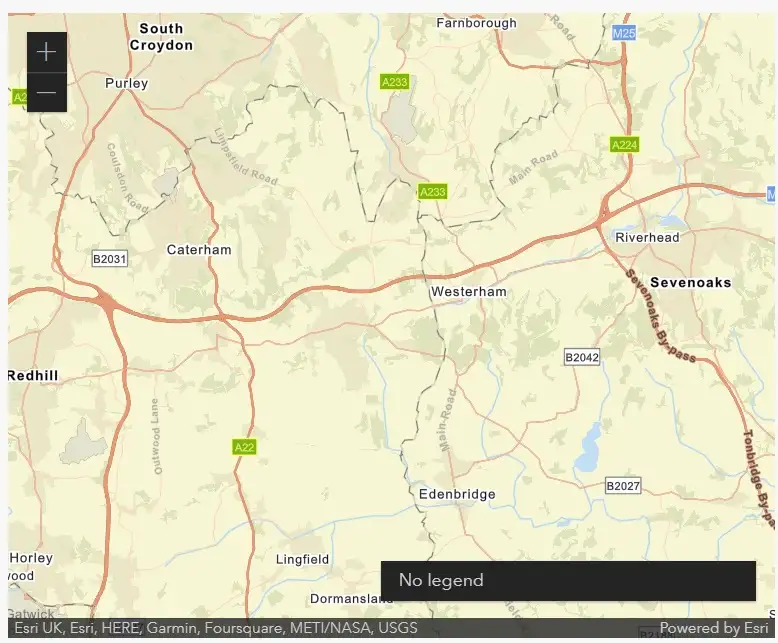
center: [0.029, 51.256], // Longitude, latitude
zoom: 10, // Zoom level
container: mapDiv.current as unknown as HTMLDivElement
});
        legend.view = view;
        view.ui.add(legend, "bottom-right");
        return view;
    };
return <div id="viewDiv" ref={mapDiv} style={{height: "500px"}}/>;
}
Let’s also import the stylesheet from ArcGIS so that we can make our widget look nice, change your UI/{widgetName}.css to:
@import "https://js.arcgis.com/4.24/@arcgis/core/assets/esri/themes/dark/main.css";
Now we build our widget with npm run build and… we get an error:
[!] Error: Invalid value for option "output.file" - when building multiple chunks, the "output.dir" option must be used, not "output.file". To inline dynamic imports, set the "inlineDynamicImports" option.
So how do we fix this? In order to explain, we need to take a few steps back…
A brief history of Javascript
This next section is a brief history of Javascript, to give context to the solution, if this is not of interest to you, feel free to skip and continue with the example
In the beginning…
Javascript was invented by Brendan Eich in 1995, and for the first several years of its development, it was used primarily for isolated scripting tasks. As JS started to be used more in applications, it became more difficult to manage the code. JS was used in more complex ways often across multiple scripts, which inevitably led to function and name conflicts.
As such, the module concept was introduced, this meant that code could be written in a closed place for internal use without fear of conflicts elsewhere and also allowed developers to break large codebases down into small separate parts, making it much easier to write and maintain.
The first attempt to fix this was with Immediately Invoked Function Expressions (IIFE), which essentially just wrapped each file in a function, keeping variables and functions within a file, in that scope instead of the global scope.
(function() {// Your code }) ();
There are still many problems with this approach, including a lack of dependency resolution and pollution of the global namespace.
Over time 3 separate (and competing) module specs emerged:
- CommonJS — still widely used in Node for server-side JS, and easily recognizable by it’s
require()andmodule.exportssyntax - AMD — Asynchronous Module Definition, split from CommonJS early. The key difference is that AMD allows modules that are not dependent on each other to be loaded async (it’s all in the name!)
- UMD — Universal Module Definition, supports both of the other module specs as well as ‘old style’ “global” variable definition
This is all very complicated…so some good news. Since 2015 and the release of ES6, modules have been supported within the Javascript language. This gives us the lovely and simpleimport and export syntax we have been using in our code.
So why the history lesson? Well, we need to be able to handle all of these module types when we write our code, and that is where bundlers come in.
Bundlers
Bundlers allow you to compile your code at build time, process your dependencies, and serve up a compatible concatenated file. Common solutions for this include Webpack (used in Mendix 8 widgets) and rollup (used in Mendix 9 widgets)
This lets you write your code modularly using modern ES6 features (and even Typescript if you fancy it) and then produce an optimized file (or set of files) to be served to the browser.
This is great, but some browsers don’t yet support ES6, so they won’t be able to do anything with these nicely compiled files. In order to fix this we can use a Transpiler such as Babel to serve it to the webpage in a format in which it can be read.
So back to our widgets…
The Pluggable Widget framework requires all of the tools you need to develop React components for Mendix apps. This includes:
- npm — A package manager to easily install and manage third-party packages
- rollup — A bundler, which lets you write your code modularly and then bundle it together in small packages
- babel — A transpiler that converts the JS into a format that can be read by older browsers (and Studio Pro)
So what’s our error mean?
[!] Error: Invalid value for option "output.file" - when building multiple chunks, the "output.dir" option must be used, not "output.file". To inline dynamic imports, set the "inlineDynamicImports" option.
For each widget project, we use the rollup configuration provided by the @mendix/pluggable-widget-tools library.
This can be found in: node_modules/@mendix/pluggable-widget-tools/configs.rollup.config.js.
In this configuration, we are telling our widget to spit out our compiled JS into a single file. Meanwhile, the ArcGIS npm library we are using provides dynamic imports in chunks, which by default rollup wants to spit out as separate files into a directory.
To fix this we just need do what it says in the error and set the inlineDynamicImports option, which will pull everything into one file. We could change the rollup.config.js file in the Pluggable Widgets library but this is a very bad idea as it is not maintainable, and creates very hard-to-read and debug code. Luckily Mendix has built-in functionality to set our own rollup config.
We need to create a file called rollup.config.js in the root widget directory. We then add the following JS code to change how our widget is built:
export default args => {
    const result = args.configDefaultConfig;
    console.warn ('Custom roll up')
    return result.map((config) => {
                config.output.inlineDynamicImports = true
                console.warn ("Set dynamic imports")
                return config;
    });
};
So we run npm run build again, and get a new error:
FATAL ERROR: Reached heap limit Allocation failed - JavaScript heap out of memory
Turns out the build process needs more memory. I can update this by running
export NODE_OPTIONS=--max_old_space_size=5120
If we rebuild then our widget now compiles.
Our bundler can help us create single files so that they can be easily read by the browser.
Rollup also does something else very clever, called Tree Shaking: this involves building an image of the dependency tree in your code and only including the code that is actually needed. This is particularly useful when using large libraries, and avoids loading large amounts of unused code into the browser. This tree shaking is one of the key factors Mendix made the switch from webpack to rollup between Mendix 8 and 9.
Bundlers also come with a whole host of other features, in roll-up, these are in the form of plugins. The last thing I want to do in this blog is cover a really common use case for having to modify your rollup config for your widget
Serving up the files your widget needs
ArcGIS delivers the files needed to create your map via a content delivery network (CDN) . However there may be instances where you want to keep and manage these files within your widget, perhaps due to do firewall settings within your organization. Fortunately, the ArcGIS Javascript API makes this possible.
The first thing to do is to update our code, to tell the API that we will be managing our assets locally. To do this we simply update our container component to contain:
import esriConfig from "@arcgis/core/config.js";
export function ArcGISMapBlog(props: ArcGISMapBlogContainerProps): ReactElement {
    esriConfig.assetsPath = "./widgets/mendix/arcgismapblog/assets";
    return <MapComponent basemap={props.basemap} />;
}
Next, we need to update our rollup to pick up the files we need from our node modules and put them in our widget mpk.
To do this we can use the rollup copy plugin (there are plugins for everything), first, we need to install it
npm i rollup-plugin-copy —save-dev We use the —save-dev command because it is a dependency only required while developing. Then we update our rollup.config.js to:
import copy from "rollup-plugin-copy";
export default args => {
    const result = args.configDefaultConfig;
    console.warn ('Custom roll up')
    return result.map((config) => {
                config.output.inlineDynamicImports = true
                console.warn ("Set dynamic imports")
                const plugins = config.plugins || []
                config.plugins = [
                    ...plugins,
                    copy({
                        targets: { src:"node_modules/@arcgis/core/assets", dest:"dist/tmp/widgets/mendix/arcgismapblog" }]
}),
                ]
                return config;
    });
};
This takes the ‘assets’ folder from the ArcGIS npm package and drops it into our dist/tmp folder which is what is ultimately zipped to create our mpk. Then when we run our application the contents of the widget mpk are served up to ./widgets/{yourOrganisationName}/{yourWidgetName}.
To see this in action let’s run the command to build our widget
npm run build
We can then re-run our app.
If we open our deployment directory we can see that the widget is serving up the assets folder, and if we check our page sources in our chrome dev tools, we can see that the ArcGIS web assembly file is served up to the browser to ensure our map works
We didn’t update our CSS to use local files. To do this we simply update our file to:
@import "../assets/esri/themes/dark/main.css";
Simple….kind of….
If you are using the pluggable widget tools of 9.13.2 or below and you are using Windows, then your fonts will not be imported properly. The following code is required in your rollup.config.js to fix the imports:
import postcssUrl from "postcss-url";
const cssUrlTransform = asset => {
    const outWidgetDirForwardSlash = outWidgetDir.replace(/\\/g, "/")
    return asset.url.startsWith(`${assetsDirName}/`) ? `${outWidgetDirForwardSlash}/${asset.url}` : asset.url;
}
export default args => {
    const result = args.configDefaultConfig;
    console.warn ('Custom roll up')
    return result.map((config) => {
                config.output.inlineDynamicImports = true
                console.warn ("Set dynamic imports")
                const plugins = config.plugins || []
                config.plugins = [
                    ...plugins,
                    postcssUrl (cssUrlTransform)
]
                return config;
    });
};
Then run npm install postcss-url --save-dev . Your widget will now render with icons.
And we are done!
The ArcGIS API is packed full of amazing features, I would encourage you to explore it. To see a great example of what it can do, check out Ivo Sturm’s widget: GitHub – ivosturm/ArcGIS-React: A new and improved ArcGIS widget based on React. The repo for my ArcGIS widget can be found here: GitHub – joe-robertson-mx/arcGISMapBlog.