How to Build Your Own REST API-based AWS Connector

Amazon Web Services (AWS) is one of the most well-known cloud computing platforms in the world, offering a vast array of tools and services to businesses of all sizes. Many companies, from small startups to large corporations, depend on AWS to handle their infrastructure, applications, and data.
However, integrating AWS with other systems can be an arduous process that calls for specialized knowledge and technological proficiency. That is where Mendix comes in.
Developers can easily utilize existing connectors or build new ones that integrate AWS services with other applications and systems using Mendix’s efficient low-code development platform.
“AWS recognizes the transformative power of the Mendix platform, and we recognize the transformative power of AWS Services,” saidf Tim Srock, former CEO of Mendix. Because of the successful seven-year strategic relationship between Mendix and AWS, the two companies have decided on an expanded go-to-market relationship.
To learn more about our partnership with AWS, read our press release here.
Using AWS allows Mendix users to leverage the power of automated procedures and services that AWS provides without having to develop them themselves, saving time and effort. With an AWS connector for Mendix, you can easily tap into the vast number of services available within AWS in a low-code and low-effort way. Making an AWS connector in Mendix can help you streamline your operations and boost your organization’s overall productivity, whether you are developing a custom app that needs to access AWS resources or trying to automate business processes with AWS tools like Lambda and S3. To help you get started with integrating AWS services into your applications right away, I will walk you through the stages of creating a REST API-based AWS connector in Mendix.
Getting Started
When someone discovers that the AWS service which they want to use does not have an existing connector in the Mendix Marketplace, their first reaction is usually something like, “Okay, then that means this solution cannot currently be built with Mendix,” or, “I’m going to have to find a workaround for this.”
I am part of the AWS team in Mendix right now, but before I started, this was also my first reaction. Even after I started, when I already knew that building AWS connectors was the goal of my team, I still felt overwhelmed. I remember thinking: “There are too many AWS services and too many actions for each of them. How are we going to keep up with the demand?” Mind you, this was my thought when I had just begun in the team and when I still thought that building a connector was akin to saving the world — that is to say, that it was extremely hard! But it is not like that at all – building an AWS connector is something all our Mendix developers can do with a little help from our How-To guides!
If you have decided that you need to build a new AWS connector as fast as possible, you might have done a search to see how you could start your journey. There you might have seen that there are two integration methods available to build an AWS connector in Mendix, that is, a representational state transfer (REST) application programming interface (API) or a software development kit (SDK). If you do not have a programming background, simply reading the word SDK may have given you chills. In truth, the process is not as complicated as people (me included) picture it in their heads and is completely doable. But since we are Mendix developers, why not use something we are already familiar with and build a REST API-based AWS connector? Are you up for it?
Here’s a step-by-step guide by yours truly.
Building a REST API-based AWS Connector
The first thing you need to know is that not all AWS services and actions have APIs. This means that before you get started on a REST API-based AWS connector, you need to check if the service and actions you need have APIs available and find the needed HTTP header (their x-amz-target value). If they do not have an API for the service and actions you need, unfortunately, the only other way to continue is to start building a connector using SDK.
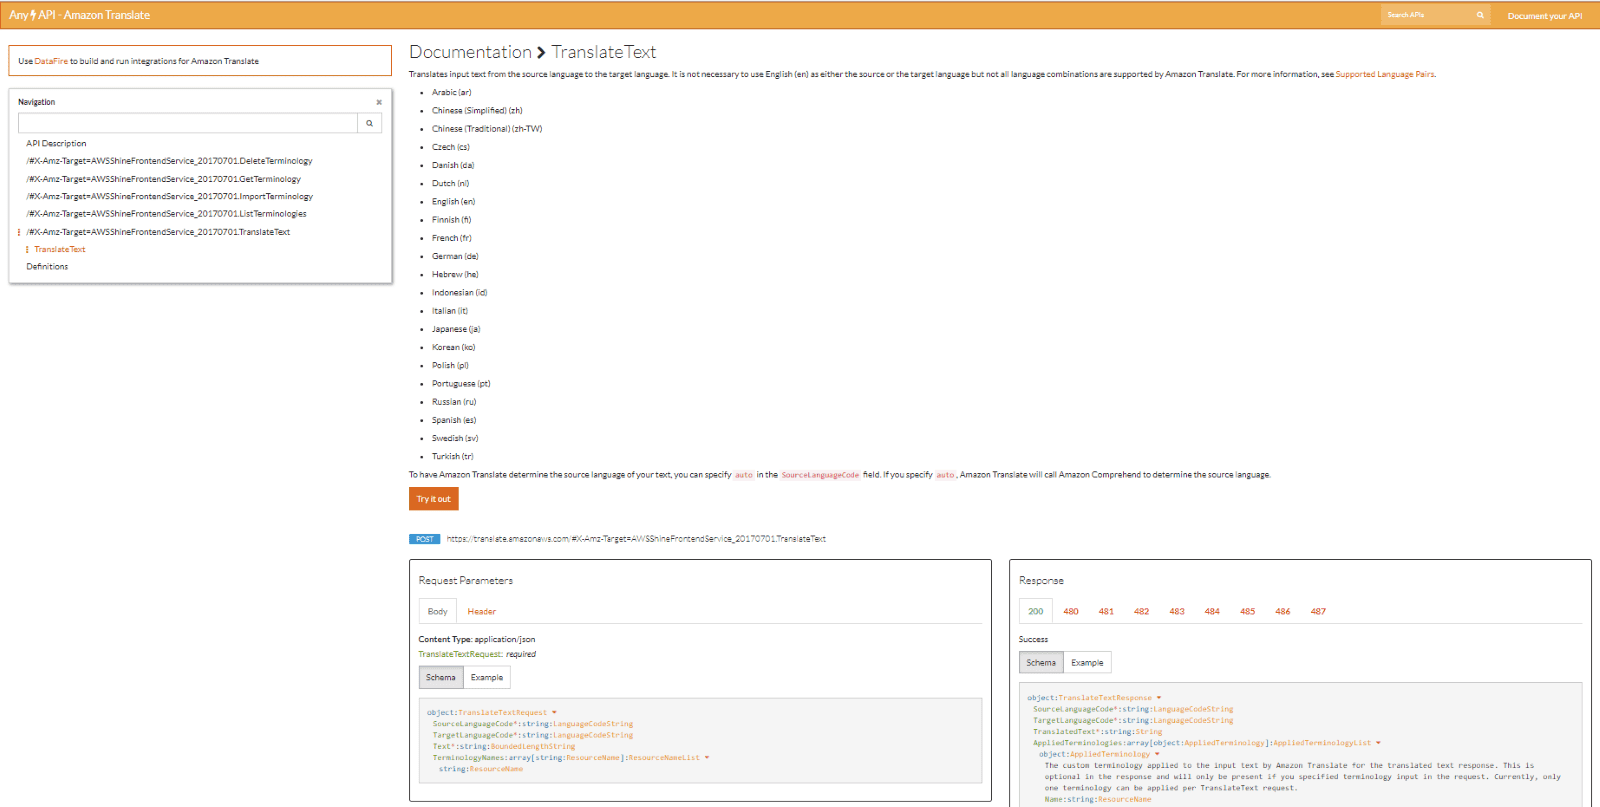
For some services and actions, the APIs can be found in the developer guide of the respective AWS service (e.g., Using Signature Version 4 with Amazon Translate – Amazon Translate). However, for others, it is a harder search. A website that I have found useful is AnyAPI (any-api.com). You can go to the Search APIs area, search the name of the AWS service you want to work on, click on it, and find a list of the service’s actions that have APIs, along with their x-amz-target value if it exists.
What we will be implementing comes from our Build an AWS Connector article and its associated links. For more detailed explanations on some of the topics, you can refer to the article as well.
In this scenario, we are assuming that the Amazon Translate Connector does not exist in the Marketplace, but it is a connector we need for a customer project. We have decided to build an AWS connector to use some of its actions (that have APIs) and will implement the TranslateText action.
Initiating the Project
To start working on a connector, we first need to prepare the right environment.
In Mendix Studio Pro, we will create a new module called AmazonTranslateConnector.
Then install and configure the AWS Authentication connector (version 3.0.0 or higher) as it is needed to authenticate with Amazon Web services.
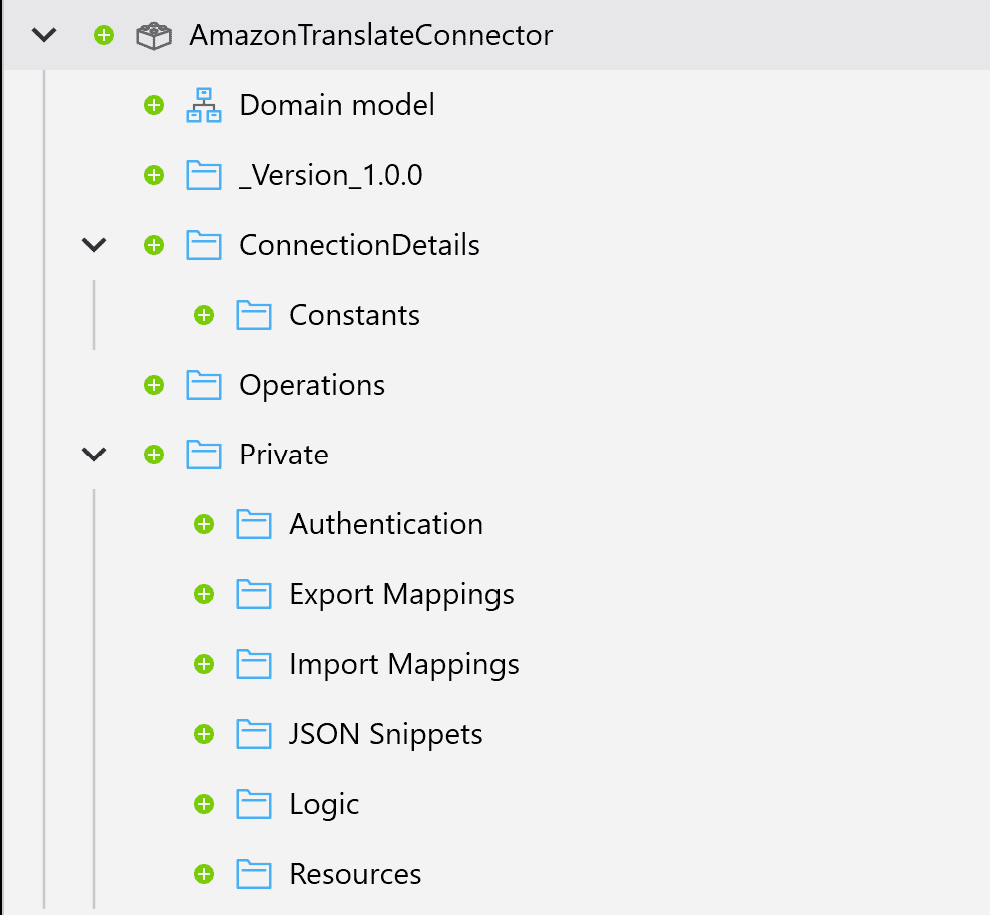
In the AmazonTranslateConnector module, impose a folder structure as shown below.
After the working environment is ready, it is time to learn more about the action that we want to implement, especially about what the REST API would need as its request and what we would receive as its response.
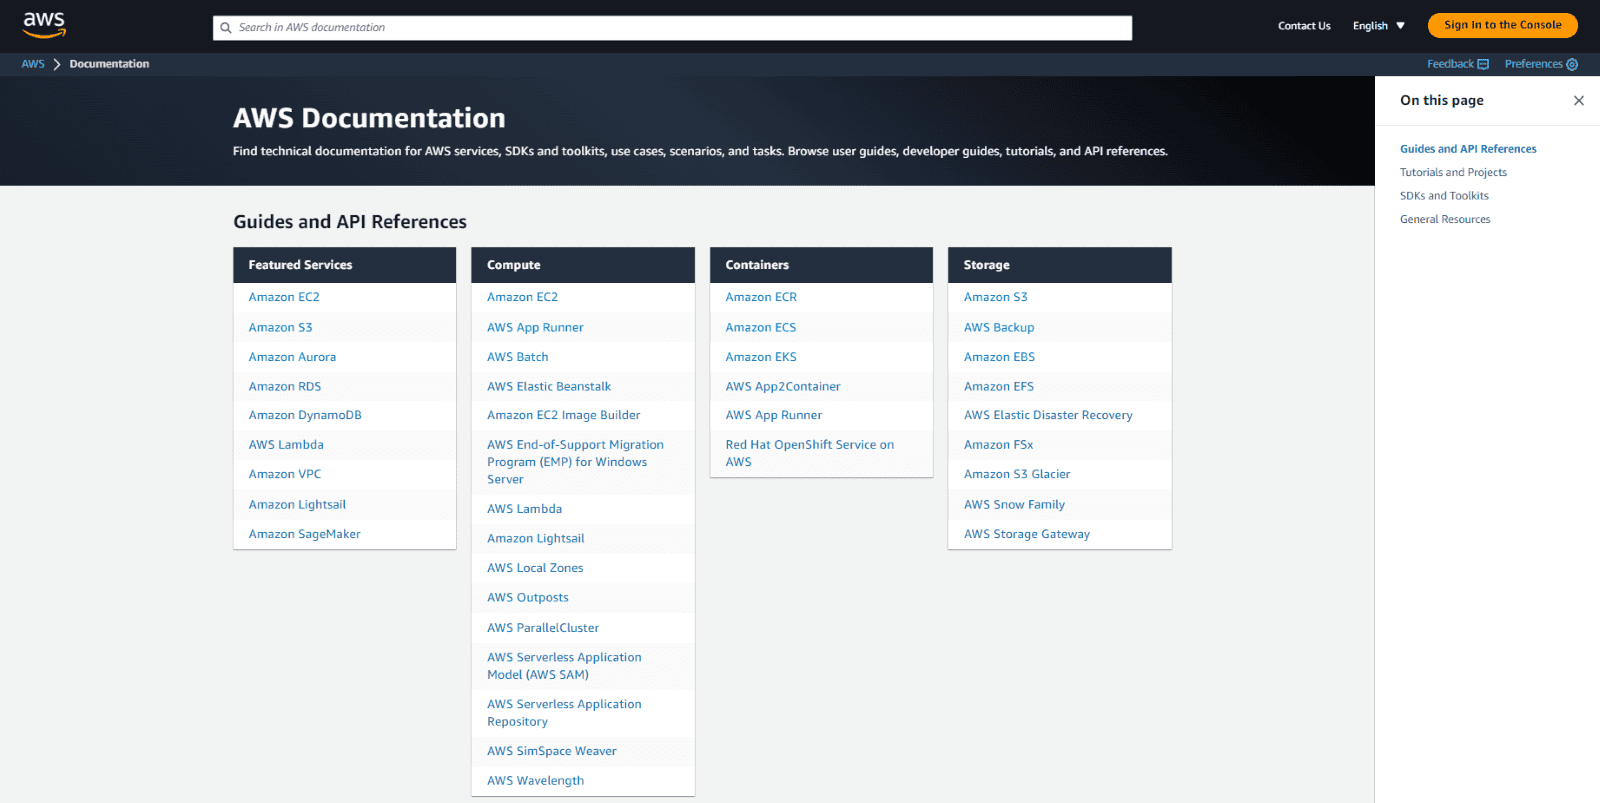
To learn more about the action we would like to implement, we can go to the AWS Documentation (amazon.com).
There we find the documentation of the AWS service we are currently working on, which in our case would be the Amazon Translate Documentation.
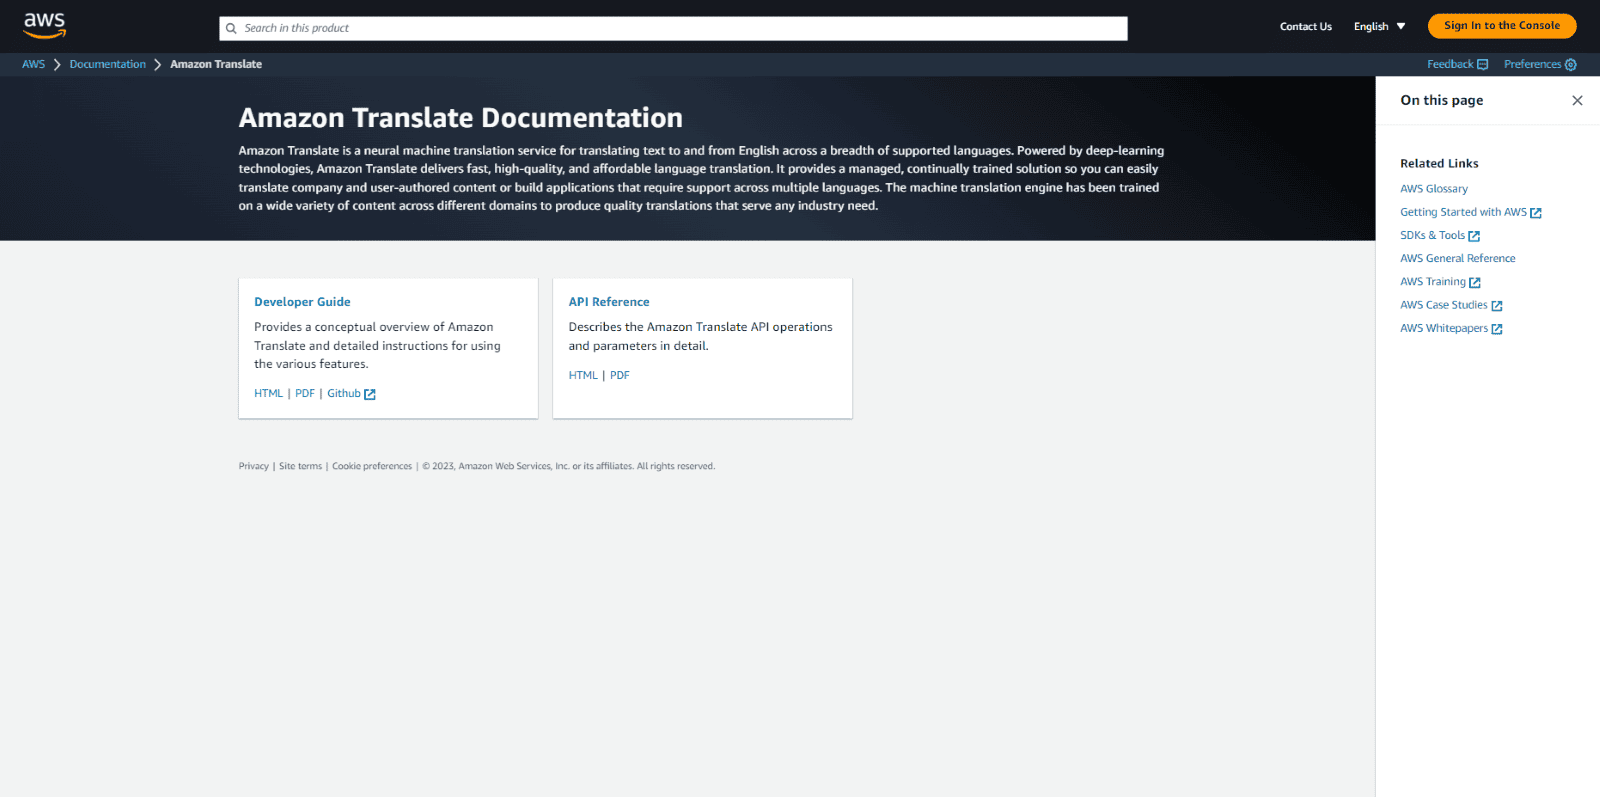
Here are two guides that are helpful during the development of an AWS connector. Because we are building a REST API-based connector, we choose Amazon Translate API Reference – Amazon Translate API Reference, and then open TranslateText – Amazon Translate API Reference.
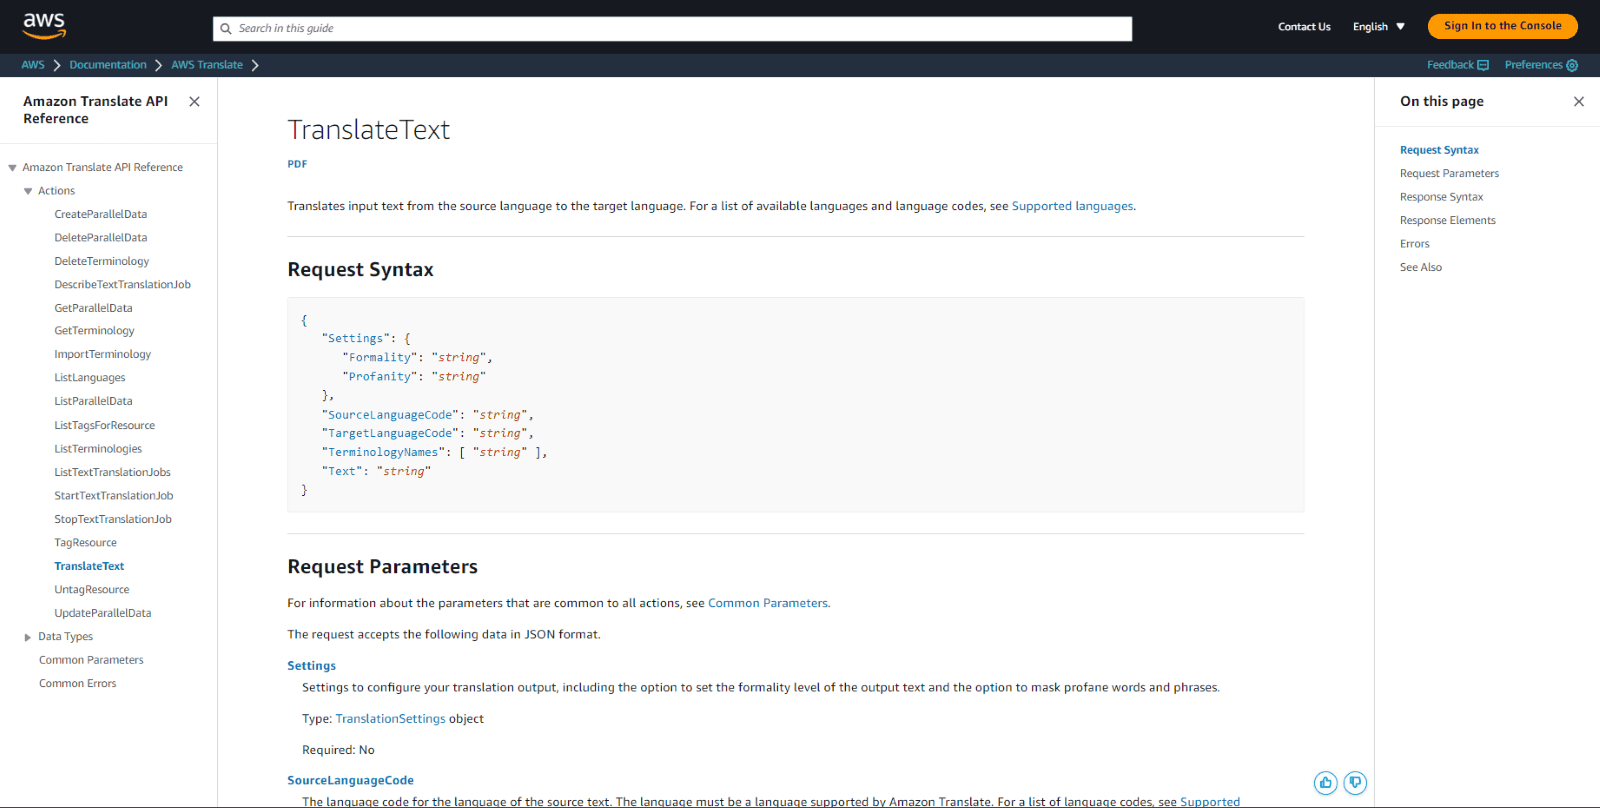
On this page, we can find a lot of valuable information about the action we wish to implement, like the request and response syntax, the details of their parameters, as well as common errors that we might face.
After reading more about the action we are going to implement, we will first use the request and response syntax of the TranslateText action to model the corresponding entities.
Since the upgrade of the AWS Authentication connector to version 3.0.0, it is a best practice for the request entities of all other AWS connectors to inherit from the AWSAuthentication.AbstractRequest entity. Also, the timeout settings should be specified in an associated BasicClientConfig object. This is especially relevant if you want to publish your connector on the marketplace.
In this example, however, we want to take the easiest route. We will therefore neither use the inheritance nor create a BasicClientConfig object to specify the timeout settings.
Let’s create the request entity and have a look into the request body in the AWS documentation first. Conveniently, we can generate the request entity based on the syntax of the TranslateText action.
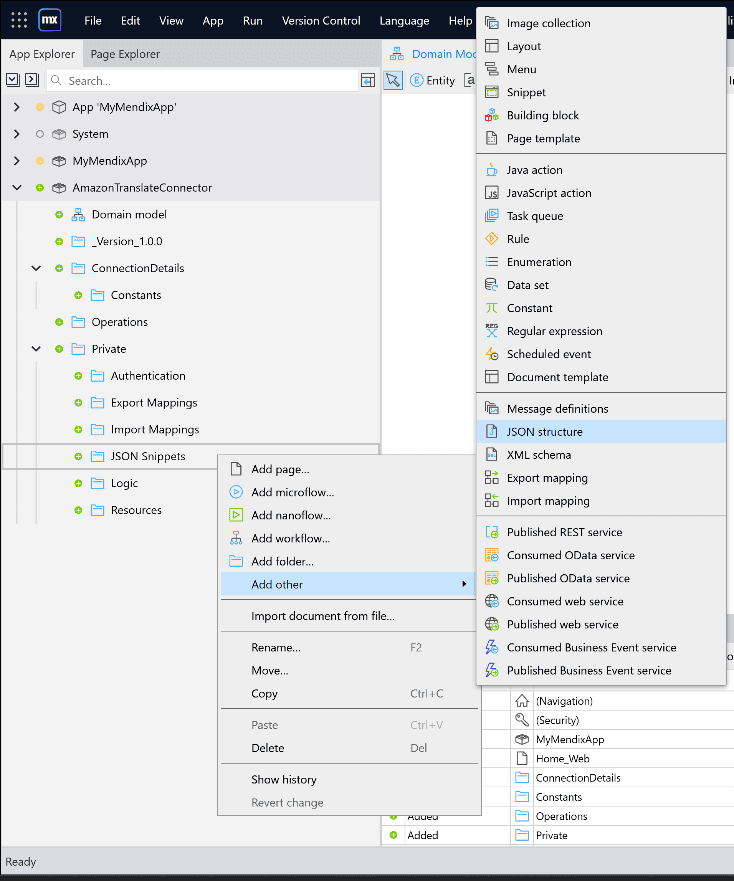
In the JSON Snippets folder, we create a JSON structure document named after the AWS service, in this case, JSON_TranslateText.
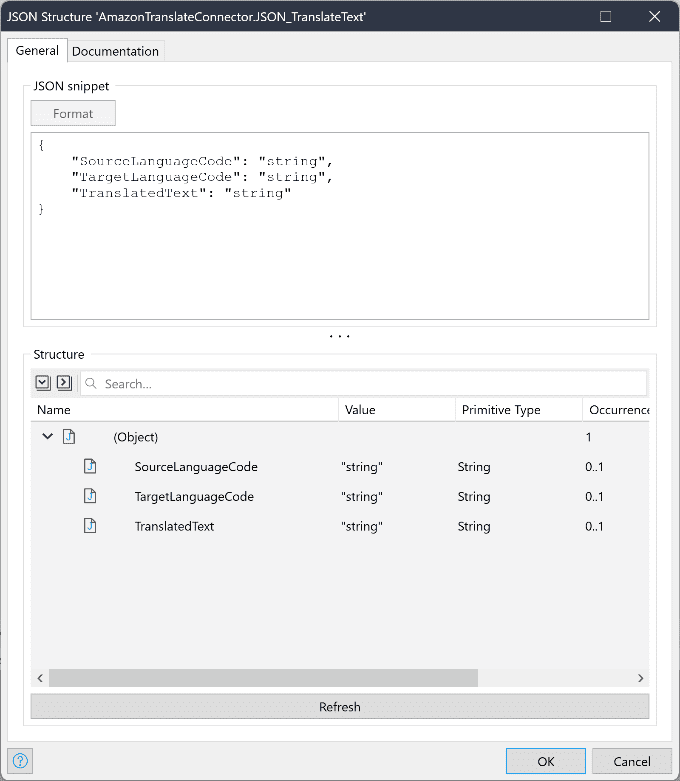
We open the document and paste the quest syntax found in TranslateText – Amazon Translate API Reference.
We then click Format. Because we do not care about the applied settings and applied terminologies in our case, we are going to delete those parts and just leave SourceLanguageCode, TargetLanguageCode, and TranslatedText before clicking Refresh and OK.
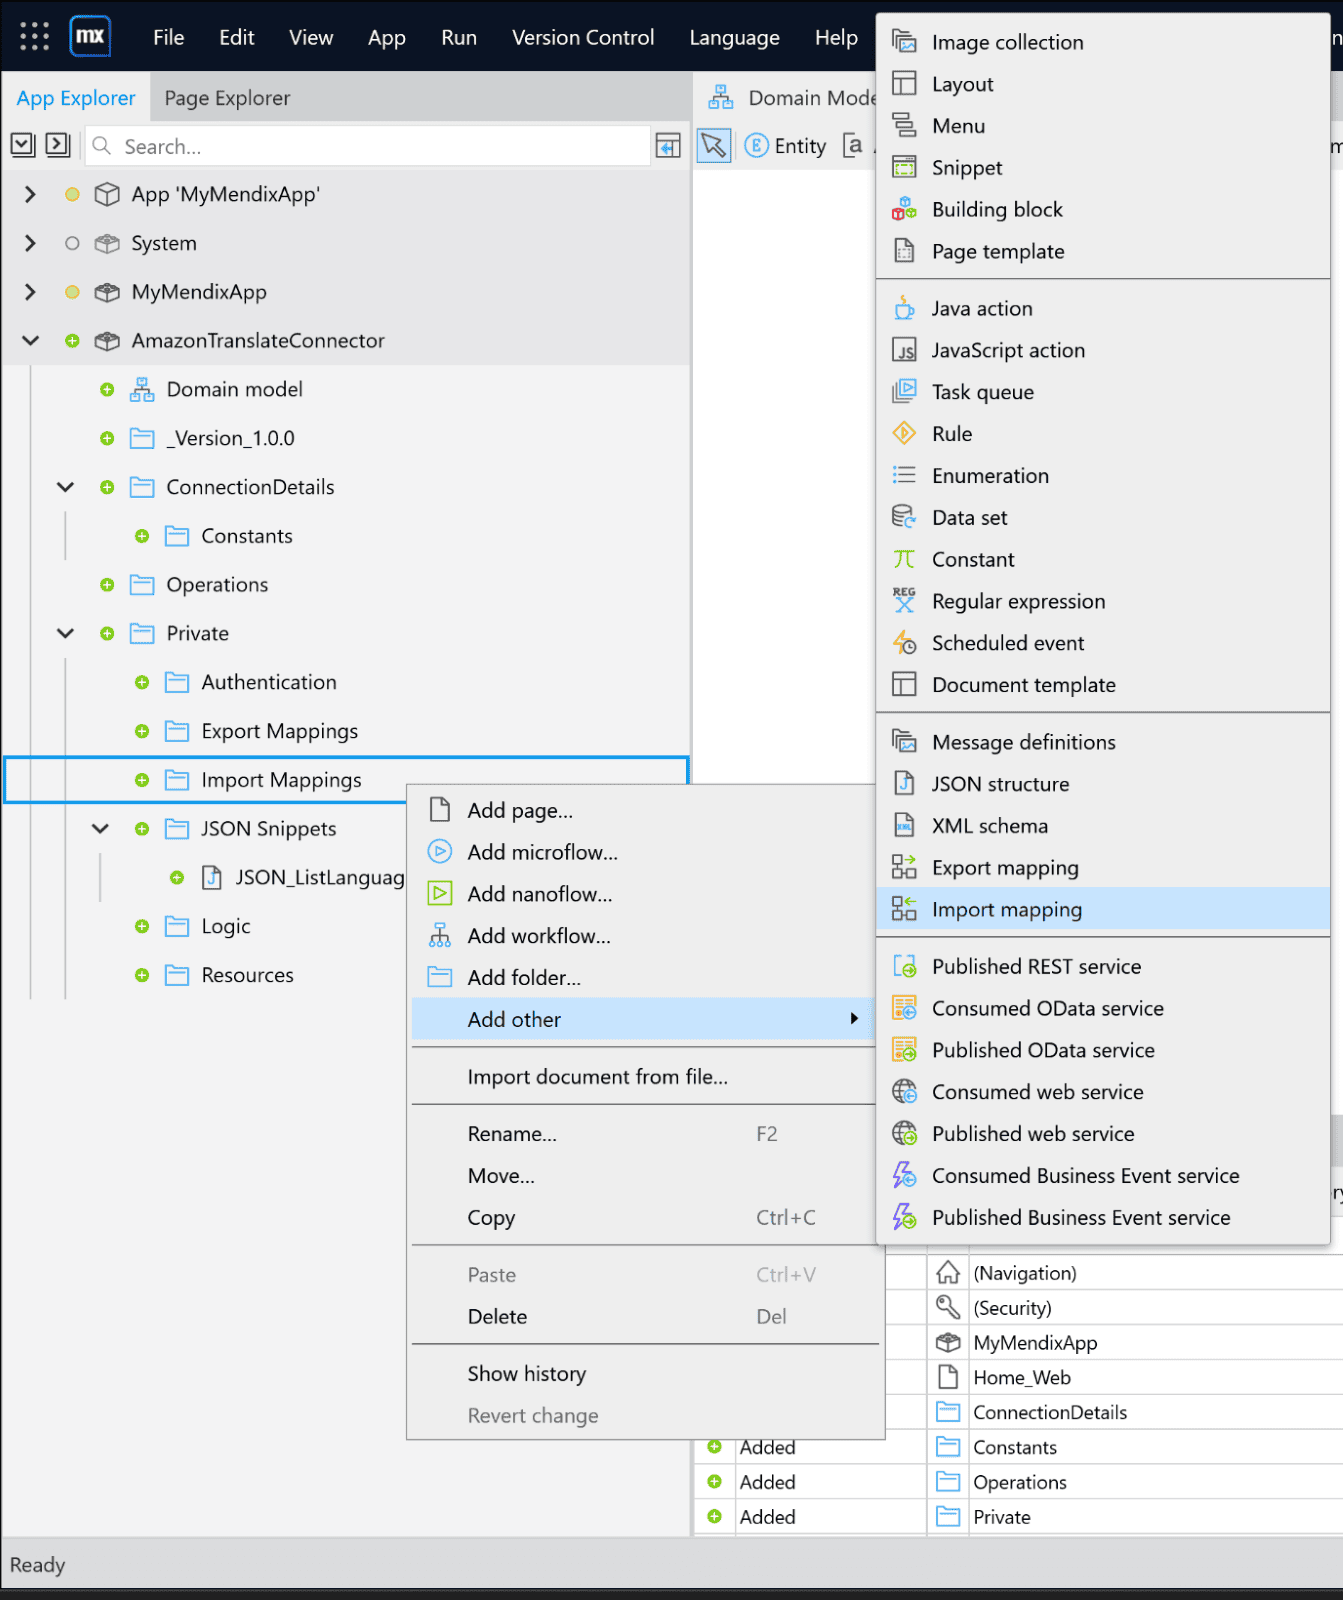
In the Import Mappings folder, we create an Import Mapping document, name it IMM_TranslateText and click OK.
We open the IMM_TranslateText document. In the Schema source section, we select JSON structure, and then select the JSON_TranslateText document.
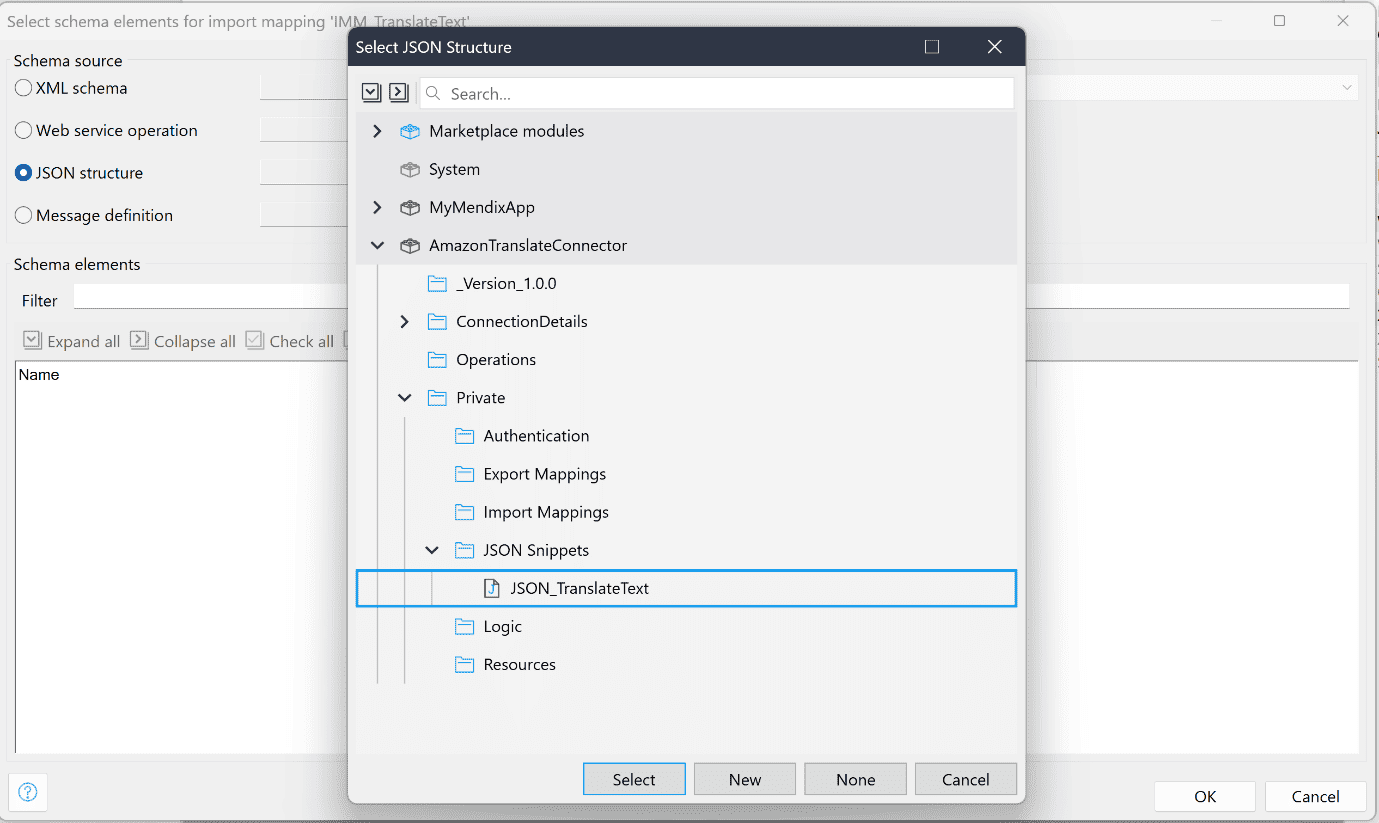
Then we click Expand all, select Check all, and then OK.
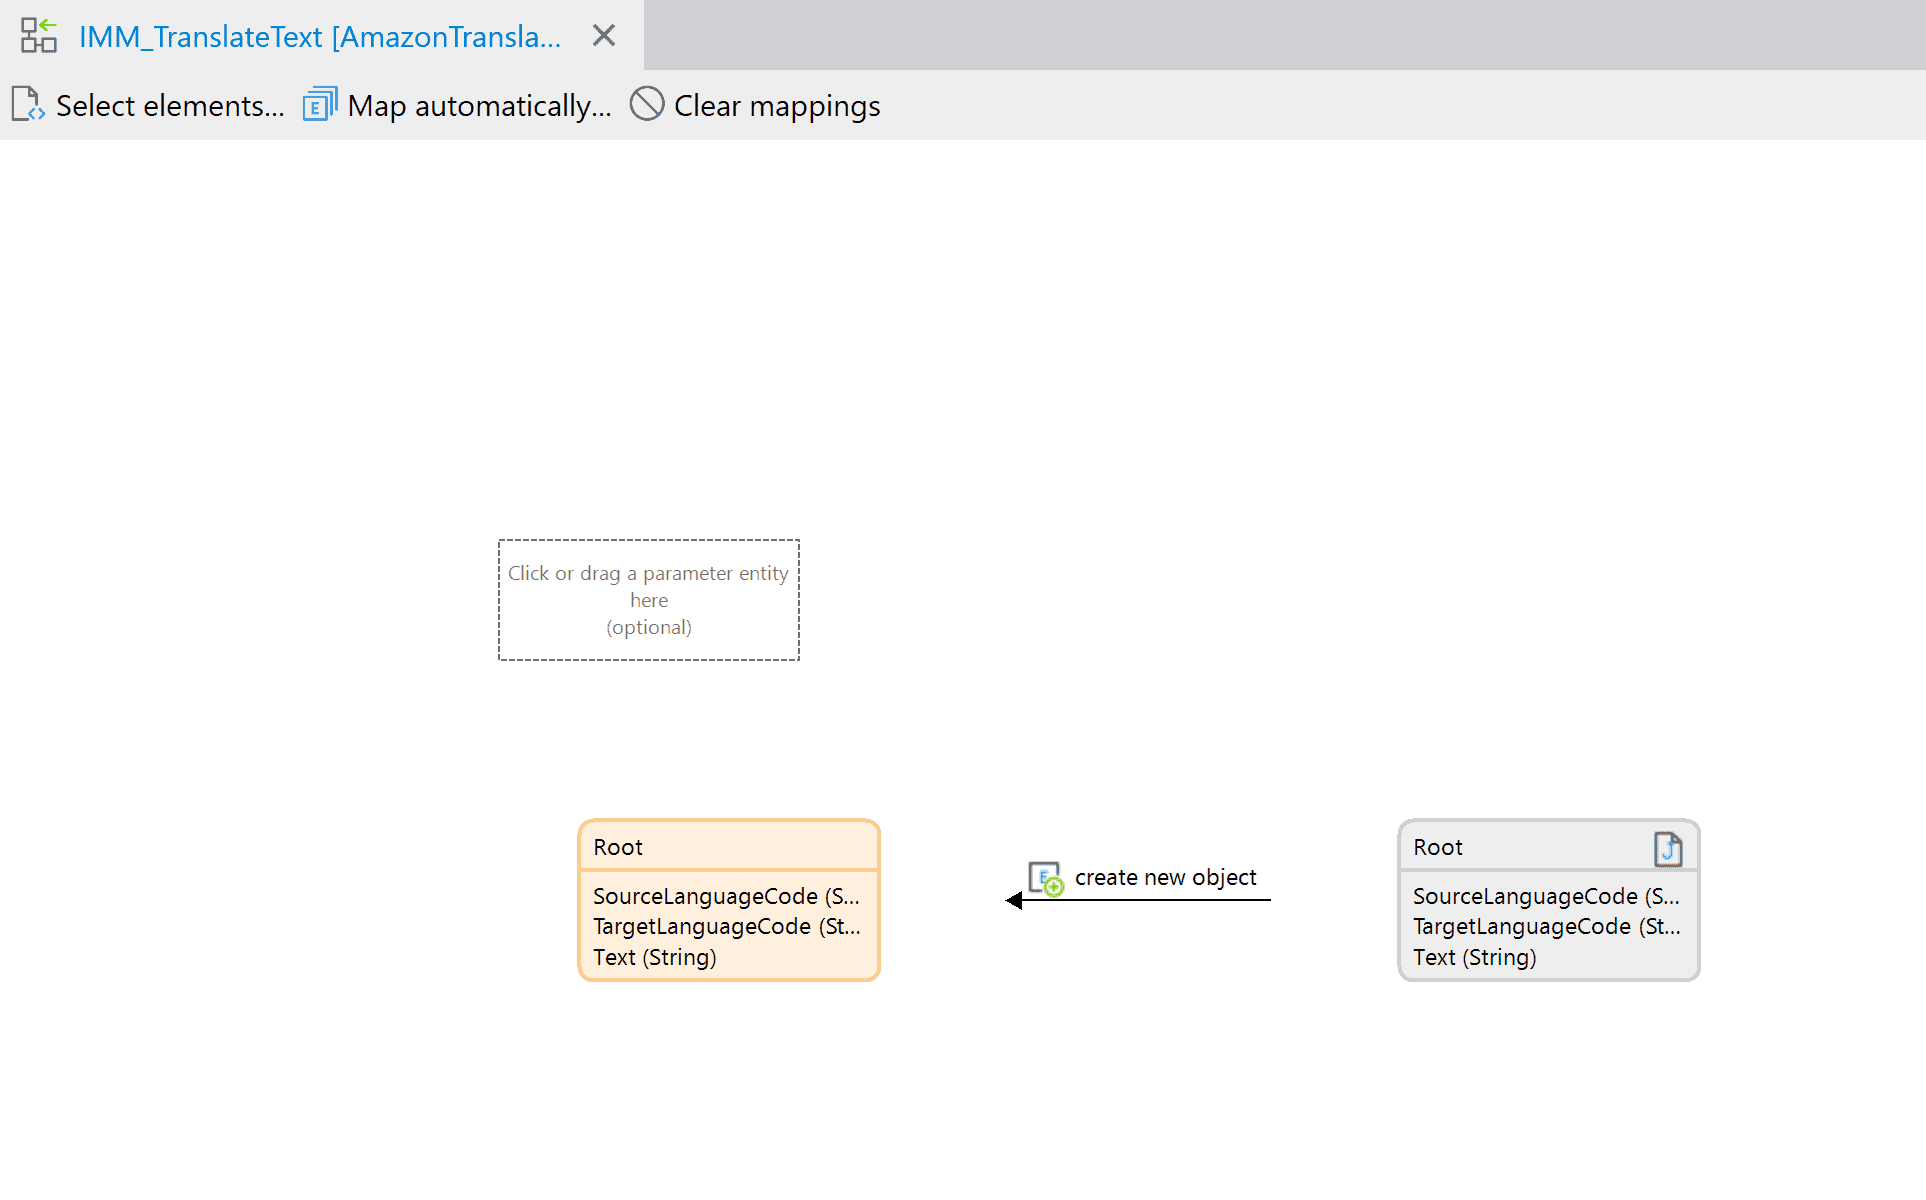
Mendix Studio Pro will now show a visual representation of the mapping of the AWS service into your Mendix application. In some cases, entities that serve no purpose might be generated. Remove them by opening the import mapping document again and unchecking the unnecessary ones. In this case, because there are no unnecessary entities created, we will move on.
After this is done, we click Map automatically. Mendix Studio Pro will create the entities into which the AWS service response will be mapped in the domain model. In our case, the import mapping looks like this:
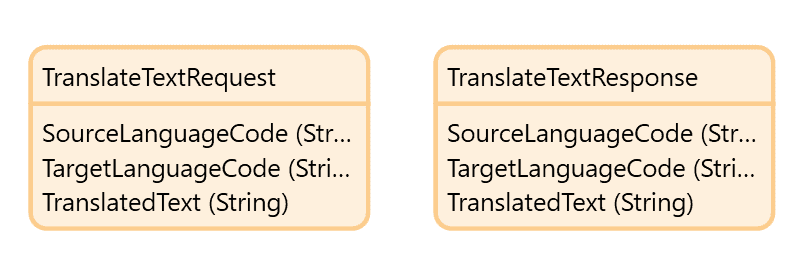
Now we go to our domain model and change the names of the created entities to match the TranslateText action. Conveniently, we can see from the API documentation that the attributes within the response that we are interested in are the same as for the request. So, we can simply copy the newly created TranslateTextRequest and rename it. This is what the two entities should look like now:
We will also need to export TranslateTextRequest objects later. To prepare, we create an export mapping EXM_TranslateText in the same way as the import mapping IMM_TranslateText. After our domain model is ready, we can move on to creating our microflow action. However, before we start working on that, we will quickly add the constants we need for authentication.
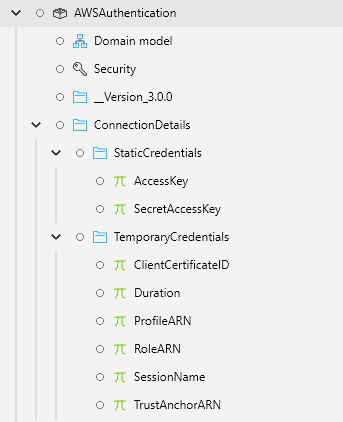
In the application settings, we change the constant values for the AWS Authentication connector. The required constants for the two types, static and temporary, are listed in the ConnectionDetails section of the connector, as you can see in the image below.
Now, we can start working on our microflow.
In the Operations folder, we create a microflow called POST_v1_TranslateText, according to the Mendix naming conventions.
According to TranslateText – Amazon Translate API Reference, the request for this action has three required parameters: SourceLanguageCode, TargetLanguageCode, and Text, which is the text we would like to translate. So, we add three input parameters to the microflow for these parameters and create a string variable called RequestBody to prepare the action request.
Since we created a request entity, we can use it as the only input parameter.
We then add either the GetTemporaryCredentials or the GetStaticCredentials microflows from the AWS Authentication module to get our credentials. In this implementation, we will use static credentials, so we add the GetStaticCredentials microflow. All the necessary information to create the Credentials object will be populated from the constants we filled in the AWS Authentication connector.
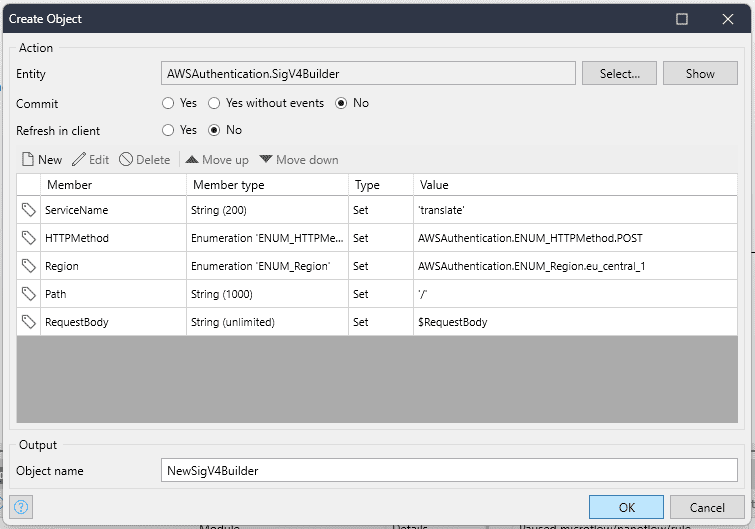
We now have both our request and our AWS credentials. However, before we can call the REST service, we need to use Signature Version 4 to add the authentication information to our request call. We need to configure the microflow to get a SigV4Header object by using the Get SigV4 Headers operation from the AWS Authentication module. For this, we first create a new SigV4Builder object called NewSigV4Builder and fill out its members. Please select a region according to the best practices: the closest region to your location where the translate service is available.
Next, we create a list of SigV4Parameter objects called HeaderList because there are two important headers that are needed as the input parameter of the Get SigV4 Headers Java action.
For the first header, we create a SigV4Parameter object ContentTypeHeader with the following parameters:
- Key – Content-type
- Value – application/x-amz-json-1.1

For the second header, we create a SigV4Parameter object TranslateTextActionHeader to add the x-amz-target for the TranslateText action that we had found before we started working on the connector.
- Key – x-amz-target
- Value – AWSShineFrontendService_20170701.TranslateText

We add both these headers to the HeaderList we have created.
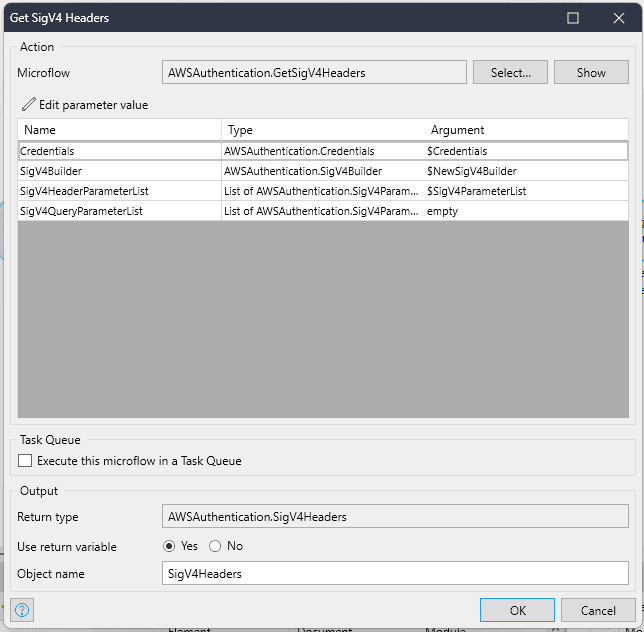
Now, we can add the Get SigV4 Headers operation to our microflow and use our credentials, the NewSigV4Builder object, and the list of SigV4Parameter objects HeaderList as its input parameters. It returns a SigV4Headers object.
After getting the SigV4Headers object in scope, we want to export the TranslateTextRequest to get the RequestBody as JSON. To do this, add an ‘Export with mapping’ action to the microflow. Then select the EXM_TranslateText mapping as well as the TranslateTextRequest object and use a return variable called ‘RequestBody’.
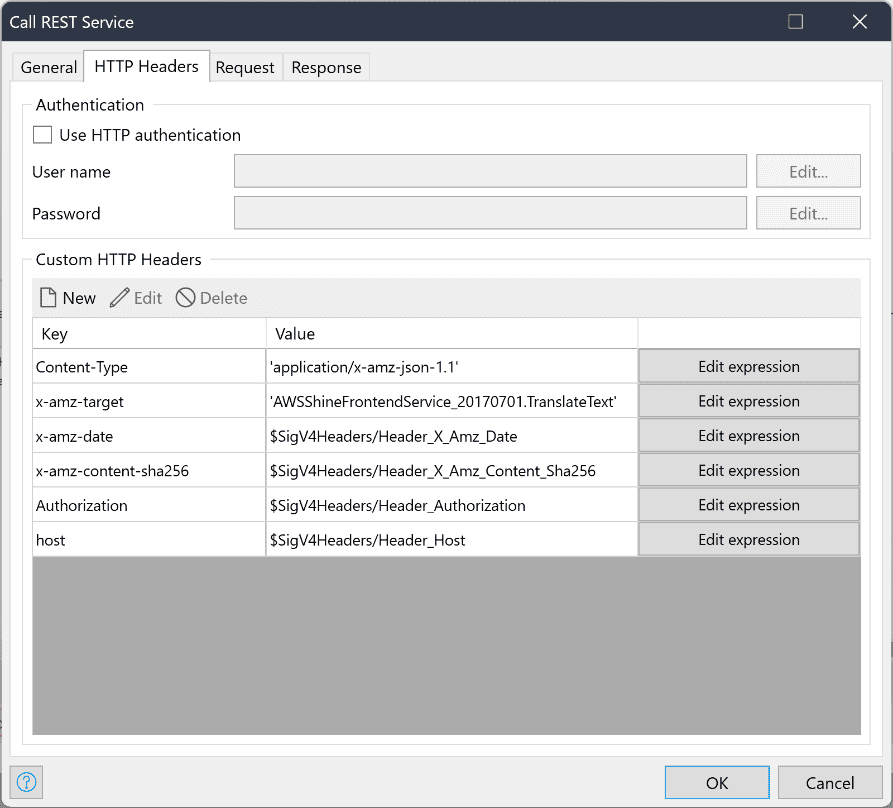
We can now call the REST service, as we have all the needed information, so we add a call REST action to the microflow. Location is the EndpointURL attribute of the returned SigV4Headers; Timeout is set to 300ms per default and can be changed to any integer value you prefer; and Request is the RequestBody string variable of the microflow. We add the ContentTypeHeader, TranslateTextActionHeader, and the headers in the returned SigV4Headers object as Custom HTTP Headers to the REST call as well.
We map the Response using the IMM_TranslateText document, which returns a TranslateTextResponse object.
Our completed microflow looks like this (the generation of the SigV4Headers has been consolidated in a subflow for better clarity):
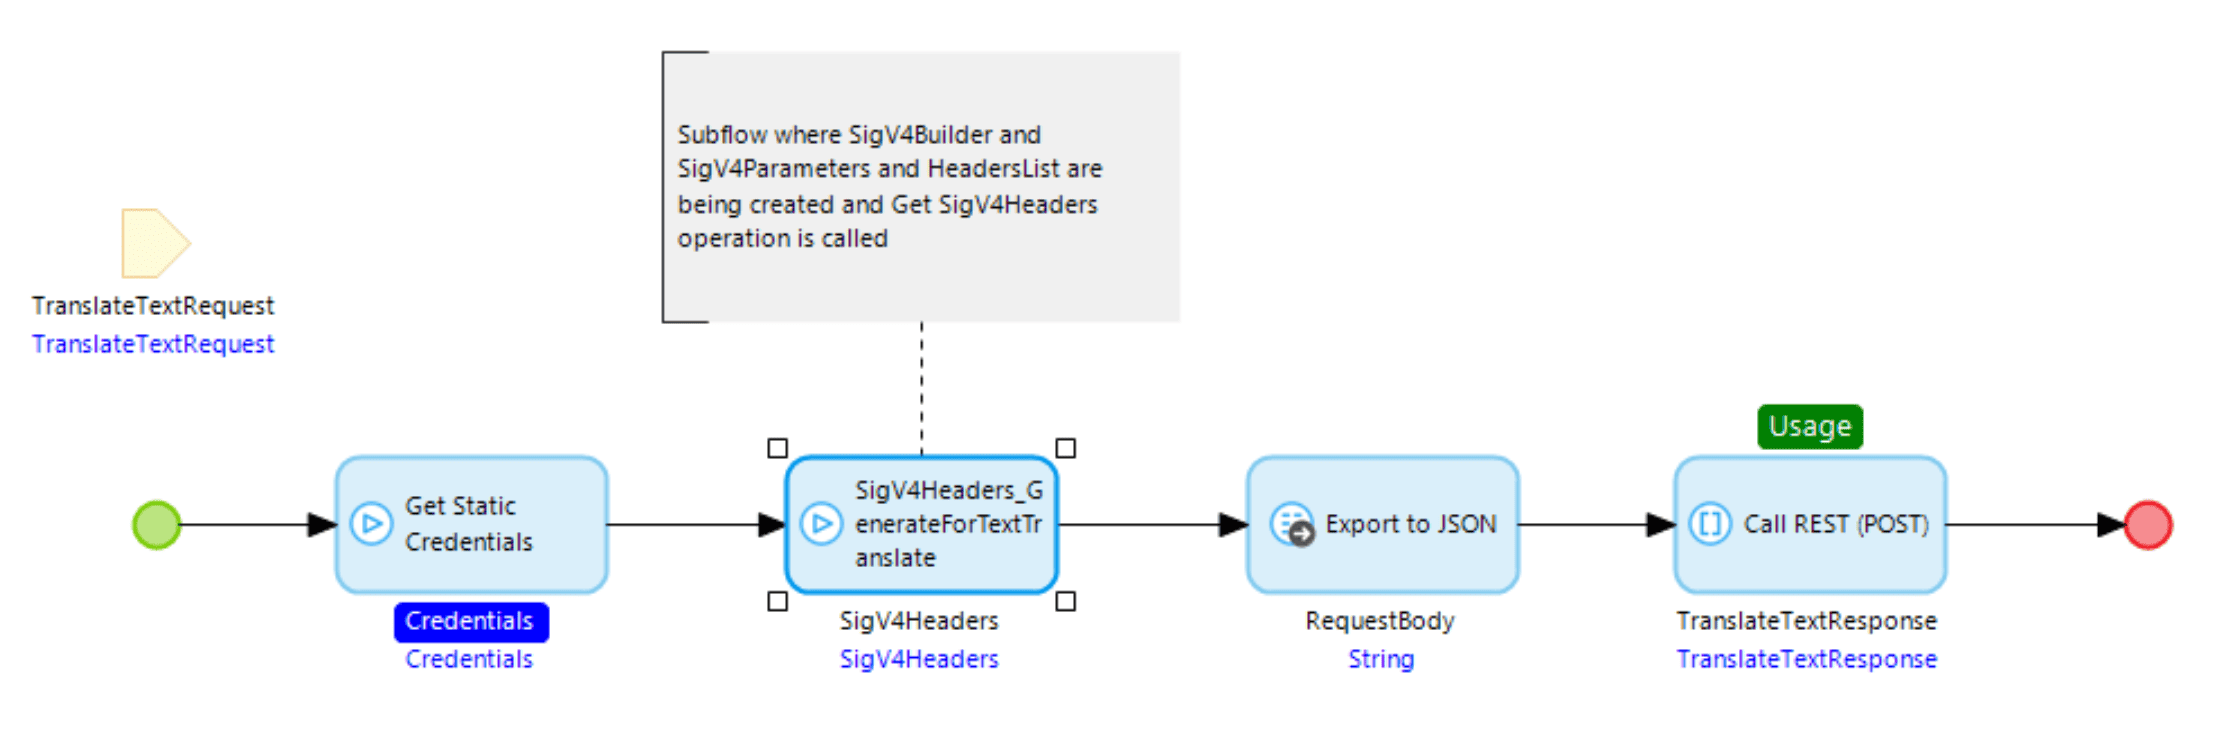
And we are done! You have created a new Amazon Translate Connector, which can translate text to another language! Don’t forget to expose this microflow so it can be easily reused.