
Amazon Rekognition is a deep-learning image analysis service that allows you to train your own models using just a few images.

With the Mendix connector, it’s incredibly easy to set up in your app. From facial recognition to creating your own custom labels, you can train it to detect anything you want in an image.
So, of course, I came up with something super practical and useful for daily life – I created an app to detect different kinds of dog breeds in images. This was inspired by my own dog Bean, who constantly garners the question: “What kind of dog is he?” If you have ever found yourself asking – what kind of dog is that – well, now there’s an app for that!
All jokes aside, I wanted to create something that shows just how easy it is to train a Rekognition model to detect anything you want, and getting it to detect different kinds of dogs seemed like a fun example.
Before we get started
In this blog, we will be using session-based credentials, which I talked about in my last piece. So if you haven’t read or watched it yet – click the link below to go back and do so now. Today we are going to continue building on what we did last time.
Setting up your S3 bucket
The first step to creating a Rekognition project is to create the dataset on which your model will be trained. That means we have to create an Amazon S3 bucket, and after that, we can upload our images to train the model. To create your S3 bucket, follow these steps:
- Sign in to the AWS Management Console and open the Amazon S3 console. Then we are going to choose Create bucket.
- Enter a name for our bucket. I’m going to name mine “HelloRekognition.”
- In Region, choose the AWS Region where you want the bucket to reside.
- Choose a Region close to you to minimize latency and costs and address regulatory requirements.
- Leave everything else as default, scroll down, and we can click the Create bucket button.
5 Upload your pictures into the bucket, but first, make sure they have a folder structure and that the folders are named correctly. These folder names will be used to create the tags which Amazon Rekognition returns to you.
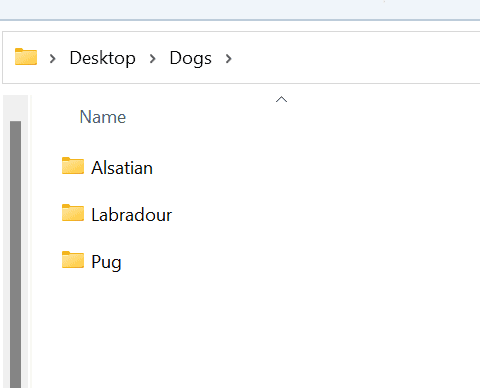
If we take a look at my photos, I have all the subfolders inside a parent, and then each subfolder is named after a breed of dog. Once the model is trained, then Amazon Rekognition will return these folder names to me as the labels, along with a certainty score that is between 1 and 100.
https://docs.aws.amazon.com/rekognition/latest/customlabels-dg/im-metrics-use.html
Creating your Amazon Rekognition model
Next up, we need to create and train your Amazon Rekognition model. This is a pretty simple step
- If you’ve never used Amazon Rekognition before in a region it will ask you to create an S3 bucket. This is separate from the bucket we just created – this just stores information that your projects need.
- Click Create S3 bucket to continue.
- Next up, we need to create our project, and we are going to use custom labels for this. So on the custom labels page, we can click “get started”
- Choose Create Project.
- In Project name, enter a name for your project. I’m going to call mine helloAWS. Choose Create project to create your finish here.
- We need to create a dataset for our newly created project, and here we need to supply the s3 bucket we created and uploaded our photos to.
- Choose Create dataset.
- Choose Start with a single dataset
- Choose Import images from the Amazon S3 bucket.
- In S3 URI, enter the Amazon S3 bucket location and folder path. we want the path for the parent folder
- Next, we can choose Automatically attach labels to images based on the folder.
- Choose Create Datasets. The datasets page for your project should now open.
Modifying your s3 Bucket’s policy
Scroll down and copy the policy provided. In a new tab, open the S3 console and select your bucket with images.
On the Permissions tab scroll down to Bucket policy and click Edit and paste the policy.
Make sure to delete any leading whitespace after pasting Bucket restrictions:
Change the Principal from rekognition.amazonaws.com service to the ARN of the role created in each instance of:
"Principal": {
  "Service" : "rekognition.amazonaws.com"
}
with
"Principal": {
  "AWS" : "arn:aws:iam::"
}
It’s really important to replace all occurrences – there will be FOUR instances that need to be replaced.
Click Save changes to save policy updates.
Go back to Amazon Rekognition configuration and click Create Dataset in the Amazon Rekognition console. Depending on the number of images, it might take a few minutes to create a dataset.
Finally, once our dataset is created, we need to open it up and train the model, and this can take a little while, depending on the size of your dataset
The final thing we need to do is start the model, and this means we are actually turning on our model so we can use it.
https://docs.aws.amazon.com/rekognition/latest/customlabels-dg/rm-start.html
Setting up your Mendix App
From Studio Pro, we can open up the Marketplace panel and search for “Rekognition”.
On the page I have for Amazon Rekognition, I have a simple interface setup that allows me to upload pictures using the image uploader widget. I also have a microflow button that is going to call Amazon Rekognition via a custom microflow.
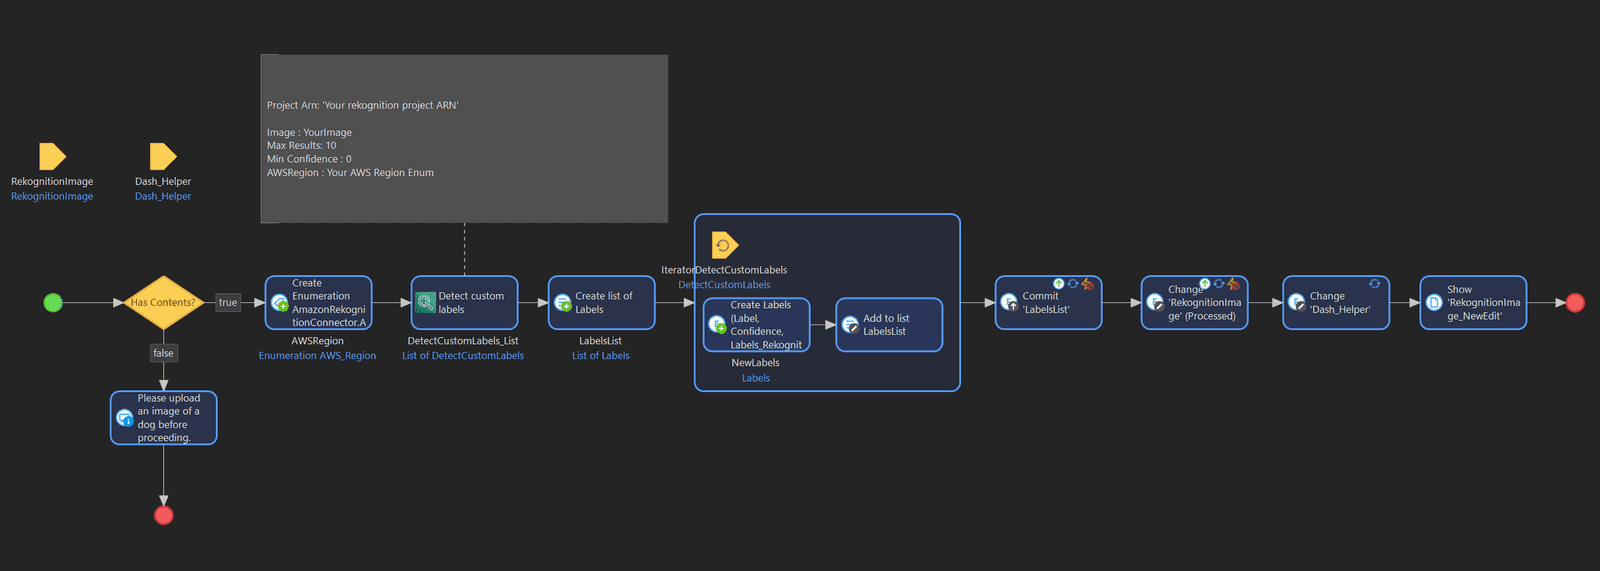
You can use the Detect Custom Labels direct from the Toolbox by dragging in the Amazon Rekognition action detect custom labels from our toolbox, and then configuring the rest of the parameters. I have a simple loop to save the data and link it to my Amazon Rekognition image so that the labels can be displayed on the page.
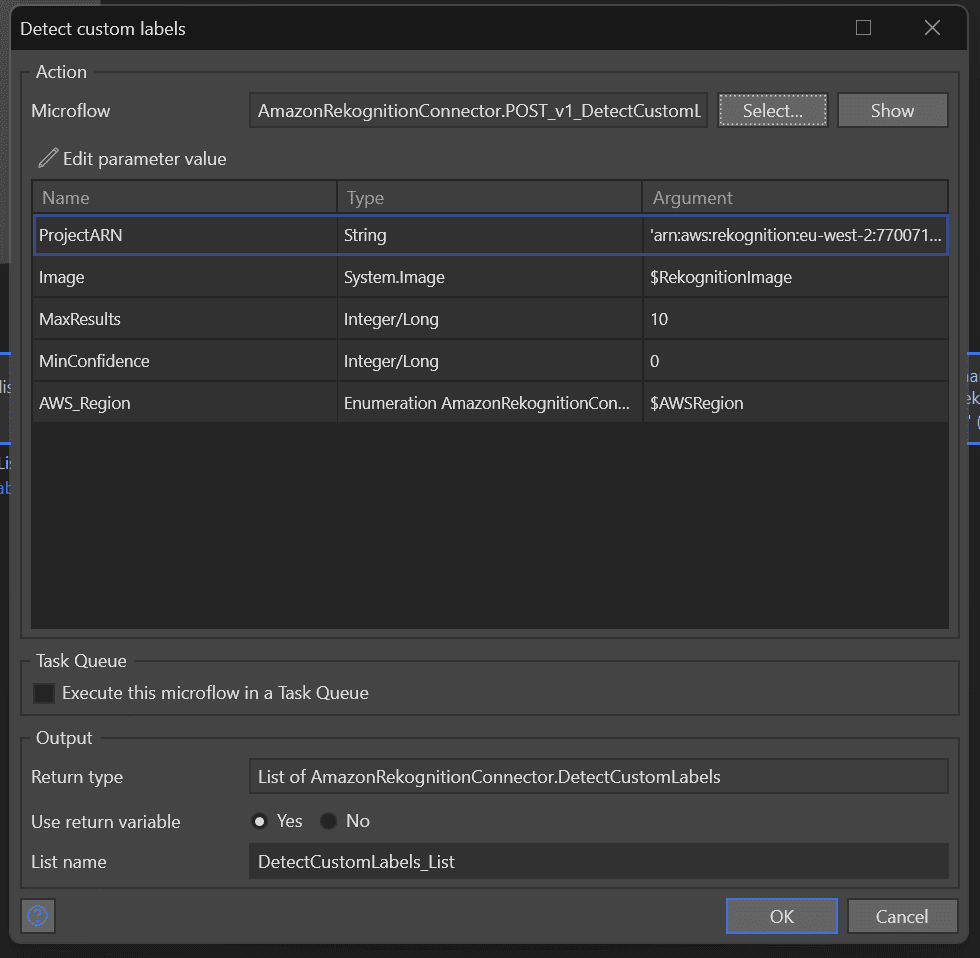
Remember to set up the action by providing all the required parameters, as I have done in the screenshot below.
Configuring the Amazon Rekognition Constants
To finish setting up the Amazon Rekognition Connector – we just have to set some constants in the module, and we do that by copying the ARNS from our AWS project. You can find all of the constants you need to fill in the Amazon Rekognition connector if you look in the file constants and then session credentials.
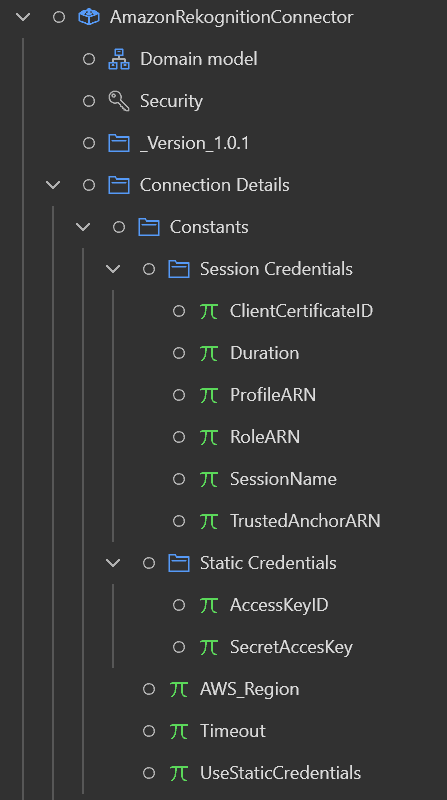
These constants are for the get session credentials action, but there is also a folder where, if you choose to, you can use the get static credentials action as well. In that case, you would have to make sure the constants under static are configured. While it is possible to use static credentials, the preferred method of authentication is session-based credentials.
Once we have finished configuring all of these from here on, the connector is basically drag and drop where ever we want to use it in our app.
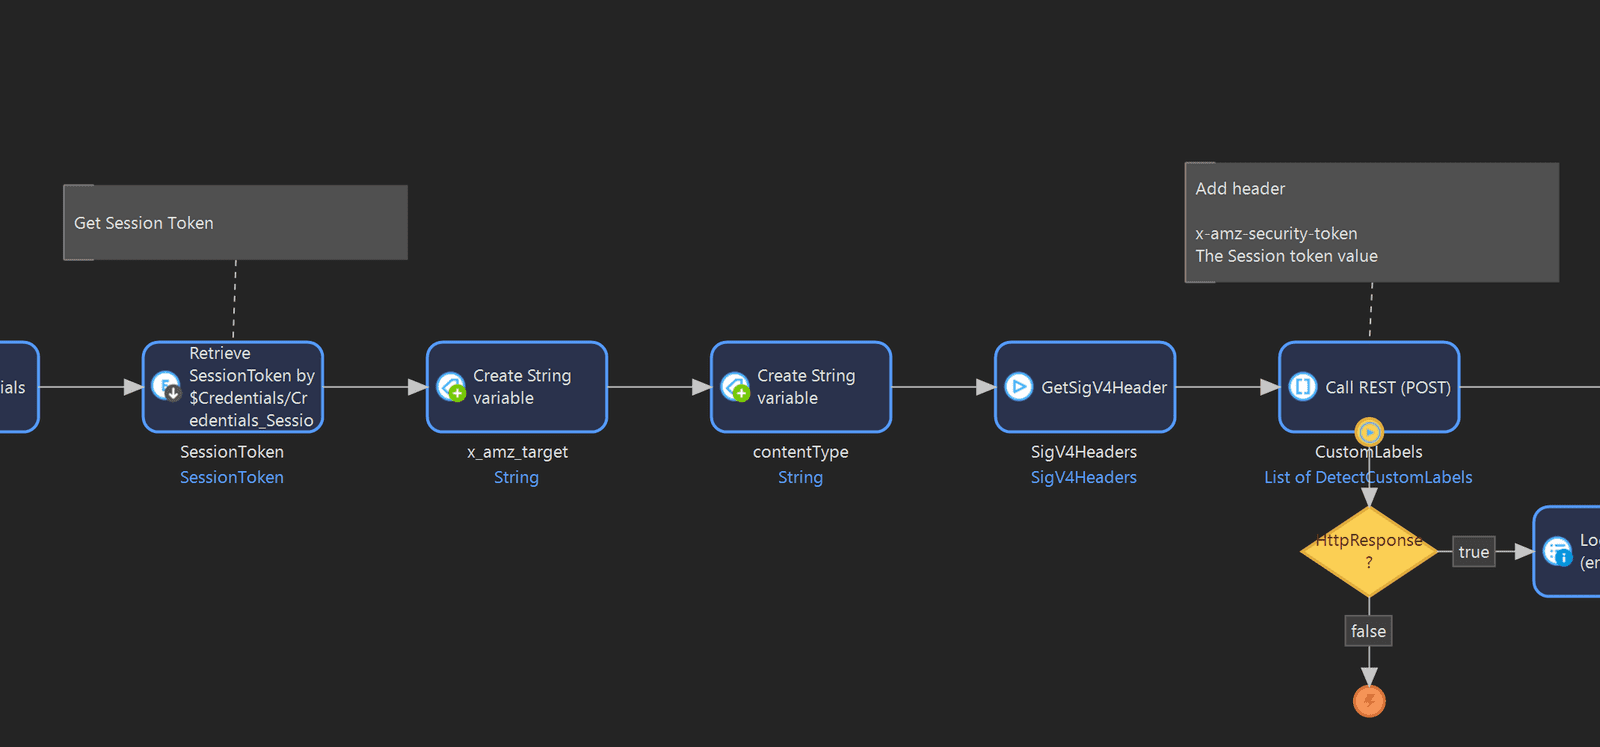
I did have to make one small change, which was inside the microflow “POST_v1_DetectCustomLabels”. I added an additional header “X-amz-security-token” to the request, and this takes the session token connected to the credentials entity as its value.
Calling Amazon Rekognition
Everything is done, and if you’ve followed along this far, you can run your app and test it out!
If you want to watch me test it out, watch the video and skip to # Video Timestamp #
I know the idea for my app is a bit silly – but what I really wanted to show you is that you can train Amazon Rekognition to detect almost anything you want using a really small dataset. If I can train it to identify a pug in a photo, then imagine how easy it is to create an inspection app or image processing application.
If you get stuck at any point, make sure to head over to AWS workshops and take the course Low-code application development on AWS with Mendix. It covers everything I just did but in much more detail. Also, make sure to head over to our doc pages for another great breakdown of the connector and how to use it.