Why do Dark Mode?
Who doesn’t love dark mode? It’s everywhere these days – from your favorite website and your desktop applications to your mobile devices. As far as customer experience goes, it’s a great arrow to add to your quiver for a slick experience that users will appreciate. So this begs the question, “How do I go about implementing dark mode in my Mendix application?”
I’m here to tell you how and it’s quite simple!
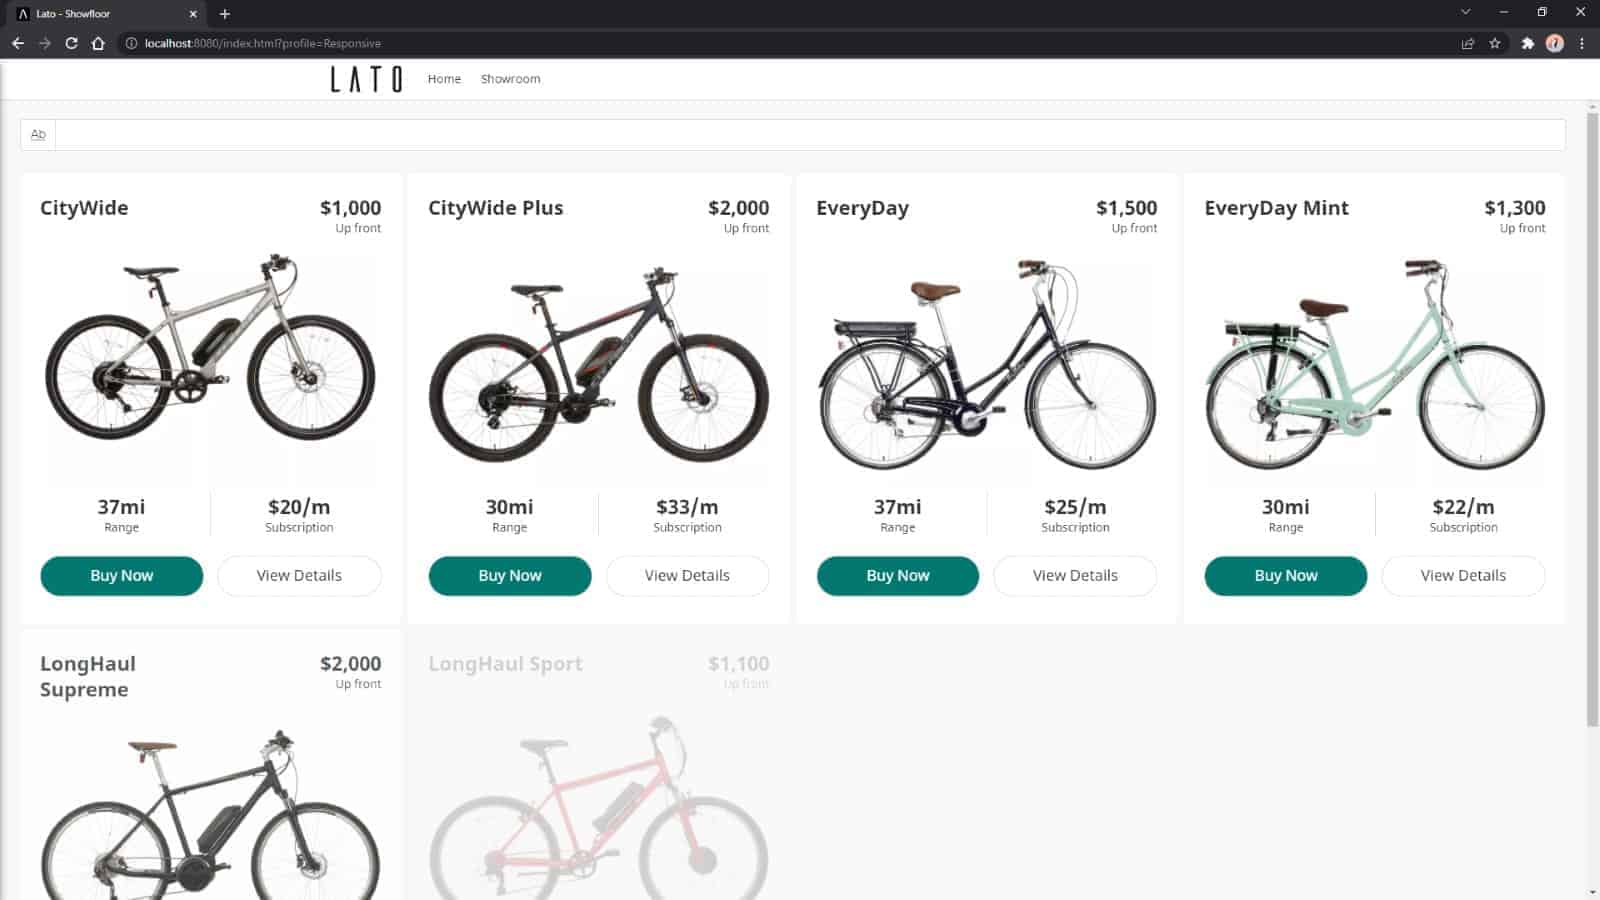
The first thing we’re going to do is find an application in need of the dark mode treatment. For those of you who attended the most recent Mendix World, you might be familiar with Lato Bikes – the company we created to demonstrate a Mendix adoption journey in Johan den Haan’s keynote speech.

The products page in particular is very bright and could do with the dark mode treatment. Let’s take a look at how we go about doing that.
Dark mode, step by step
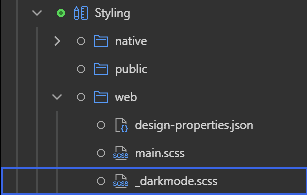
First off, we’ll add a new module to our project called DarkMode and we’ll add a single user role to the module (everyone should be allowed to use dark mode!). In this new module, we’ll create a SASS file called _darkmode.scss. — Make sure you add it to the main file as an import!
Next, in our new SASS file, we’ll start building our dark theme. I like to do it as an override to everything, so I’ll usually start with something like this:
html body{
background-color: $gray-darker;
color:#fff;
h1, h2, h3, h4, h5, .widget-eventTime, .widget-timeline-title, h6, .h1, .h2, .h3, .h4, .h5, .h6{
color:#fff;
}
//Continue adding styles here…
}
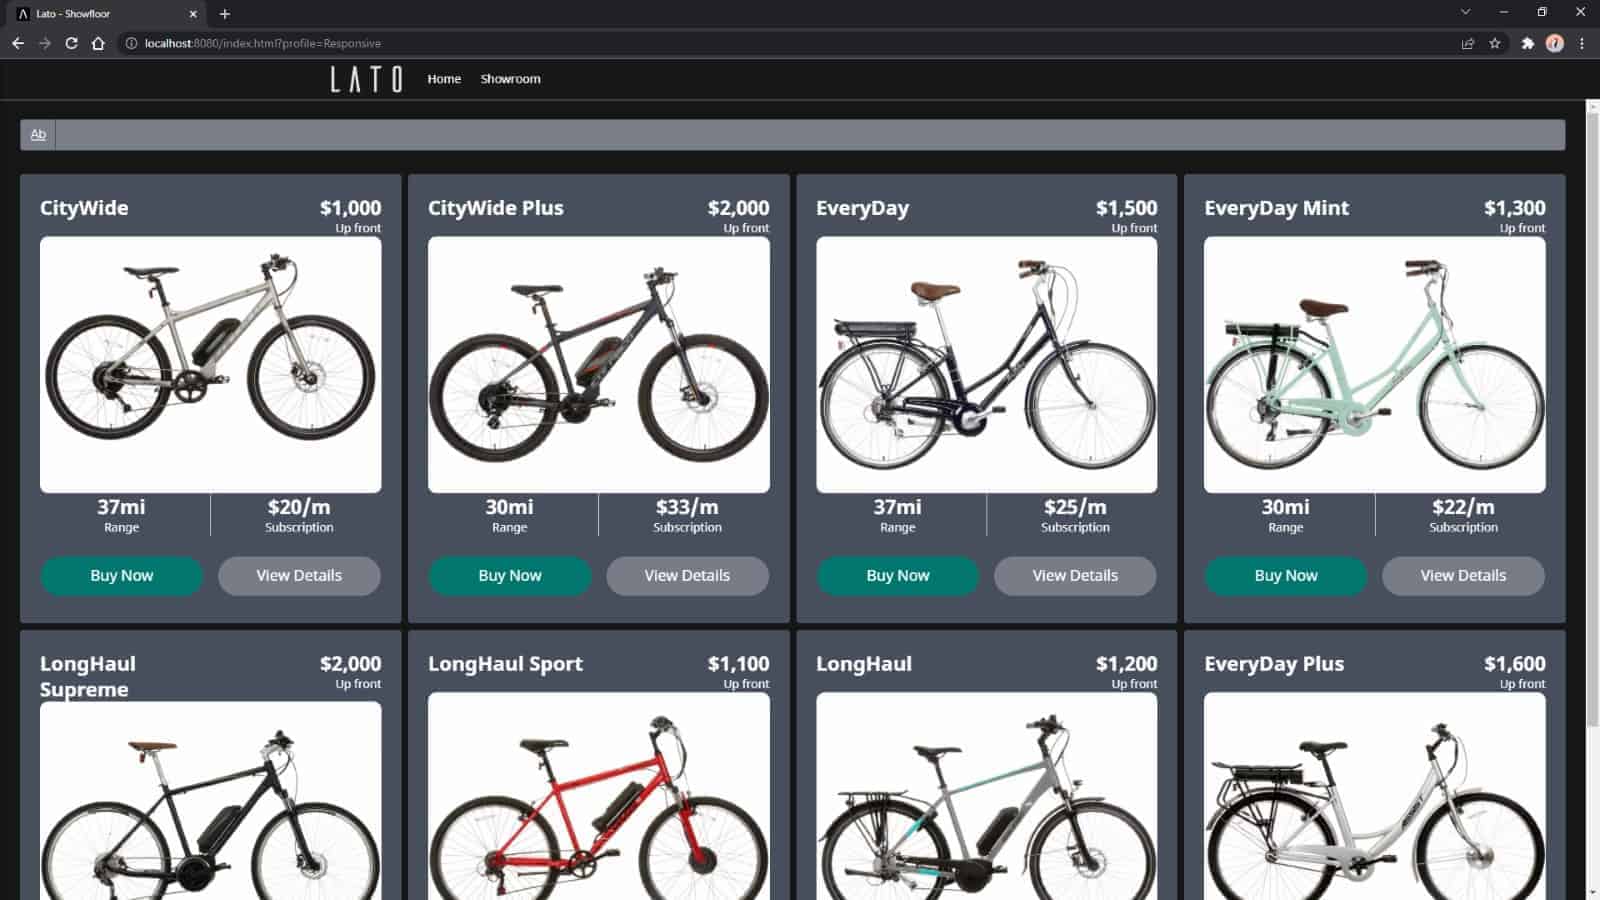
Piece by piece, I’ll override background colors, borders and font colors until I get to a point where I’m happy with the overall look and feel. Something like this…
Once you’ve got a theme you’re happy with, we’re going to need to make it togglable so that a customer can choose whether or not they want to use it. For the purpose of this demonstration, we’re going to build it as a toggle that applies to this session, but it could easily be made a permanent setting linked to a customer’s account. To do that you’ll need to add an extra bit to your SASS file.
Append the “html body” with a “.darkmode” style. This means your new look and feel will be applied whenever the class “darkmode” is added to the body.

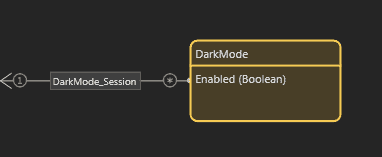
The next thing we’ll do is add an entity to track whether dark mode is on or off. We’ll make it non-persistent for this demonstration and link it to the customer’s session. We’ll then set the security up as “read-only” for the association and “read/write” for the Enabled flag.
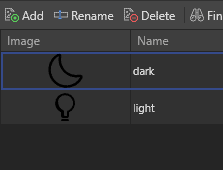
After that we’re going to give the customer a way to turn it on and off. We’ll grab a couple of icons and add then to a new Image Collection, one for light mode and one for dark mode.
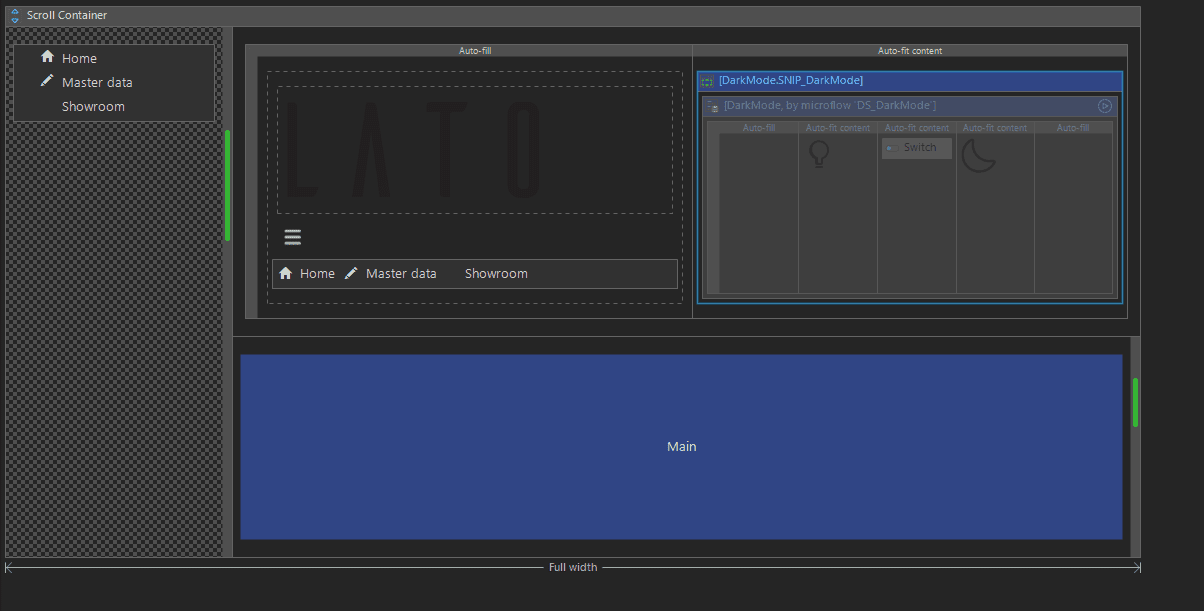
Then we’ll create a Snippet which will have a Switch control for toggling that Boolean value. It’ll need to use the DarkMode entity we created previously. First the snippet which should look something like this…

The extra columns at the end help to keep it centralized if it’s put into a large area, and you’ll notice the data source isn’t a context entry on the snippet, it’s a DataView. This is because we’re going to put it in the layout template so the Switch is available on every page. When using a Snippet on a layout template it needs to load its own data source and, in this case, we’re doing that with a DataView and a Microflow.
The Microflow data source is DS_DarkMode and it should either return the DarkMode entity linked to the current session or, if there isn’t one already, return a new one which is linked to the current session. It should look like this…

The last thing to do on the Snippet is to give the Switch an OnChange Event. That event should trigger a Nanoflow. I’ve called the Nanoflow OCh_DarkModeToggle and all that Nanoflow does is call a JavaScript action. That action will add or remove the “darkmode” class to the body when it’s called. This could simply be done using the JavaScript class toggle method but I’ve decided to make it more explicit so it can be used absolutely.
First off I created the Action with a parameter of IsEnabled and then I added this function:
export async function JS_DarkMode(isEnabled) {
// BEGIN USER CODE
if(isEnabled){
document.body.classList.add(“darkmode”);
}else{
document.body.classList.remove(“darkmode”);
}
// END USER CODE
}
The final step is to add your Snippet into your layout template and you’re good to go!
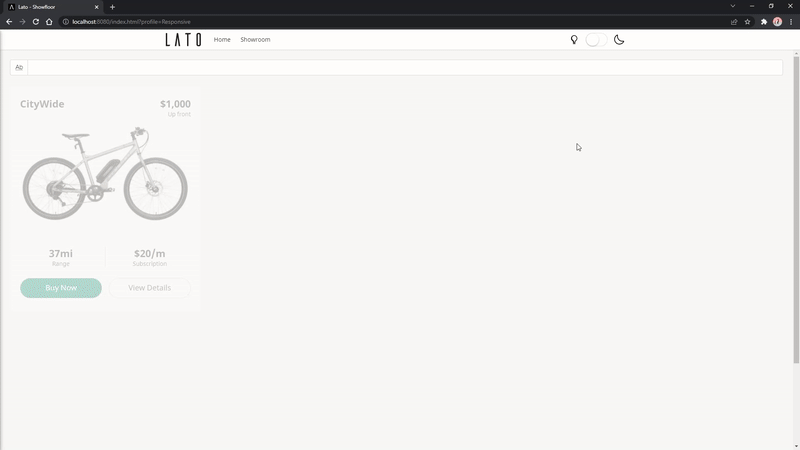
Once it’s published you’ll find a Switch control in your header and flicking it should apply and remove the dark mode style. If you want to go a step further you can even detect what the customer desktop theme is set to and use that to choose whether to apply dark mode or not.
if(window.matchMedia && window.matchMedia(‘(prefers-color-scheme: dark)’).matches){
document.body.classList.add(“darkmode”);
}
I hope this has helped you with your implementation of dark mode! If it has, get in touch and send us some screenshots or links — we’d love to see how it’s working for you!