How to Integrate Spotify in Mendix: Part 2

In part one of this series, we covered Client Credential Authentication and how to search Spotify’s library of content using their Search API.
In part two of this series, we talk about using their authorization code flow to obtain an authorization code for the user to be able to read and make changes to their profile data, including playing music on the user’s devices.
Authenticate with the Authorization Code Flow
This method works by sending the user to Spotify to grant your app access to their Spotify Data. This is done by providing Spotify with a list of permissions known as Scopes, which define what access your app requires.
For a full guide, visit Spotify’s doc page.
To summarize this as simply as I can, you need to craft a special redirect URL that redirects to Spotify. There, the user can approve access to their account, and Spotify will redirect the user back to your app, where you can extract a special code from the URL using the Deep Link Module.
Here is the URL I created for this:
https://accounts.spotify.com/authorize?response_type=code&client_id='+$ClientID+'&scope='+$scope+'&redirect_uri=https://localhost:8080/link/spotifyauthentication&state='+$state+'&show_dialog='+toString(@MyFirstModule.ShowDialog$ClientID = ClientID$State = Any random 4 digit integer, used to retrieve data later on$ShowDialog = true or false (If true will show dialog for user to approve every time they are redirected, if false will auto approve)$Scope = a list of URL encoded scopes, separated by spaces(‘urlEncode('user-modify-playback-state user-read-playback-state user-read-private user-read-email user-read-currently-playing')The scopes needed for each API request are displayed on the documentation for that endpoint. To learn more about scopes, refer to Spotify’s Guide on the subject.
In a nanoflow, I used the Open URL action to redirect the user:
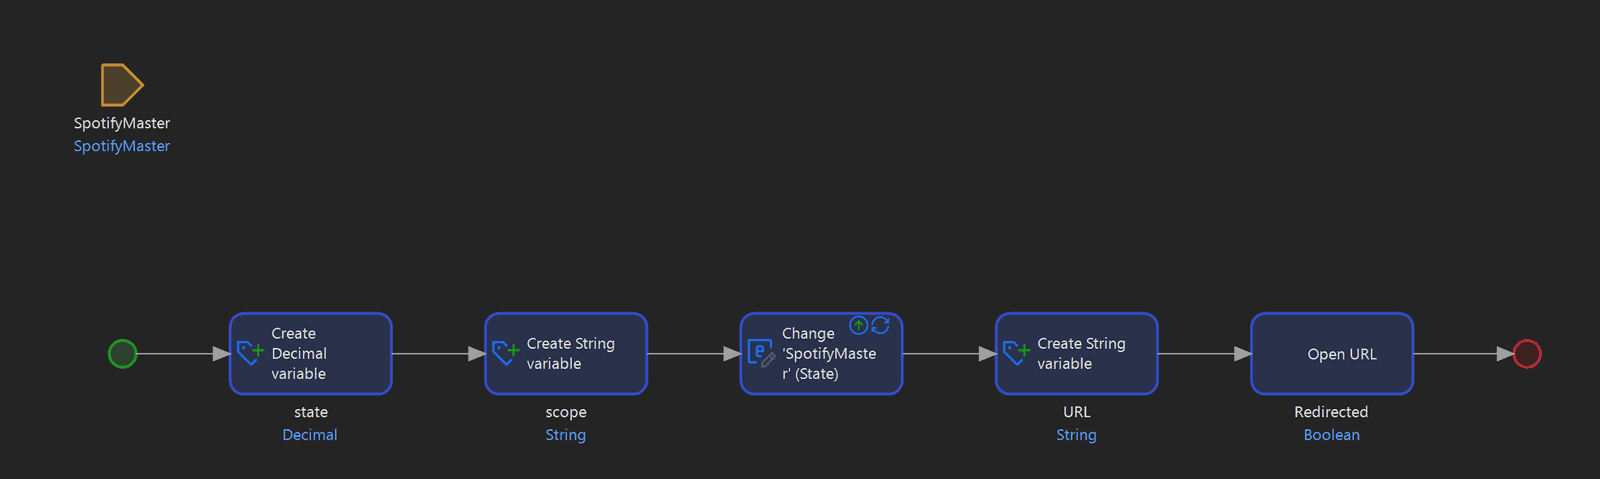
After they approve, Spotify redirects the user back to your app once again through a special redirect URL. In my app, I have a deep link setup, which breaks down the URL into its pieces and extracts the user’s unique authorization code from it based on the parameters for the microflow.
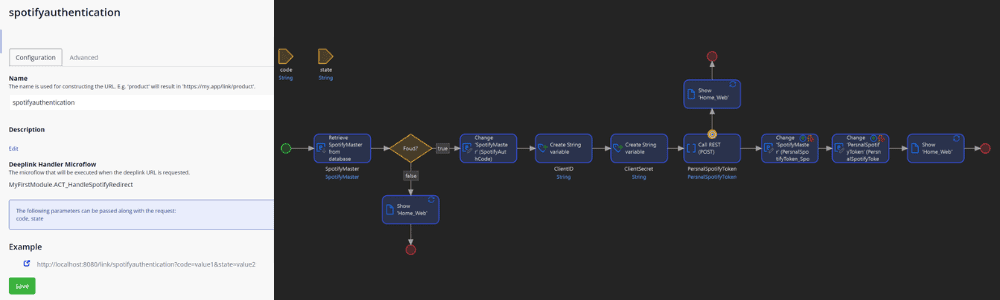
The app then takes that code and exchanges it for a Personal Token in the same microflow, which handles the deep link. That personal token can be used to make API calls on behalf of that user, such as playing music on their devices connected to Spotify and Modifying playlists.
Location: https://accounts.spotify.com/api/token
HTTP Method: POST
Header: Content-Type 'application/x-www-form-urlencoded'

Body:
grant_type=authorization_code&code=XXX_Your_Auth_Code_XXX&redirect_uri=XXX_YourAppURL_XXX&client_id=XXX_YourClientID_XXX&client_secret=XXX_YourClientSecret_XXX

Response:
{
"access_token": "XXX_USER_ACCESS_TOKEN_XXX",
"token_type": "Bearer",
"expires_in": 3600,
"refresh_token": "XXX_REFRESH_TOKEN_XXX",
"scope": "user-modify-playback-state user-read-email user-read-private"
}
Make sure to store the token for later use.
Using the Personal Token to play music
Once you have a Personal Token for the user, making requests for them is quite simple enough. To play music on any Spotify-connected device, simply make a request to the play music endpoint.
We need to provide the user token and a context URI to play (a context URI can be for one or more tracks, an album, or an artist).
You can get these by using the Search API discussed in part one of this series and passing the URI into the Play Request API as shown below:
Location: https://api.spotify.com/v1/me/player/play
HTTP Method: PUT
HTTP Header: Authorization 'Bearer '+$PersnalSpotifyToken/Access_token
HTTP Header: Content-Type 'application/json'

Body:
'{
"context_uri": "'+$ArtistAlbum/Uri+'",

//anything below here is optional, only context_uri is required
"offset": {
"position": '+$Tracks/Track_number+'
},
"position_ms": 0
}'
Additionally, if you want to specify which device you would like to play music on, you can pass an option query string in the URL for the Device ID.
Get Device List
To get the user’s device list is a simple GET Request, as shown here:
Location: https://api.spotify.com/v1/me/player/play
HTTP Method: PUT
HTTP Header: Authorization 'Bearer '+$PersnalSpotifyToken/Access_token
HTTP Header: Content-Type 'application/json'
For the Response, choose to apply an Import mapping and use the following JSON Structure:
{
"devices": [
{
"id": "string",
"is_active": false,
"is_private_session": false,
"is_restricted": false,
"name": "Kitchen speaker",
"type": "computer",
"volume_percent": 59,
"supports_volume": false
}
]
}
Store the device list to transfer playback up next.
Transfer playback between devices
To transfer playback, simply make a request to the Transfer Playback endpoint and provide it with the Device ID obtained in the previous request.
Location: https://api.spotify.com/v1/me/player/play
HTTP Method: PUT
HTTP Header: Authorization 'Bearer '+$PersnalSpotifyToken/Access_token
HTTP Header: Content-Type 'application/json'

Body:
'{
"device_ids": [
"XXX_Your_Device_ID_XXX"
]
}'
The final product
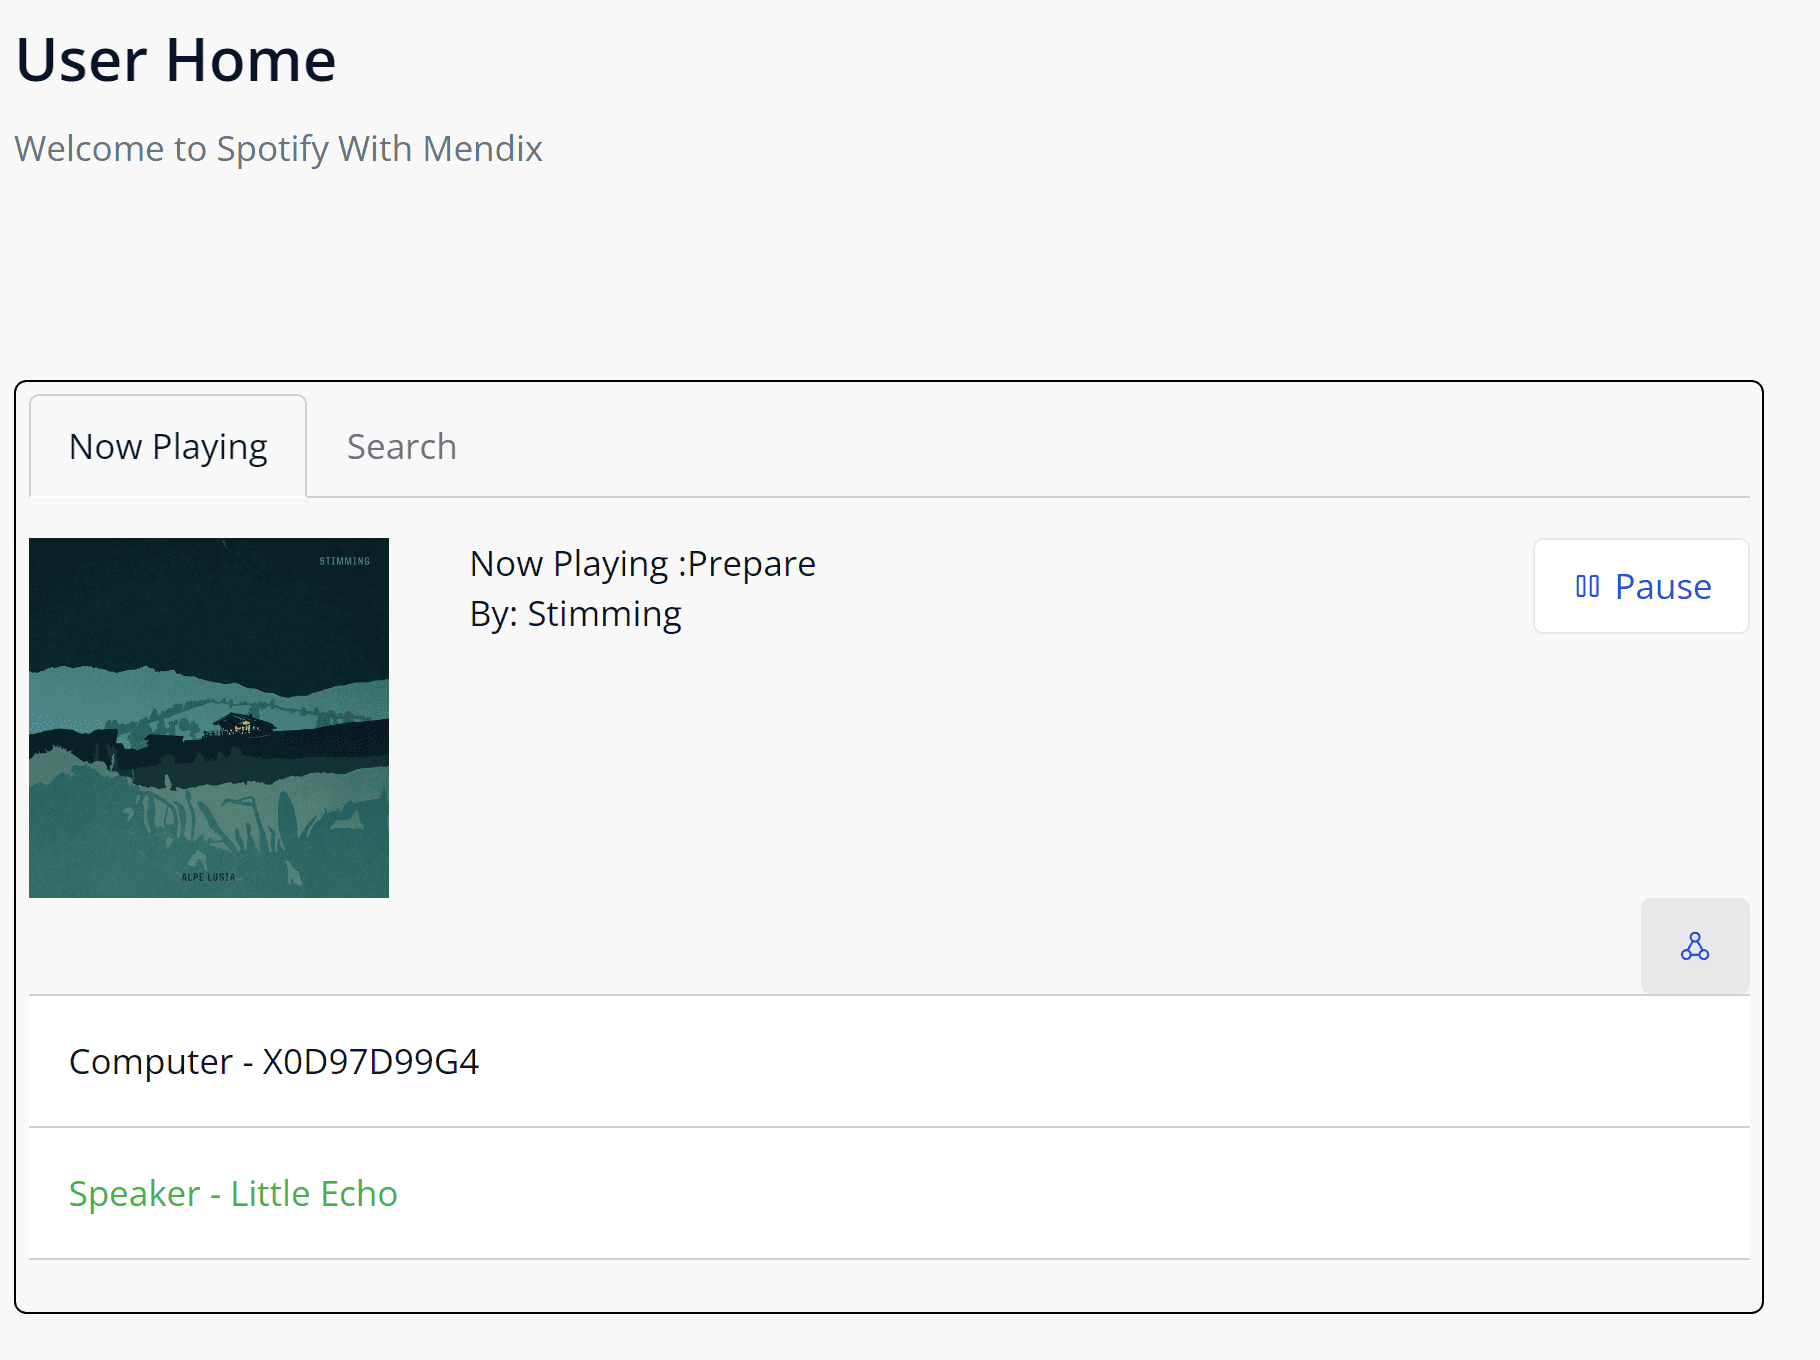
Finally, I crafted a simple UI for the user to see all the data for their currently playing track and device list, as well as search for music or tracks. You can download the code from Github here.
I hope you enjoyed reading this two-part series, Spotify has an extensive API with many more endpoints and capabilities to explore. Happy creating!