
After seeing all the buzz on IoT and Mendix, I wanted to build my own pet project using an IoT device and incorporate it into a Mendix App. I decided to build an IoT app to help automate some small tasks I do regularly to start, and then hopefully take it a bit further after getting a good foundation. My first tasks would be to help me track my time for work – since I often forget to do so and need to reconstruct my day to remember how long I had worked on each task.
Why The Internet Button?
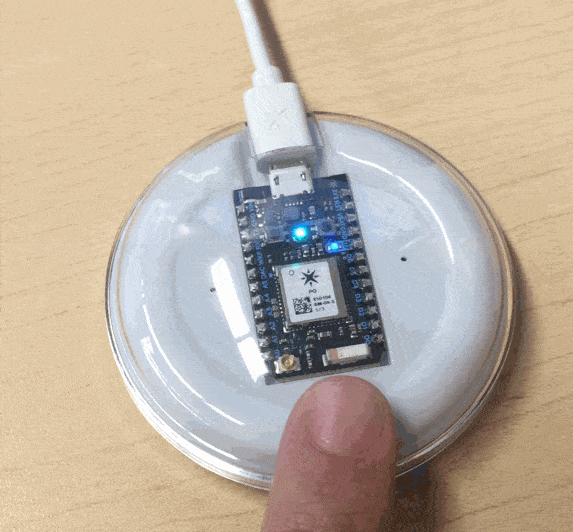
I remember when I first heard about the Amazon Dash IoT button – I thought it was a very cool concept, and having a button you could put anywhere in your house to accomplish some task was great. Armed with Mendix, I had another tool to make my button even more powerful – using Mendix I can quickly and easily send emails and add some custom logic. After doing a bit of research, I ordered my own Internet Button from Particle.IO!
I decided on the Internet Button for two main reasons:
- The device has a lot of inputs and outputs: four buttons, an accelerometer, eleven full-color LEDs, and a speaker!
- The Particle.IO platform allows you to build your own IoT device with their hardware. I could add on to the Internet Button, or start from scratch with my own parts.
This allowed me to get a quick start with a pretty comprehensive device, and would allow me to potentially build out an arsenal of IoT devices to complement it if I wanted to.
Boosting The Internet Button with Mendix
Once I received my Internet Button, I connected it to my laptop and had it up and running in just a couple of minutes. Now that I was connected I wanted to build an IoT app fast – so I went to GitHub to find an open-source project.
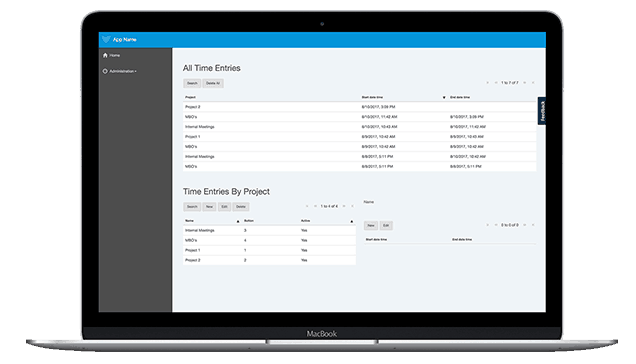
I wanted to connect it to a Mendix App to get some real functionality out of it. Since I need to enter my billable time every day, and most days I remember at inopportune times, I decided to build out some functionality to help me remember. I needed a quick way to note when I started and finished working on specific projects. My idea was to assign each button of The Internet Button to a specific project, and on the push of that button, create a log of how long I worked on that project. Since Particle.IO supports REST calls, I designed this workflow:
- Click the left button on The Internet Button
- This will send a REST request to my Mendix App to manage time for Project 1
- First, in my Mendix App, I check to see if there is an open time entry
- If there is, I check if it is for Project 1. If it is, I close that entry. If it isn’t, I return an error saying another project currently has an open time entry.
- If there is no open time entry, I open one for Project 1
- The Internet Button receives the response
- If a time entry is opened for Project 1, it lights up green
- If a time entry for Project 1 is closed, it lights up blue
- If another time entry is open, the corresponding project lights up red
- First, in my Mendix App, I check to see if there is an open time entry
- This will send a REST request to my Mendix App to manage time for Project 1
Now that we know what we’re going to do I’ll step through how I did it, starting with the code for The Internet Button. For The Internet Button, the code is written in C++ following the structures defined by Arduino. The first and most important thing to understand is the two functions – setup() and loop(). Setup is the first function called and it is only called once. This is where I will start the button and set up how I receive the response to the REST calls:
void setup(){ b.begin(); Particle.subscribe("hook-response/timeEvent", myHandler, MY_DEVICES); Particle.subscribe("hook-error/timeEvent", myErrorHandler, MY_DEVICES); } In the loop() function, the rest of the logic is implemented. The loop() function runs continuously after the setup() function completes.void loop(){ if (b.buttonOn(1)){ showButtonLights(1,255,255,255,250); Particle.publish("timeEvent", "1", PRIVATE); } else if (b.buttonOn(2)){ showButtonLights(2,255,255,255,250); Particle.publish("timeEvent", "2", PRIVATE); } else if (b.buttonOn(3)){ showButtonLights(3,255,255,255,250); Particle.publish("timeEvent", "3", PRIVATE); } else if (b.buttonOn(4)){ showButtonLights(4,255,255,255,250); Particle.publish("timeEvent", "4", PRIVATE); } }
This function listens for a button to be pushed. When a button is pushed, it lights the associated LED’s white for 250 milliseconds and then calls the REST service titled “timeEvent”. The REST service is defined in the Particle Cloud, at console.particle.io/integrations. The request is simple, and sends one piece of data, the button number.
{

"String": "{{PARTICLE_EVENT_VALUE}}"

}
The “{{PARTICLE_EVENT_VALUE}}” is how data is sent from the button to the service. For this service, it will be replaced with the button number. In the Mendix IoT App, I expose a REST service that takes in this single string (to learn more about exposing REST services, you can view the webinar here). This service exposes a microflow, REST_TimeEvent:
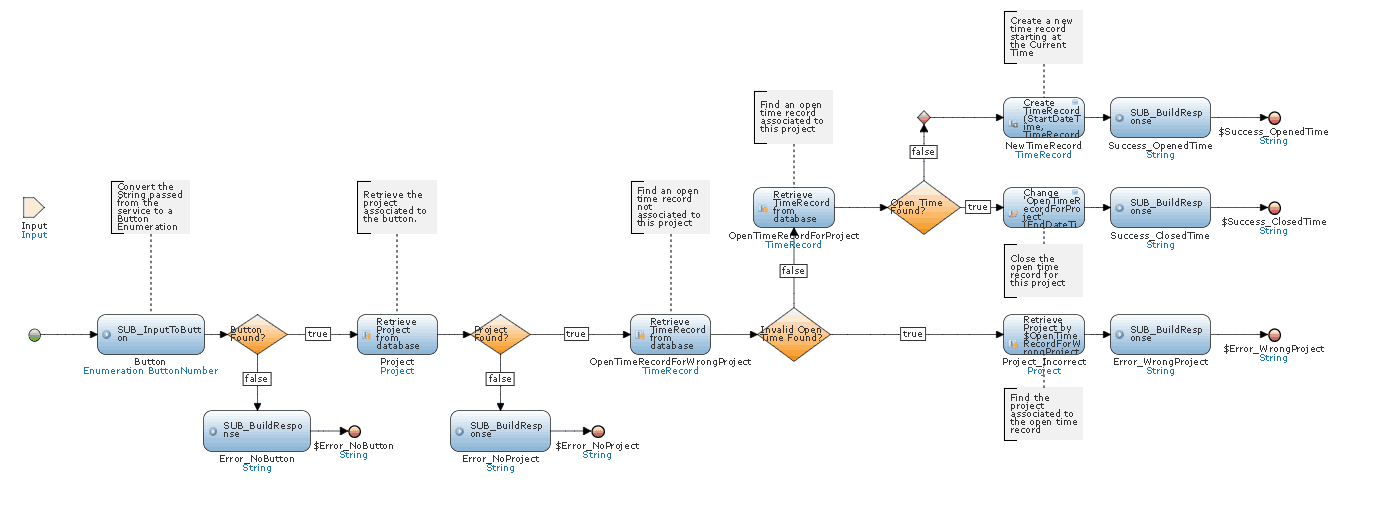
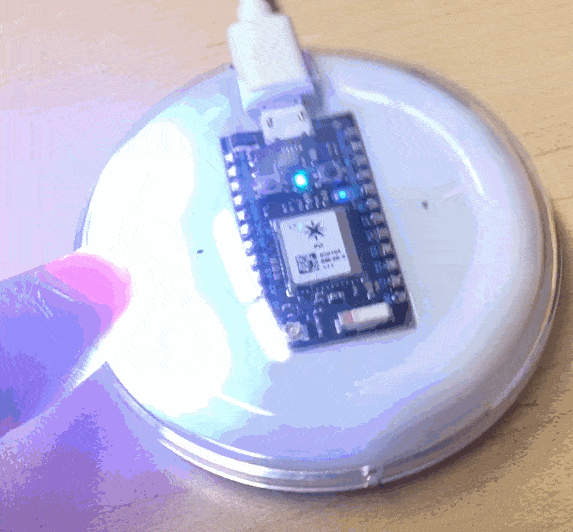
The response of this service is simple as well. It responds with two pieces of data – the button that needs to be lit, and if the response was “error”, “closed”, or “opened”. This data tells us what color to light up. Using this data, I can quickly visualize what’s happening on my button so I know if my time is being recorded. As I planned, when a time entry is opened, the project flashes green:
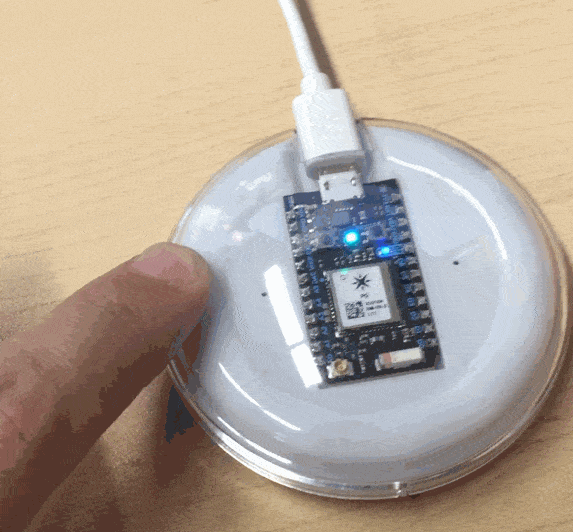
When I close the time entry, the project flashes blue:
If there is a different task open, the open task flashes in red, so I know which to close:
Since you’ve read this far, I’m guessing IoT apps interest you! Read more about how Mendix and IoT helped Hortilux innovate the greenhouse industry. If you’re interested in trying this out yourself, you can purchase The Internet Button here, download the project’s source code for the button here, and the Mendix project here.