The Ultimate Guide to Data Migration in Mendix
Backing up and restoring data is easy when running Mendix applications in the Mendix Cloud. It’s why I love developing with the Mendix platform. It’s a fully managed service offering self-service one-click deployment with fully automated CI/CD, logging with backup and restore options.
However, there may come a time when you decide to self-host your application, be that on Azure, AWS, heck even a Raspberry Pi! Mendix supports a plethora of deployment options from traditional VM based environments on Linux and Windows to newer containerization approaches with Kubernetes or Docker. But how do you migrate app data from one environment to another? That’s what I’m going to show you in this post.
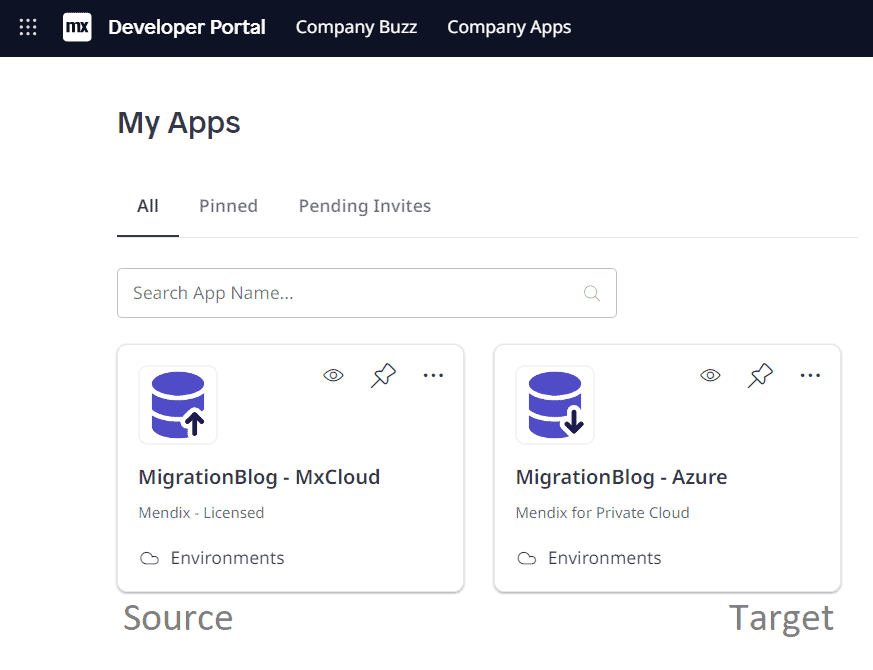
Within this post I’ll refer to Source and Target environments. Source being the currently running environment (the one we want to move away from), and Target being our brand-new self-hosted environment we want to migrate data to.
Pretext
Before we start it’s important to have a clear understanding of how data is managed and stored by Mendix. Mendix segregates data in two: Database and File Storage.
Database
Database reflects the Domain Model created in Studio Pro and stores all the information you’d expect.
- Entities map to database tables
- Attributes map to columns within tables
- Committed objects map to rows within those tables
In Mendix Cloud this is an AWS Postgres Database.
File Storage
Files, on the other hand, are stored separately. The metadata about a file (filename, size, UUID) is stored in the database, but the binary file content itself is not – the binary content is stored as file storage. The UUIDs within the FileDocument database table map one-to-one to the file names of the binary content. In Mendix Cloud this is hosted as object storage on AWS S3.
Intro
The scope of this tutorial is data and file migration of a live environment. It assumes the target environment is setup, the Mendix application is deployed, with a database and file storage configured (albeit empty) and working.
For details on how to deploy a Mendix application, you can check out this guide.
Before undertaking any migration on a live production app, it’s a good idea to review this checklist:
- Do the source and target environment run exactly the same version of the Mendix app (.mda)? (Not running the same version may lead to data loss)
- Has a migration window been scheduled and communicated? (Migration of a live application requires downtime, typically out of hours. Plan for the migration and inform users when the app will be inaccessible.)
- Has a snapshot date been agreed and communicated to users? (A migration requires taking a backup snapshot of the data at a specific point in time. Any subsequent changes won’t be migrated. When it’s time to migrate, stop the live environment, take a data snapshot, and begin.)
- Practice the restore process on a throw away environment before doing it for real to ensure you’re comfortable with the steps.
- Create a runbook to document the steps during the practice which can be referred to during the real migration.
The runbook could also include:
- Smoke Tests: Test cases ran post migration to confirm success. (A test to validate the application contains the expected data and confirm both database and file storage were migrated and in sync.)
- Steps to update DNS records & load balancers to redirect users to the new target environment.
- A plan for worst case scenario in case the migration fails or the allocated migration window elapses.
- Communications to users, stakeholders etc. in the event of different scenarios.
Migration
As Mendix supports a vast array of database, file storage and deployment types, there’s equally several approaches to migrate. I’m going to demonstrate the most versatile migration approach, using Custom Runtime Settings.
In this example, I’m going to migrate an app running on Mendix Cloud to my new self-hosted environment running in Azure Kubernetes Service (AKS). It runs an Azure SQL Database and Azure Blob Storage for file storage.
A Mendix migration requires two parts: first the migration of the Database, then secondly the File Storage.
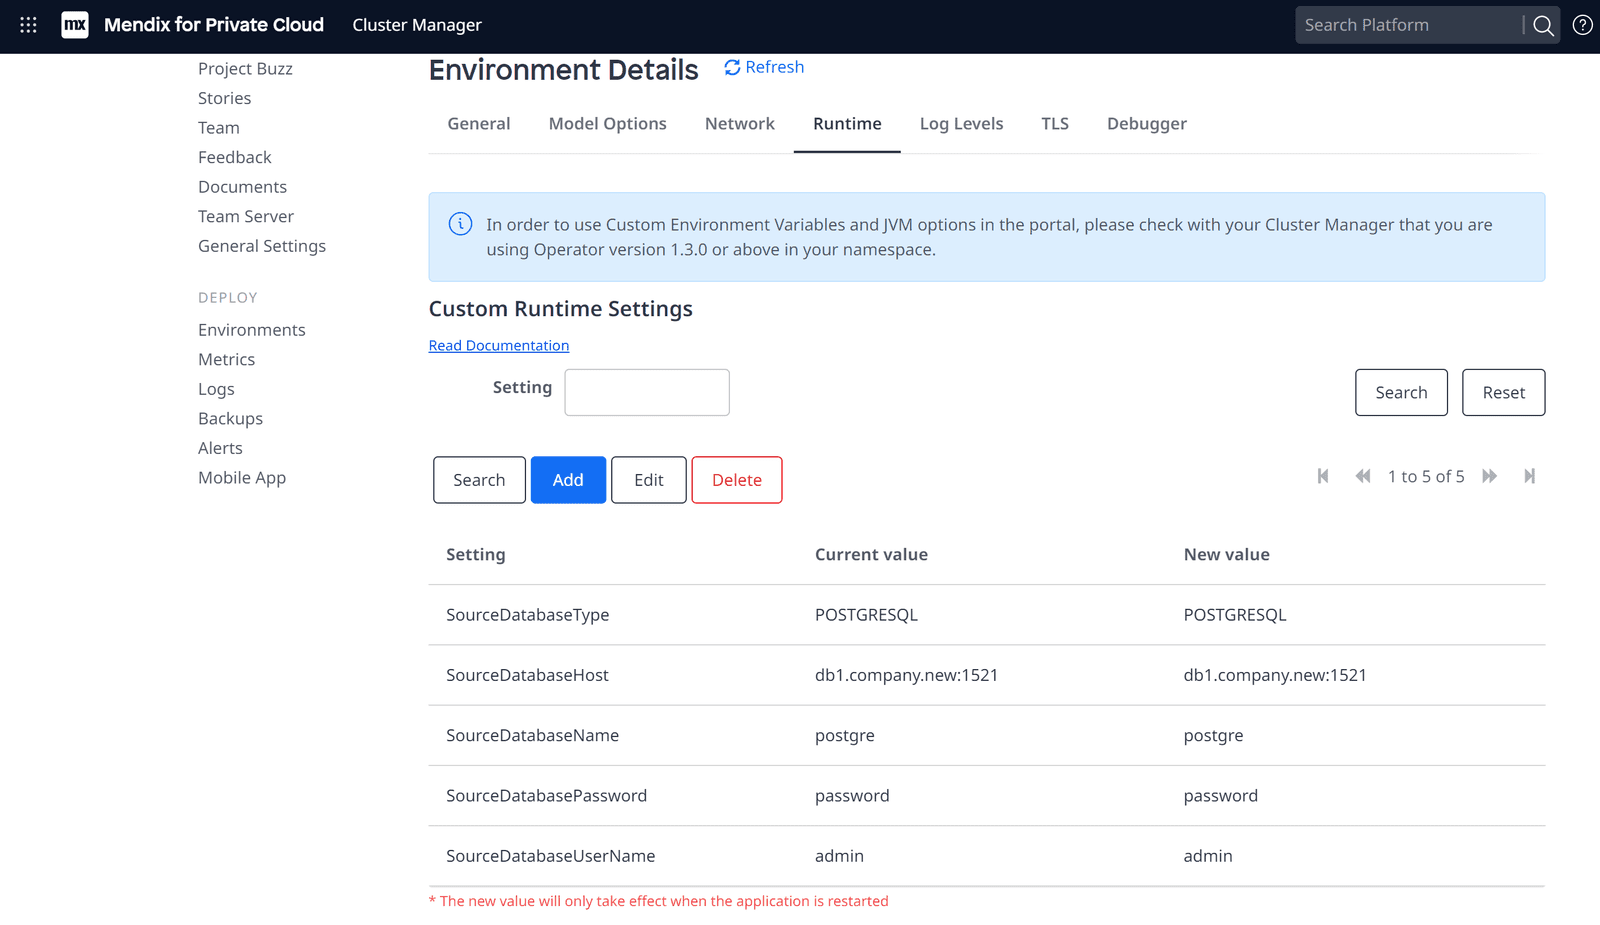
Custom Runtime Settings
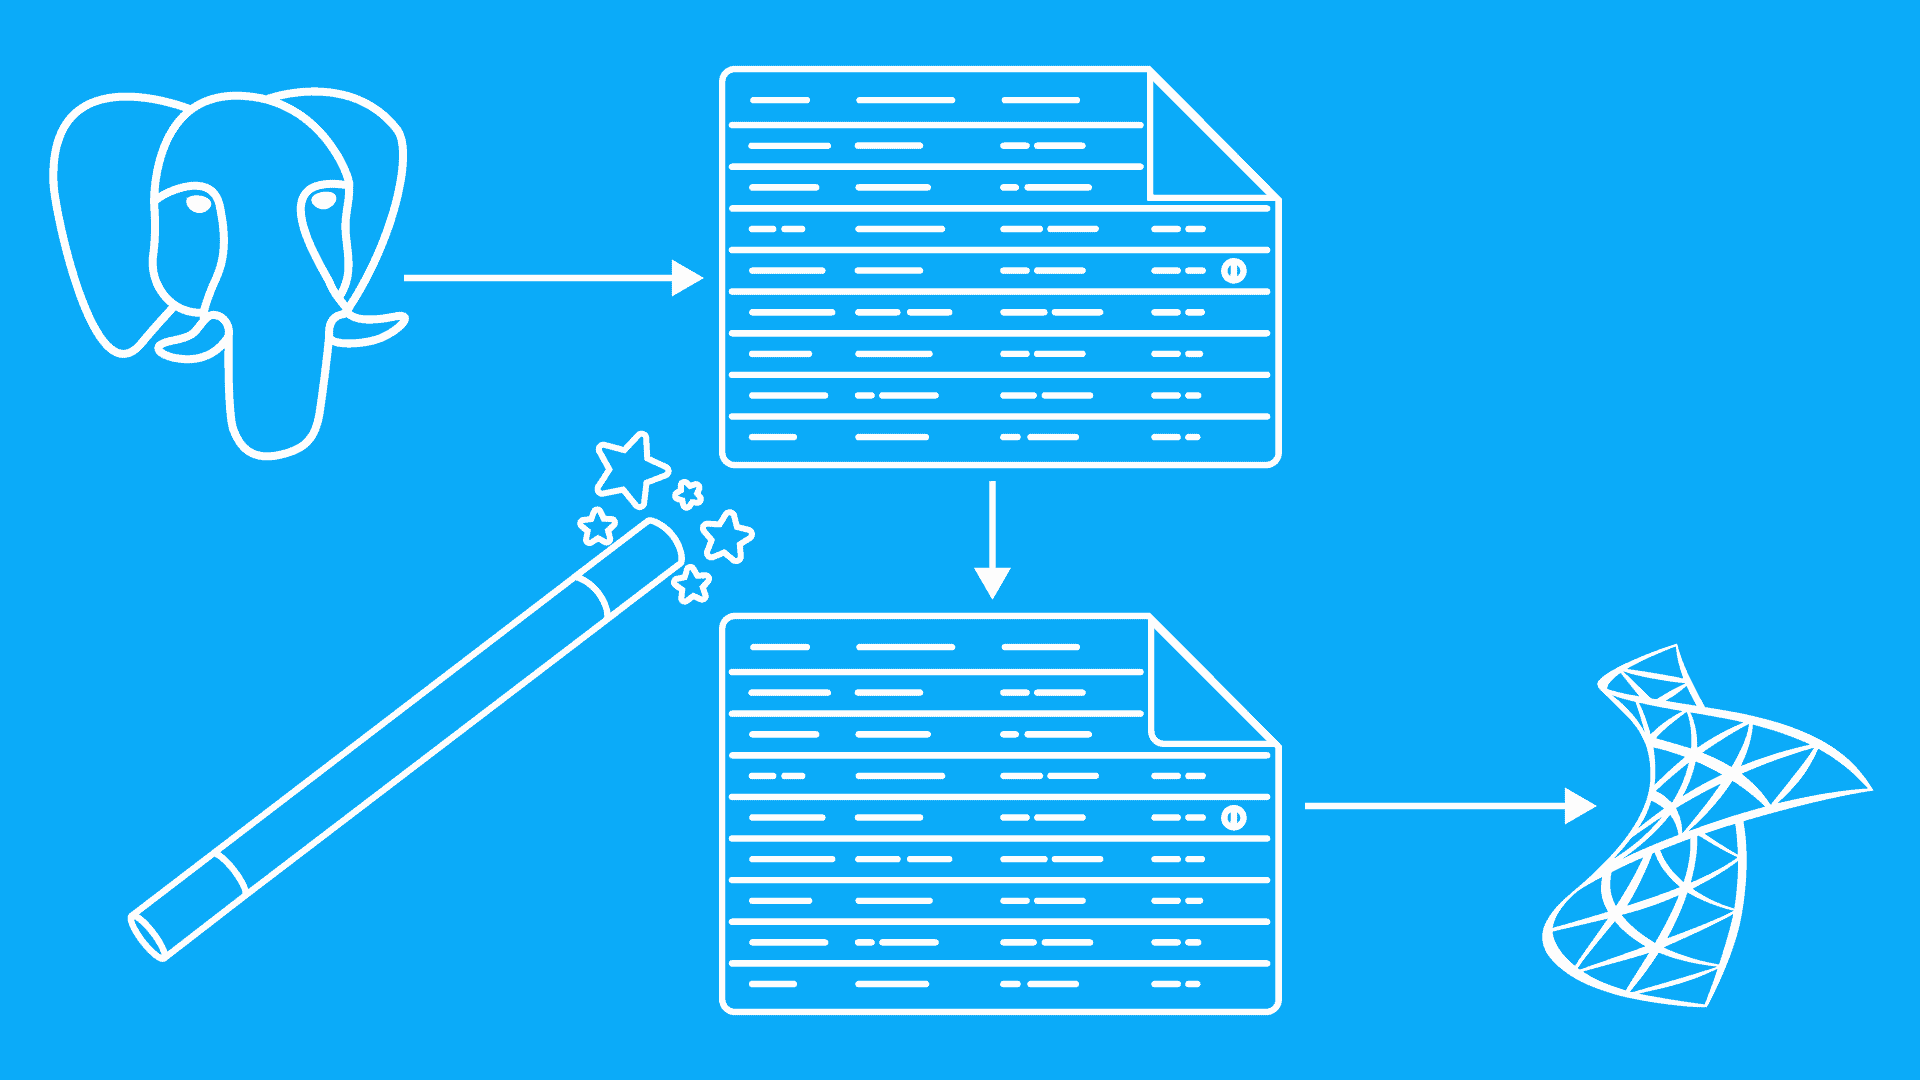
The Mendix runtime has in-built migration features via Custom Runtime Settings. These settings transfer data from a source to a target database. It also converts the database. So, if the source database is PostgresSQL and our target is MSSQL, the runtime will handle this for us.
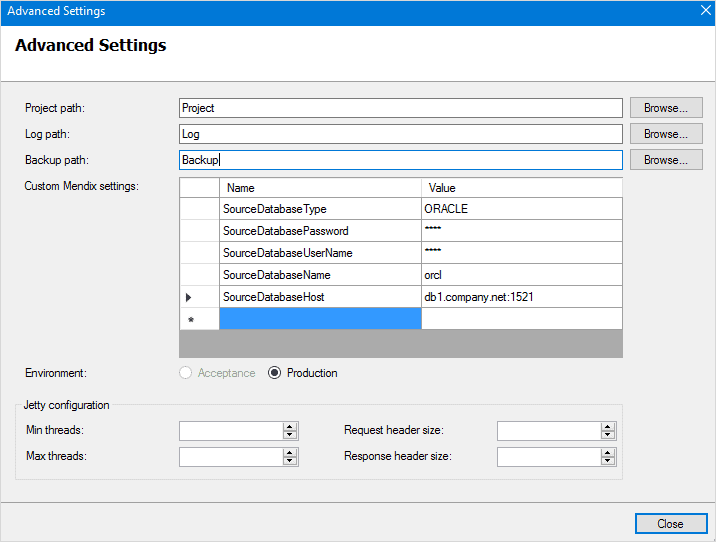
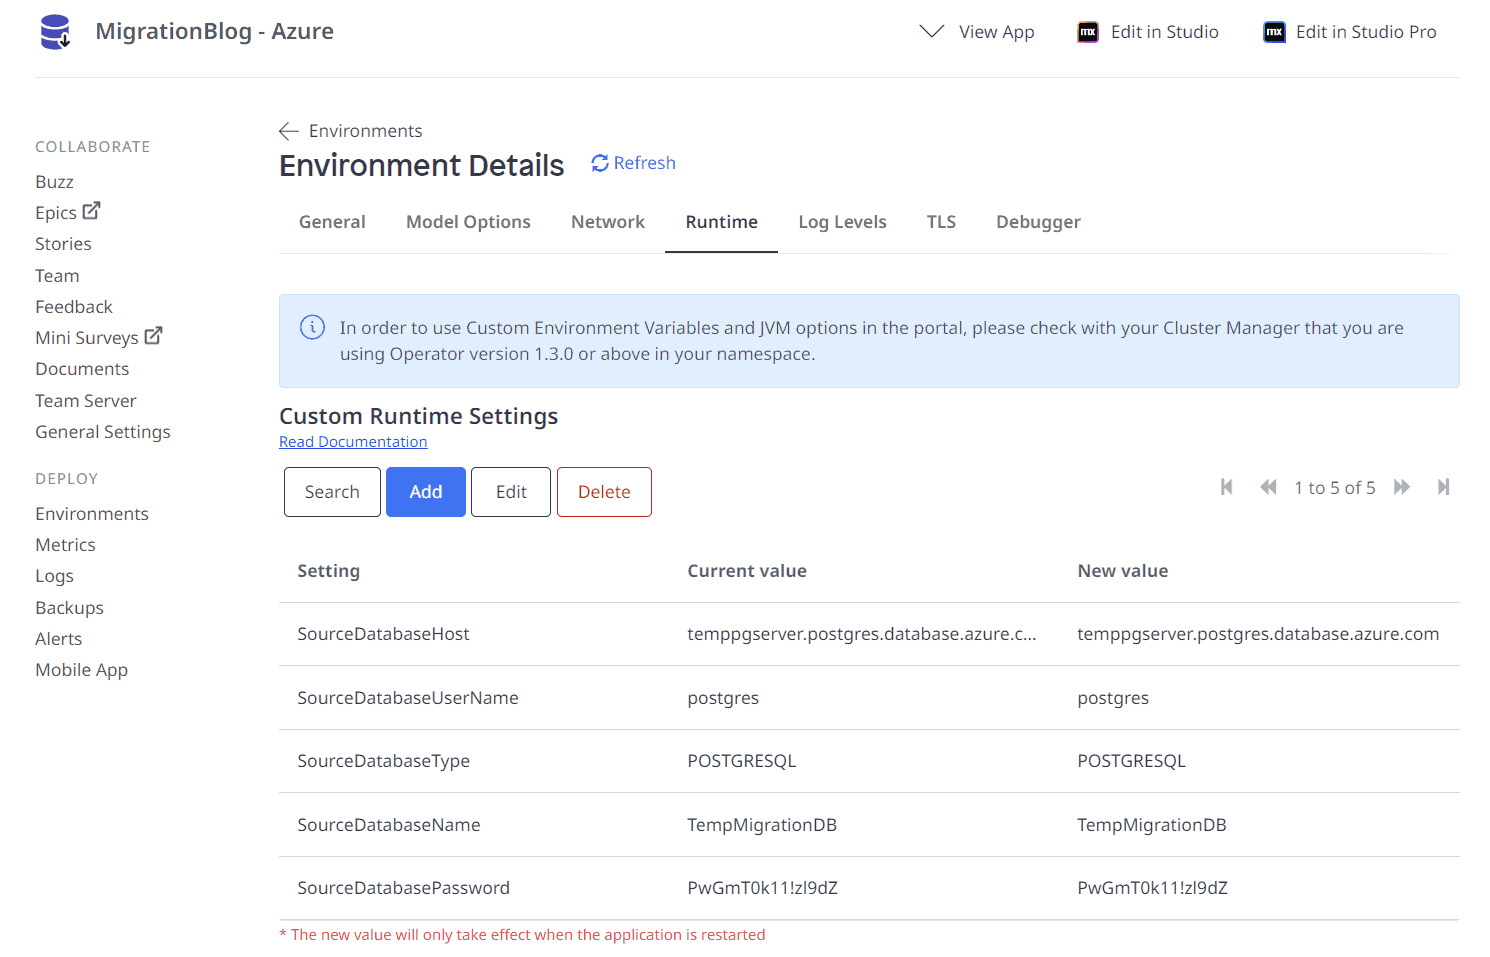
The most used custom settings for database migration are:
- SourceDatabaseType (HSQLDB, MYSQL, ORACLE, POSTGRESQL, SQLSERVER)
- SourceDatabaseHost
- SourceDatabaseName
- SourceDatabaseUserName
- SourceDatabasePassword
Our new target environment is running in Azure. So, we just need to configure the custom runtime settings as above, pointing to our source database on Mx Cloud, right?
Yes, however the Mendix Cloud does not allow direct database access.
Therefore, we need to create our own, temporary, PostgresSQL database, restore the Mx Cloud backup to it and then use this temporary database as our source in the custom runtime settings.
If your target database is also PostGresSQL, no conversion, custom runtime settings or temporary database are needed. Simply restore the Mendix Cloud backup directly to your target database using PostgreSQL restore features.
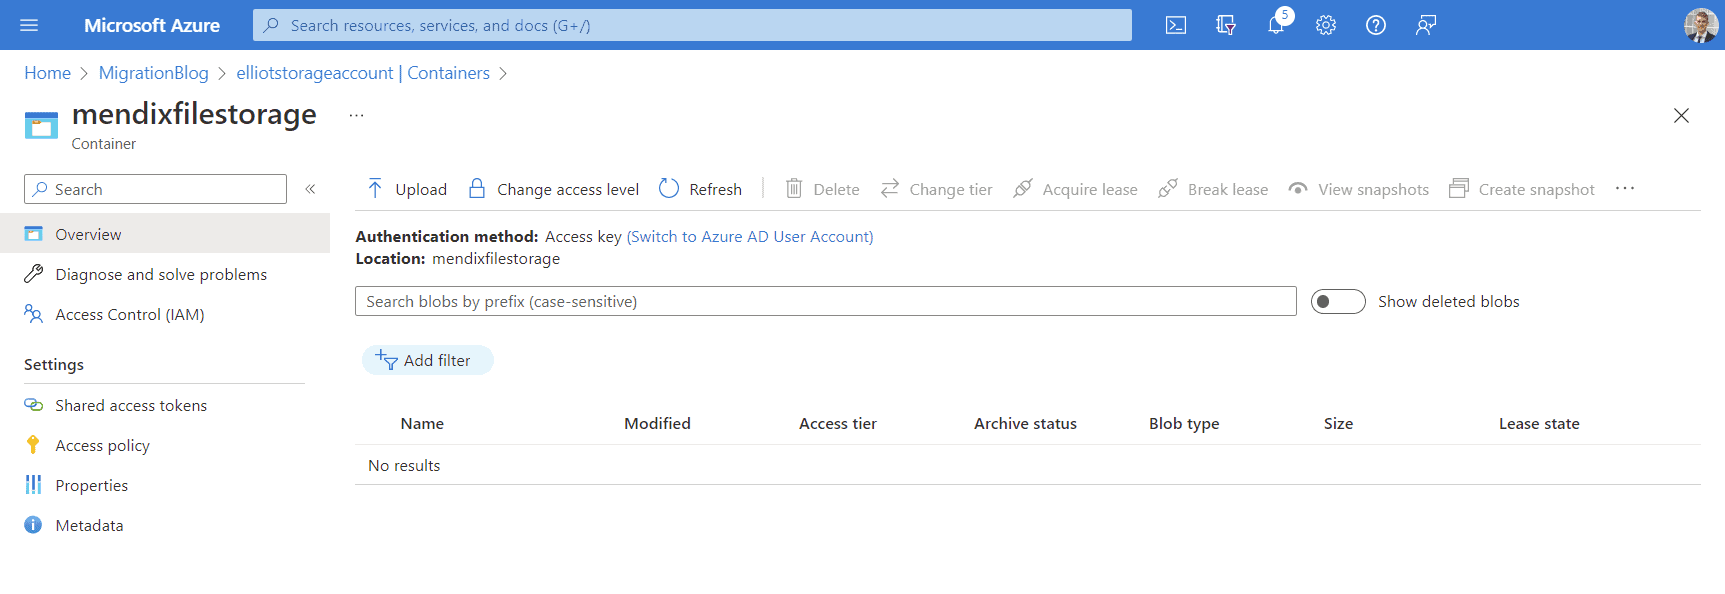
Validate that the target Database and File Storage are empty
The target file storage and database need to be empty before performing a migration.
Perhaps you’ve started your target Mendix application, ran tests to confirm it’s working, and by doing so have inadvertently created data. This needs to be removed prior to the migration.
Azure Blog Storage (Target)
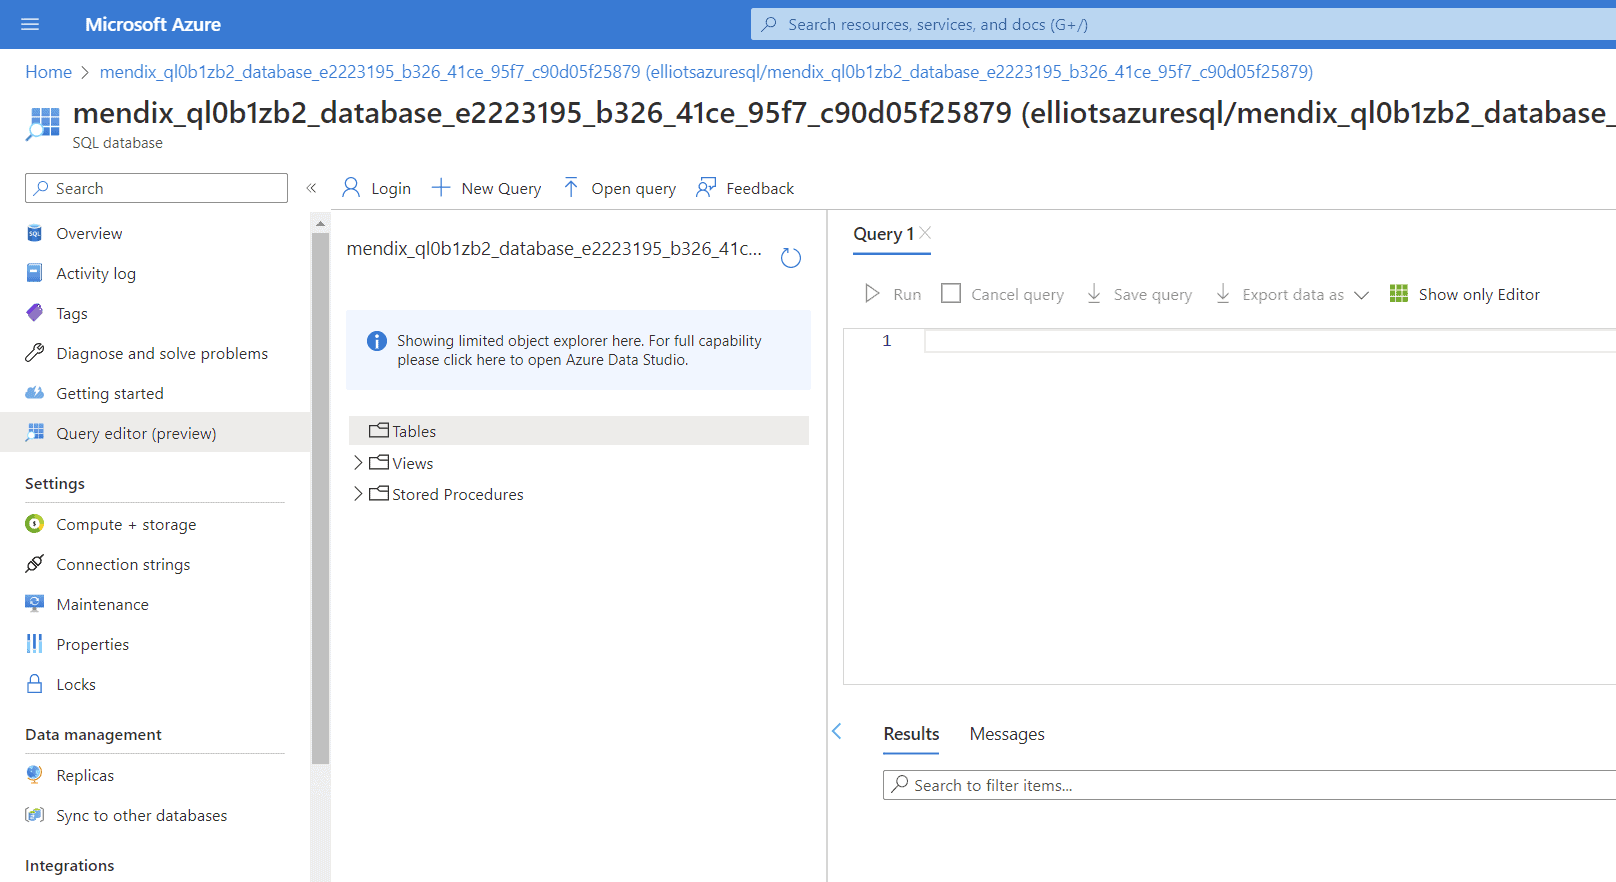
Azure SQL Server (Target)
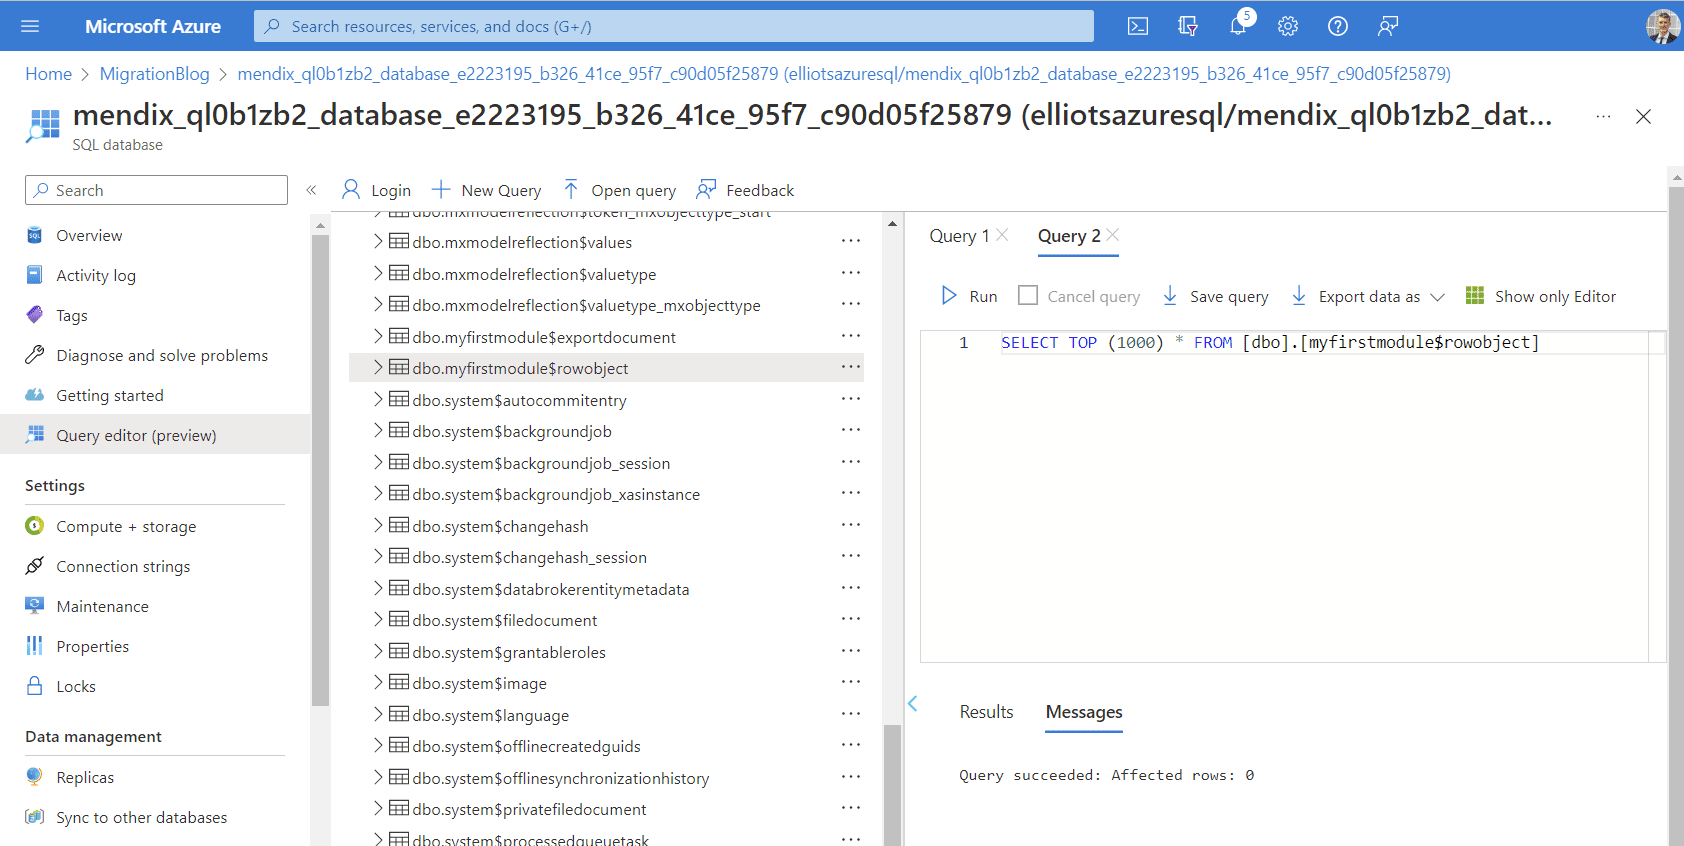
My target database isn’t empty. It contains the application tables which need to be dropped for the migration to work.
I wrote a quick Excel function to write out the necessary SQL commands to drop all the tables, without leaving the browser.
An alternative could have been SQL Server Management Studio (SSMS) which has a visual GUI to drop tables in a few clicks.
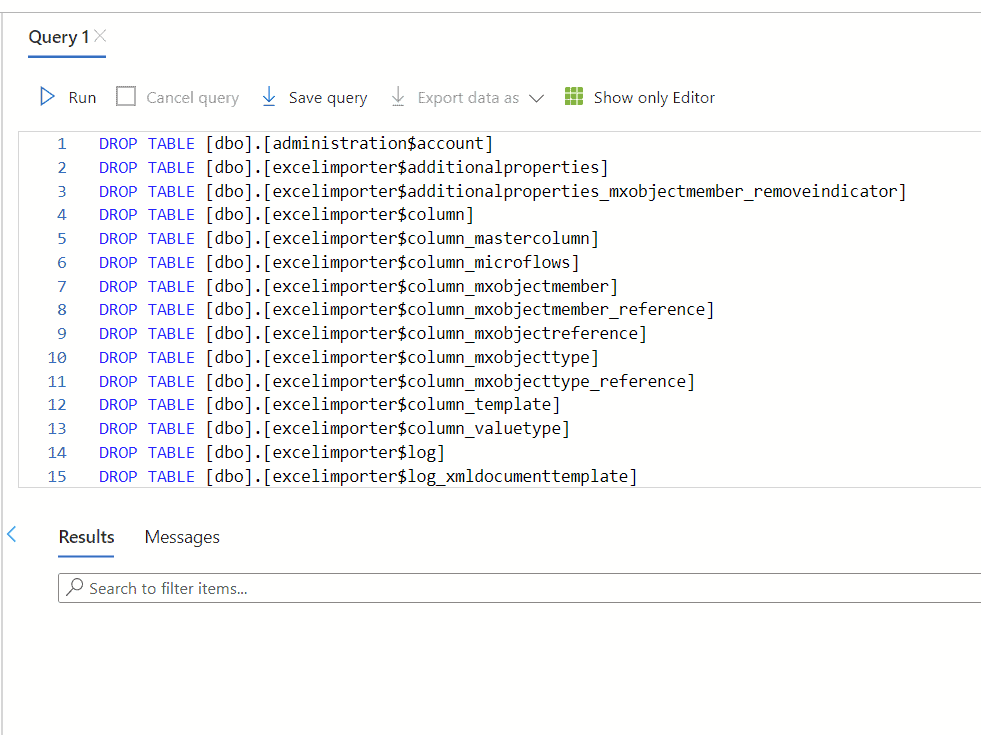
Having ran these commands, my database is empty.
Take the Snapshot 📸
It’s time to take the final backup of our production data and begin the migration. Mendix Cloud is self-service so it’s easy to action this.
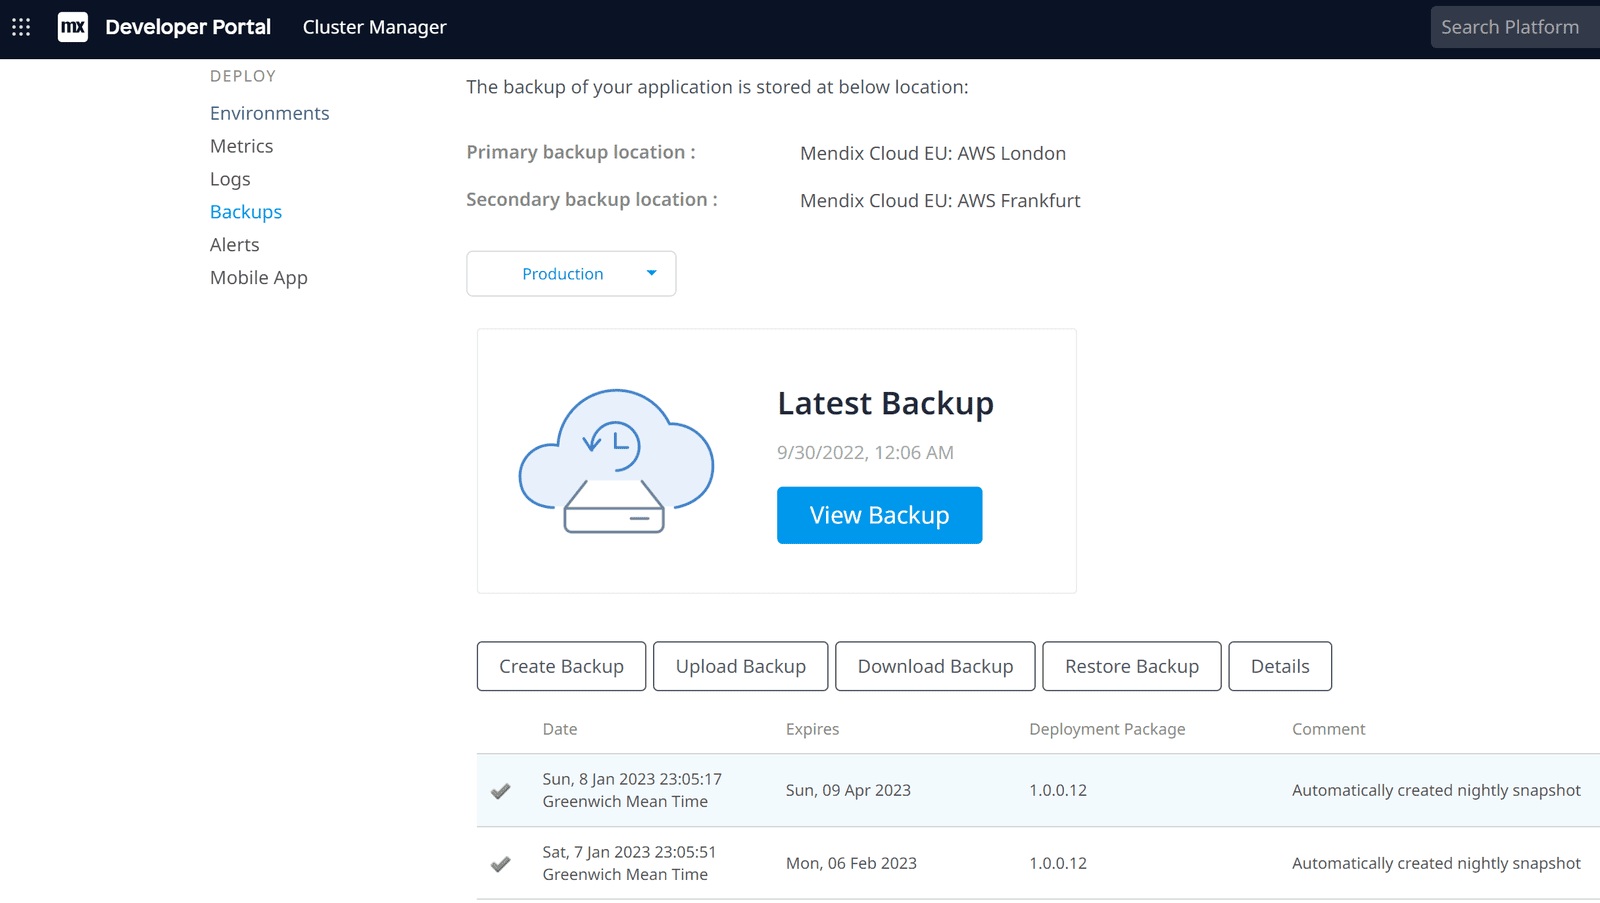
From the Mendix Cloud Developer Portal:
- Backups > Production > Create Backup (Mendix creates a snapshot of your data)
- Download Backup > Full Snapshot (Depending on the size of your application this can take minutes to several hours.)
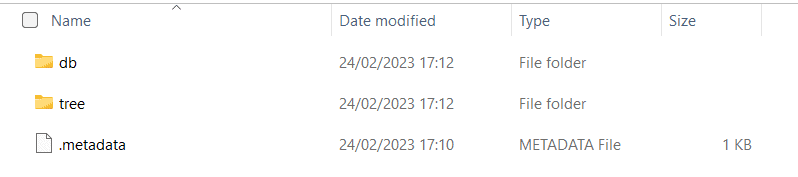
A full snapshot contains a compressed *.tar.gz archive, which is extractable using 7-zip on Windows.
The folder structure is as follows:
- db – The postgres database backup
- tree – The filestorage
The Temporary PostgresSQL Database
Create a PostgresSQL DB. This is a temporary solution to get a database which we control and have the connection details to.
Since my Target Environment is in Azure, I’m going to create an Azure Postgres Database Server.
Note: The target environment needs network connectivity to the temporary database to migrate the data.
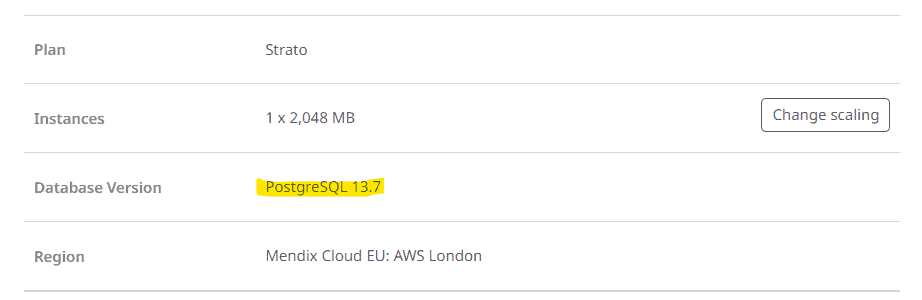
Ensure the temp PostGresSQL DB is the same version as your source database (found in the environment details page of the Mx developer portal).
To perform the restore, we need to be able to interact with our newly create temp database. I’m going to install pgAdmin 4 as this gives a simple GUI interface:
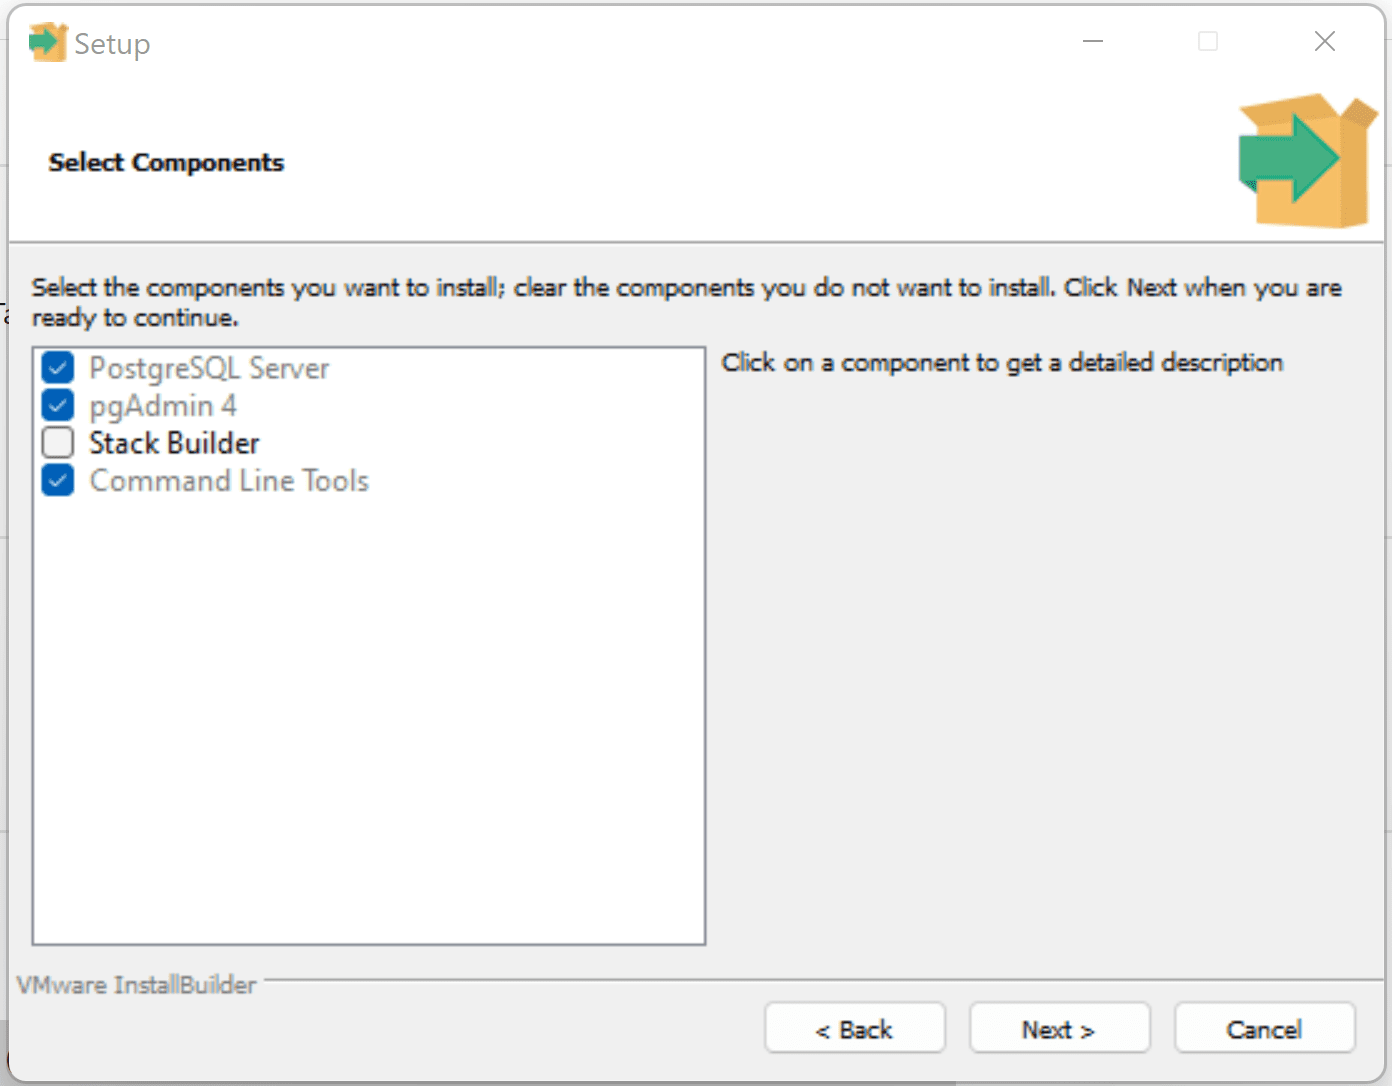
Download and install Postgres on your local machine
(PostgreSQL: Downloads) Ensure pgAdmin and PostgreSQL Server are selected (required for the restore feature).
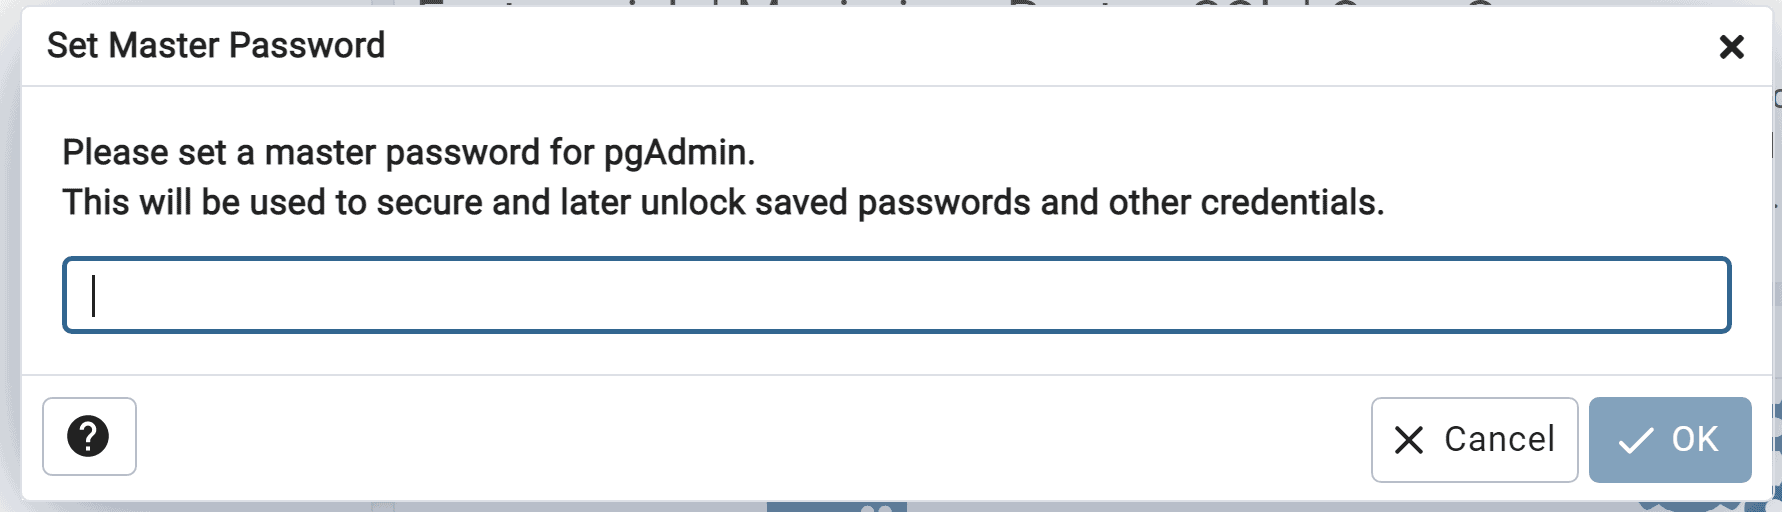
Set a Master Password on first time start of pgAdmin
Connect to our Azure PostgresSQL Server, using the connection details

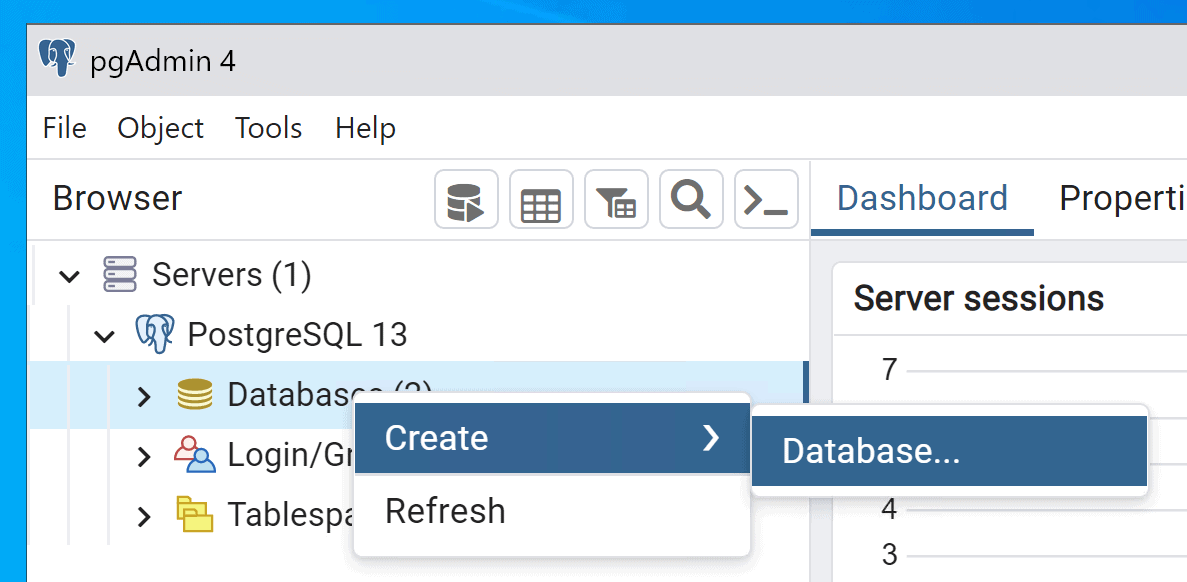
Create a temporary database
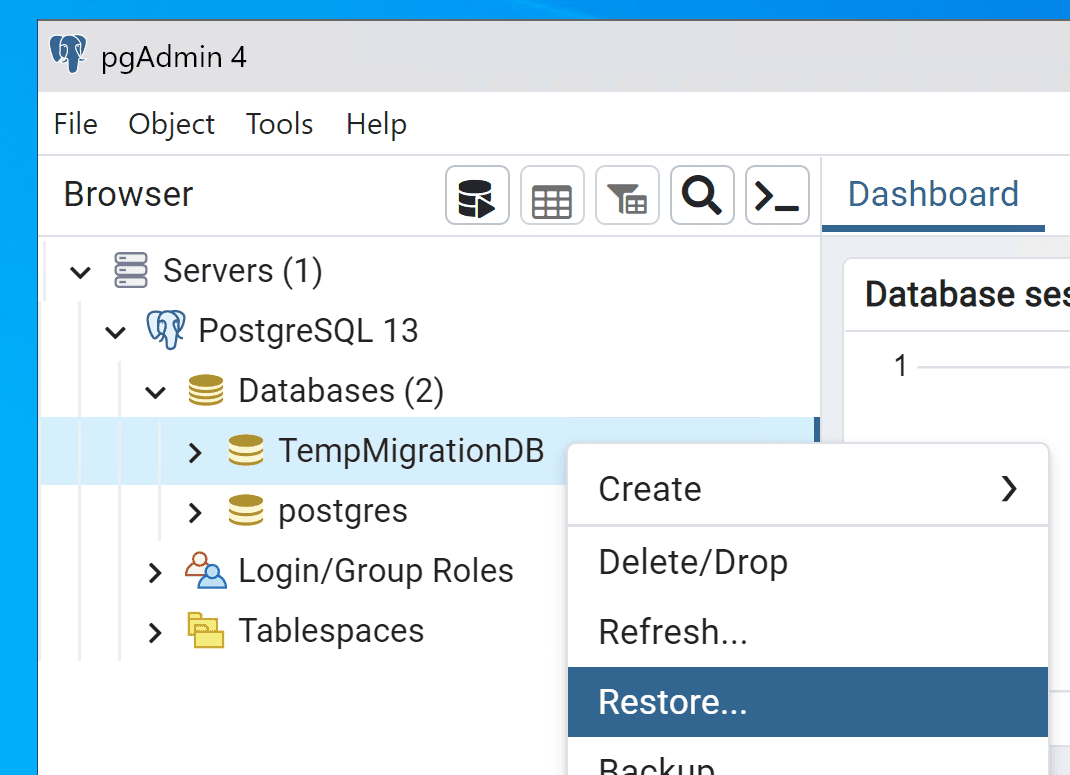
Restore the backup
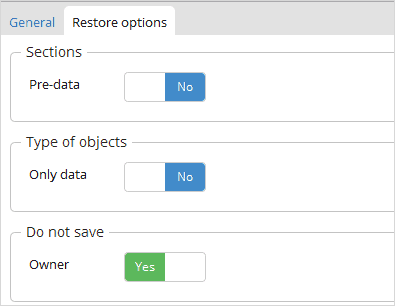
Restoring to PostGresSQL is straightforward.
Simply select your backup file ‘db.backup’, ensuring “Do Not Save Owner” is set =true.
More details can be found here.
Validate the Temporary database restore
Our data is here, the restore into our temporary database was successful.
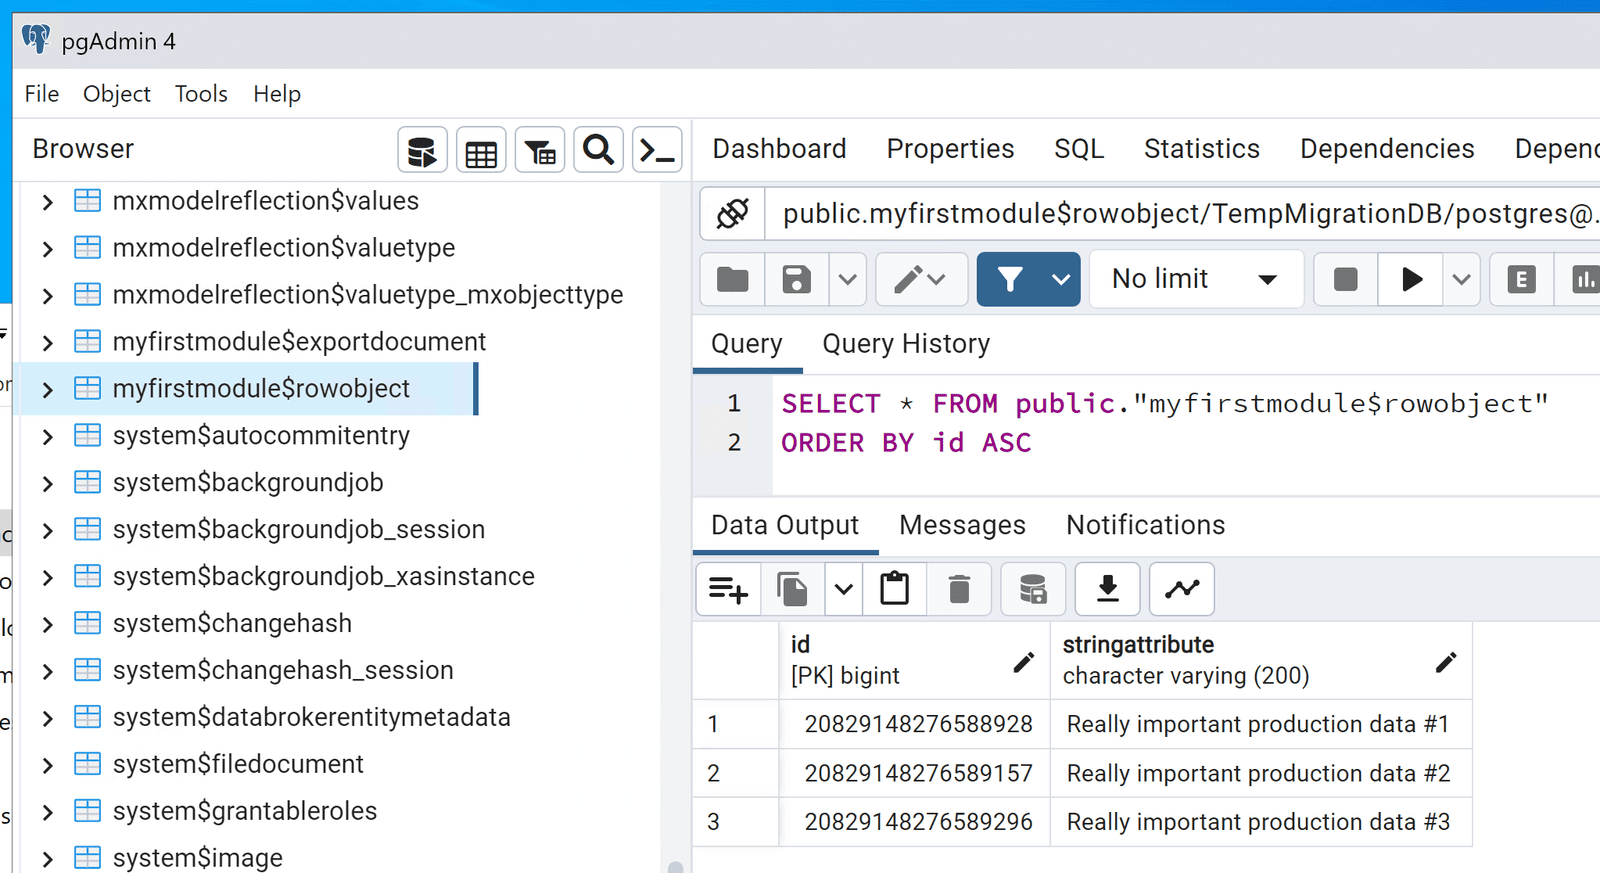
We now have our production data in a database we control and have the connection details!
Migrate the Database
Postgres to Postgres migrations are therefore extremely easy. If your target database is PostgresSQL you can just follow the steps above directly into your target database.
For me, I need to convert and migrate to MS SQL Server (Azure SQL). Fortunately, we can do this via custom runtime settings.
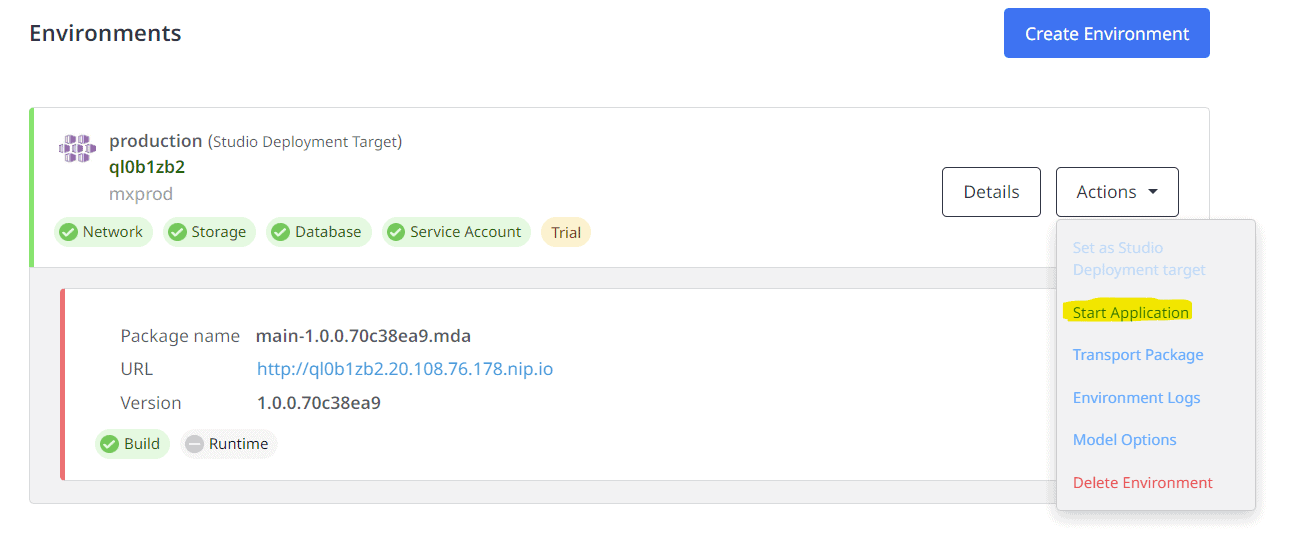
Ensure the Target Application has stopped
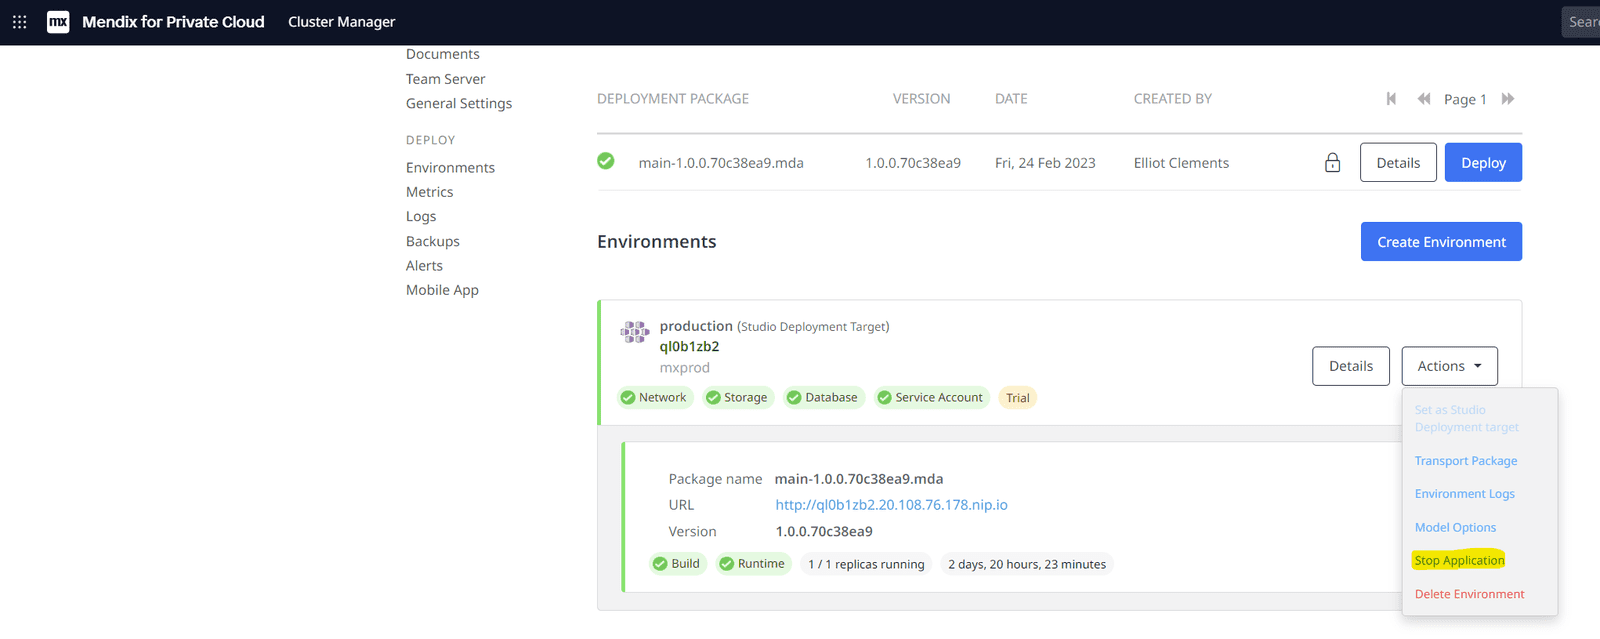
Set the Custom Runtime Variables
Start the Target Environment and validate that the database restoration worked

The data has migrated successfully.
But wait, the file documents are displaying but not downloading. This is because we’ve restored the database, which contains the metadata, but haven’t yet migrated the file storage.
Migrate the File Storage
This is the simplest of the two migrations. We simply need to upload the files within our snapshot to the target file storage, which in my case is Azure Blob Storage.
Flatten Folder Structure (if required)
The Azure Blob Storage support in Mendix expects all objects to be available in one folder. Therefore, I need to flatten and store all files within a root directory. Since I’m a Windows user, I’m going to use a simple PowerShell script to do this.
Get-ChildItem -Path SOURCE -Recurse -File | Move-Item -Destination DEST
Upload files to Azure Blob Storage Container
For larger migrations, with thousands of files amounting to 100gb+ you might prefer to use Azure CLI or Azure Storage Explorer.
In my scenario I only have two files, so I’ll use the Azure Web Portal.
Smoke Test
Running the application again, I now have full access to both my data and file contents!
The data migration was a success.
Wrap Up
When handling real production data, it’s important to run a clean-up activity post migration to ensure this data remains secure. This could include:
- Deleting local downloads of production backups
- Destroying any temporary databases
- Removing the custom runtime settings on the target environment
Closing Words
There are many potential migration combinations, setups, infrastructure designs that it’s impossible for me to cover them all within a single post. I specifically covered a complex scenario which you can adapt using the same techniques to your own data migration scenario.
Alternative Approaches
- Migrating between Mx4PC to Mx4PC or Mendix Cloud to Mx4PC with a PG Database? You can make use of the new Private Cloud Data Migration Tool (currently in preview at time of writing).
- Need a bastion host, you could stand up a Windows VM with a local installation of Postgres and use the Mendix Service Console to migrate the database to your target.
Go migrate it!