Enabling security and adding a Login Page

This is a continuation of the Hello Mendix series — where I explain the essentials of Mendix development and try to fill the gaps in your knowledge, as quickly as possible.
In part 2 of this series, I’m going to show you how to enable security in your Mendix project; including 2 different ways to add a login page to your app.

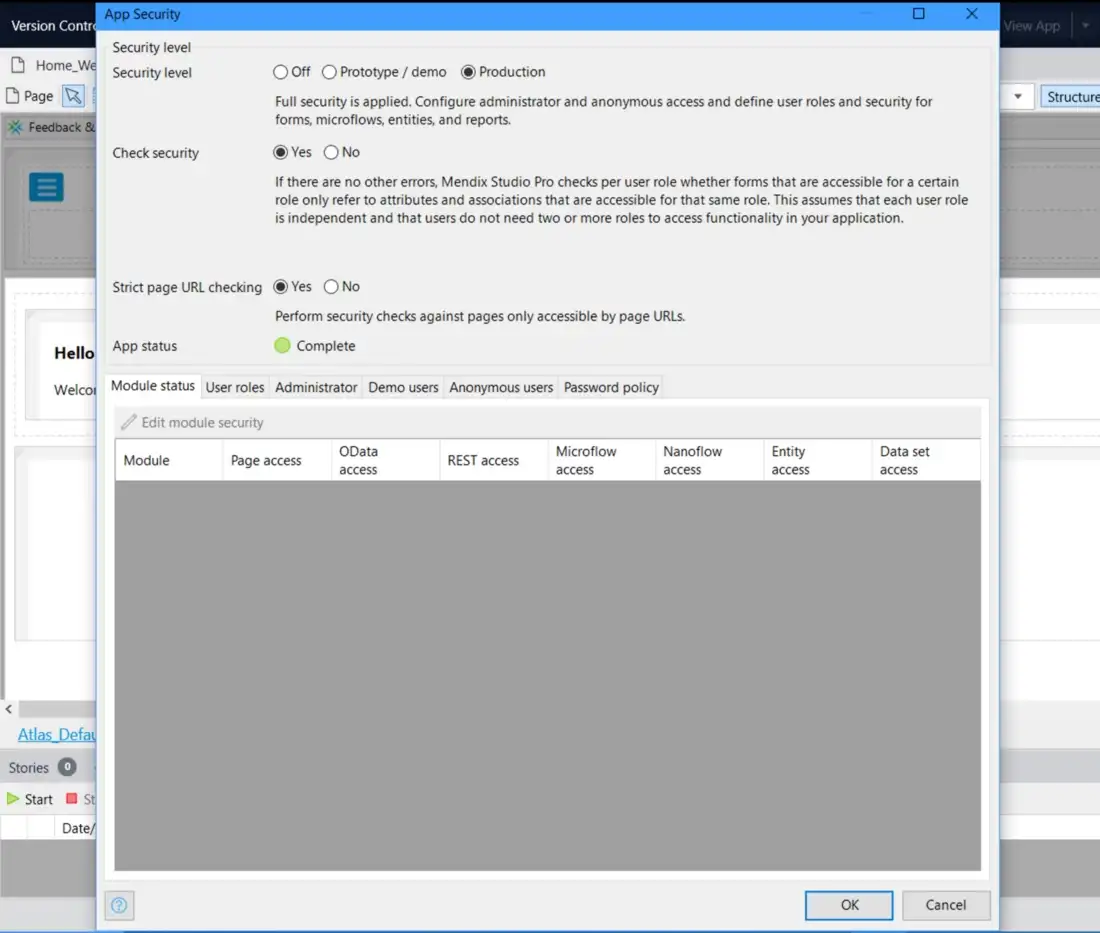
Option 1 — Use the default login.html page, by setting the App’s Security level to Production
In Studio Pro, click on Project Security in the App explorer pane. Set your security level to Production. This will automatically enable the default login page.
Now, click okay and run your app. Once you navigate to the App in a browser, it’ll direct you to a login page that requires a user name and password to authenticate a user.
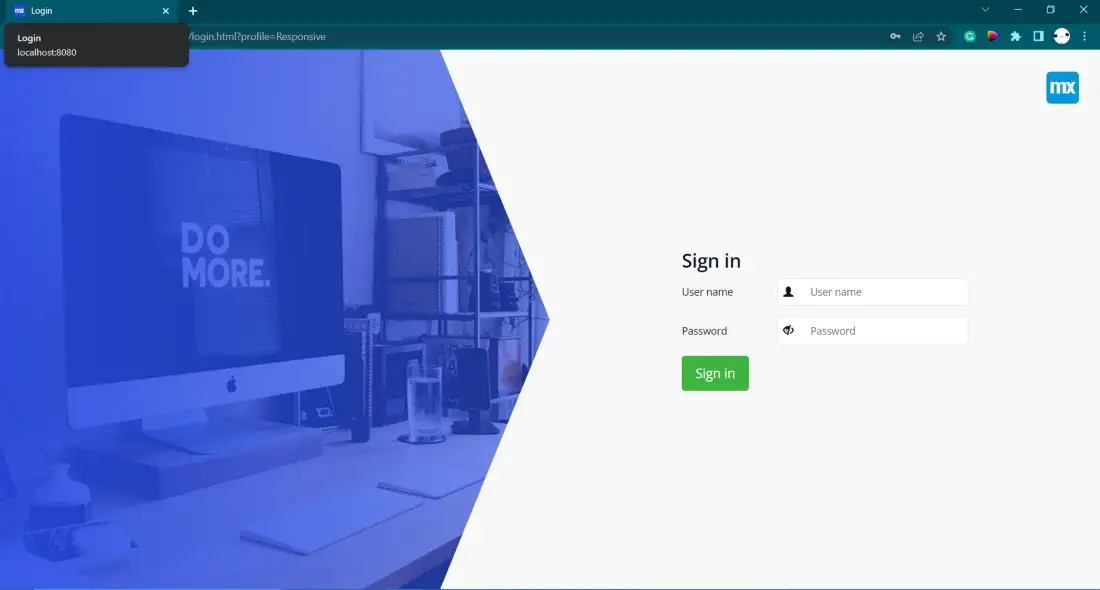
This is your app’s default login.html page which can be found inside your app’s directory, inside the theme folder. If you want to you can modify this HTML file to match your app’s look and feel or to implement SSO, but this will work as-is— straight out of the box.
You can create and administer user accounts as an administrator, by adding the “Accounts_Overview” page to your app’s navigation.
Option 2 — Allow anonymous users and create a custom Login Page
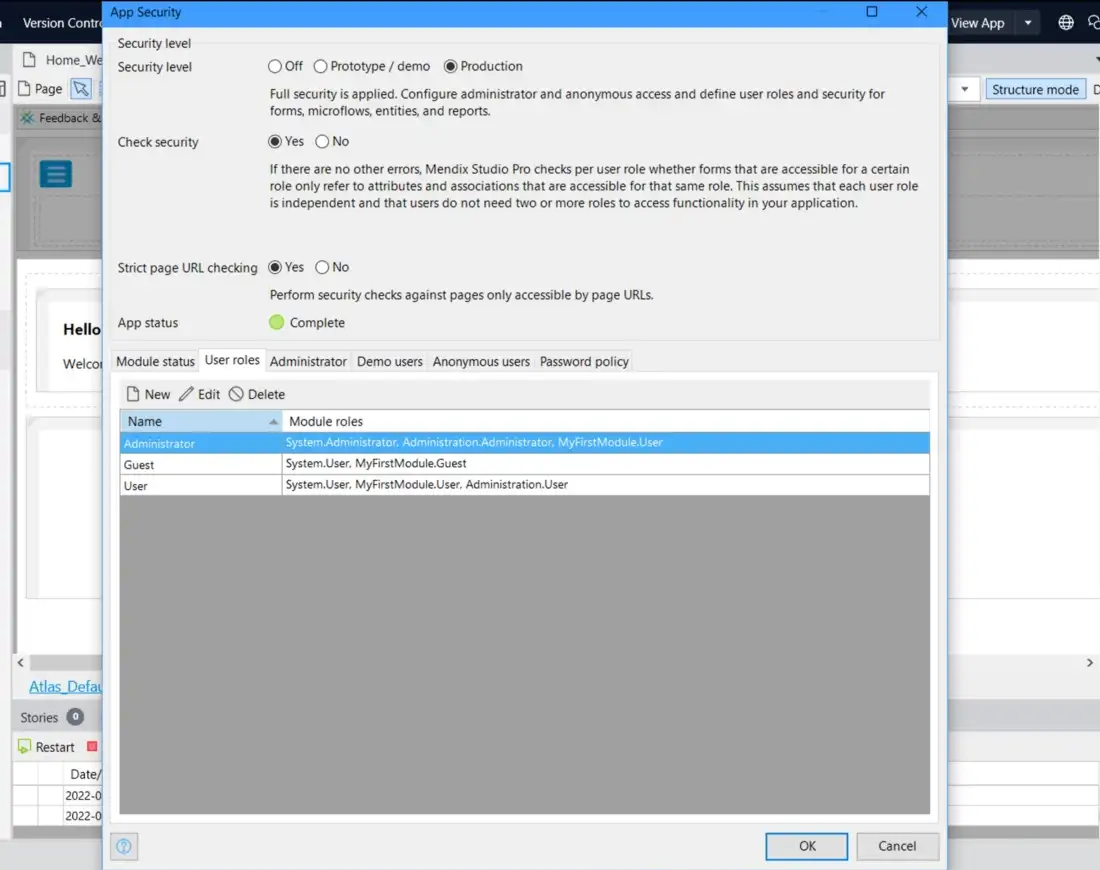
The second option is to build a page inside of studio pro using the WYSIWYG for guests users to login with. To do this we need to open the project security settings again.
Go to the User Role tab, and click new to create a new role named ‘Guest’.
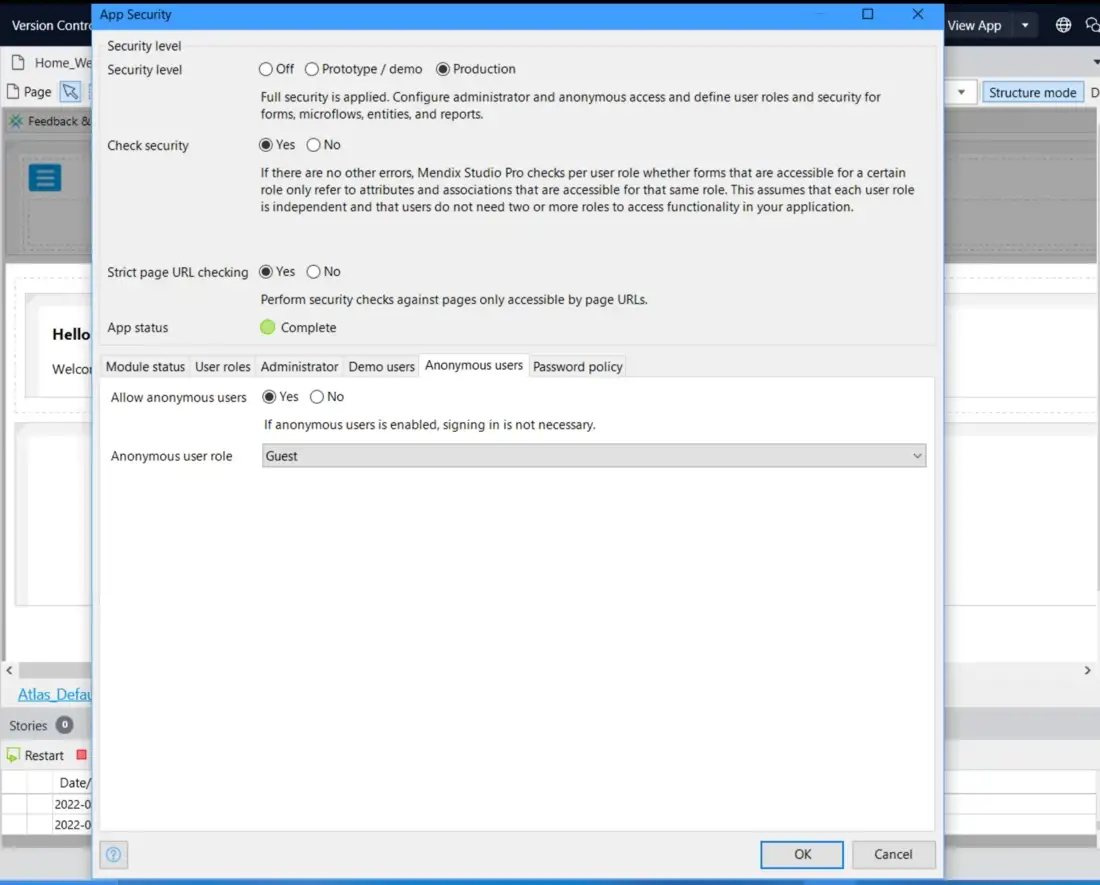
Now we can move to the anonymous user’s tab and set allow anonymous users to Yes. Then select our Guest user role, in the drop-down below.
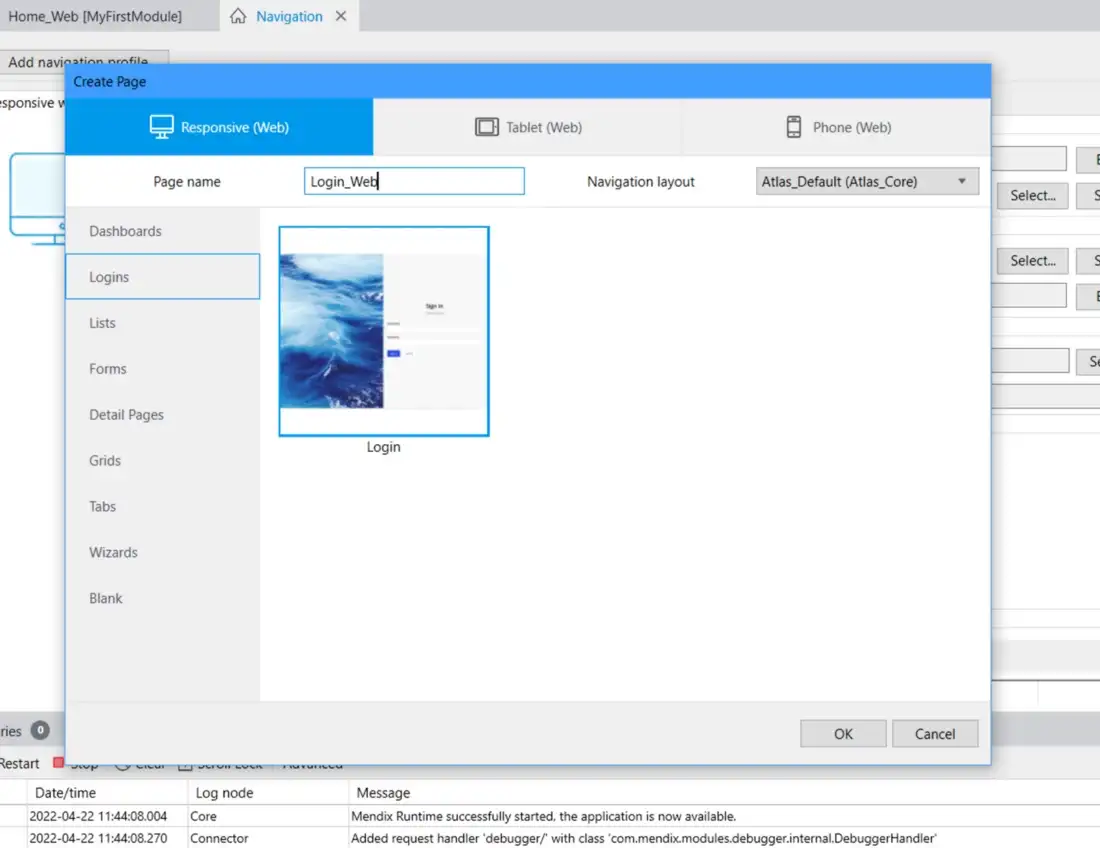
We have to set up our navigation to ensure the Guest users are directed to a page where they can log in and become authenticated users. Open the Navigation window which is just below security and click Edit on Role-based home pages. Click new and select Guest, then click select target. This is where we can choose the page the user role should be directed to. Select My first Module and click ‘New’ and select ‘create a page ’. Give the page a name like Login_Web, select the login template and click ok.
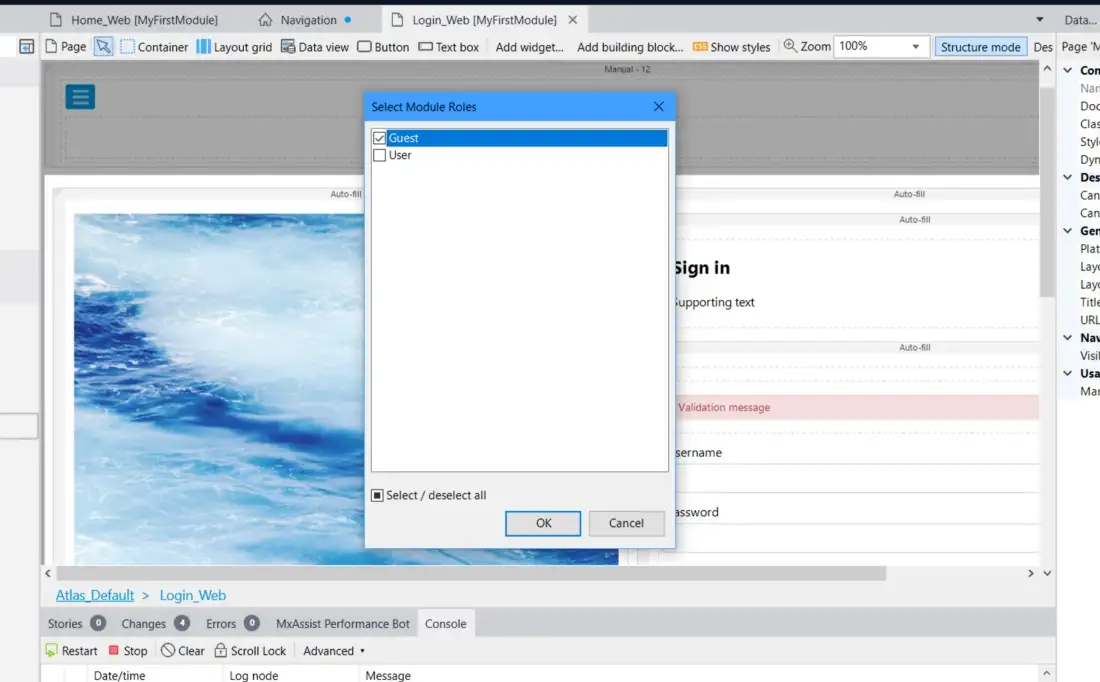
Almost done now, just define the “visible for” in the properties window on the left, remember to select guest here, and run your app to test it out.
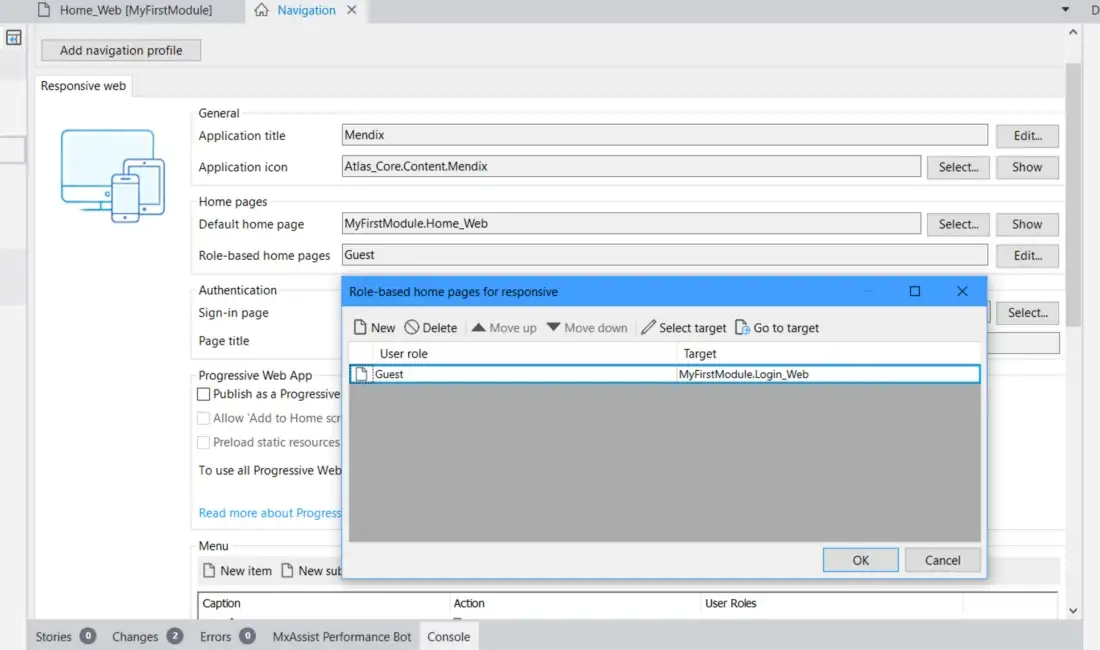
Once you’ve finished, your Role base home pages for the Responsive profile should look similar to the screenshot below.
Remember you can use the demo switcher widget to quickly change user roles when testing this out. To create login credentials an administrator will need navigation set up to allow access to the Accounts_Overview page — or you can create a sign-up process for your guest users.