How to Use the Mendix Database Connector as an Amazon RDS Connector

A little while ago, we came across a question from one of our clients who owns a large external (not in Mendix Cloud) database that is being used by other systems to read and write data. They wanted to use Mendix to build dashboards on top of this database, but they needed a connector between Mendix and Amazon RDS to make it work.
Who doesn’t like connectors? We, as a team, love developing them, so when faced with the challenge of connecting Amazon RDS with a Mendix app, we were eager to get started. However, before we dove into building a new connector, we did some research in our own Mendix Marketplace to see if anything useable already existed. There we bumped into Mendix Database Connector, a platform-supported product that enables you to incorporate external data directly into your Mendix application. That sounded very promising, so we thought: ‘’Hmm, let’s put it to the test….’ All it took were a couple of setting changes, and our data was available in our Mendix App.
What we also love as a team is to spread the knowledge of how to create cool apps, so in this post, we’ll show you how the magic happens and all the secrets to using the Mendix Database Connector to connect your Amazon RDS database and streamline your workflow.
What is Mendix?
Imagine a platform that makes app development feel like a vacation. That’s Mendix! It is a high-productivity platform that lets organizations build stunning web and mobile applications on a large scale. With Mendix, you do not need to be a coding wizard or ChatGPT to create amazing apps. Its intuitive visual modeling environment lets developers and business users collaborate effortlessly, allowing you to bring your custom applications to life faster than ever before. Plus, with its agile development methodologies, Mendix adapts to your evolving business needs, giving you the flexibility to respond quickly and stay ahead of the game.
What is AWS?
Imagine a powerful cloud-based friend that handles all your technological requirements. That is Amazon Web Services (AWS). It’s like having a virtual toolbox filled with a wide range of services to store, process, and analyze your data, run applications, and even deploy infrastructure. From computers and storage to databases, networking, analytics, and even machine learning, it provides a wide range of services. You can say goodbye to the hassles of managing intricate infrastructure and pricey hardware and say hello to pay-for-what-you-use and no need to maintain infrastructure with AWS. It’s like having a trusted partner by your side, ready to scale your infrastructure when needed, so you can focus on what you do best: making amazing things happen.
Why should I use Mendix with AWS?
Integrating AWS with other systems can be a real puzzle, requiring specialized knowledge and technical know-how. But fear not because Mendix is here to save the day! With Mendix’s efficient low-code development platform, developers can easily build connectors that seamlessly integrate AWS services with other applications and systems. It’s like having a magic wand that effortlessly connects the dots between AWS and your existing tools. Tim Srock, the CEO of Mendix, perfectly sums it up by saying, “AWS recognizes the transformative power of the Mendix platform, and we recognize the transformative power of AWS Services.” Together, Mendix and AWS make an unstoppable team, and we’re excited to share the details of our expanded go-to-market relationship.
What is Amazon RDS?
Amazon Relational Database Service (RDS) is “a collection of managed services that makes it simple to set up, operate, and scale databases in the cloud” so you can concentrate on what you do best: create incredible apps. RDS is a top option for companies of all sizes because it is brimming with features and advantages. As your applications expand, you may easily extend your databases without becoming bogged down in difficult management responsibilities. With built-in encryption measures to keep your data secure and compliant, RDS also has your back when it comes to data security. And don’t forget the cherry on top: RDS offers useful management and monitoring tools to enhance database performance and save operational costs.
Why do we want to connect Mendix with Amazon RDS?
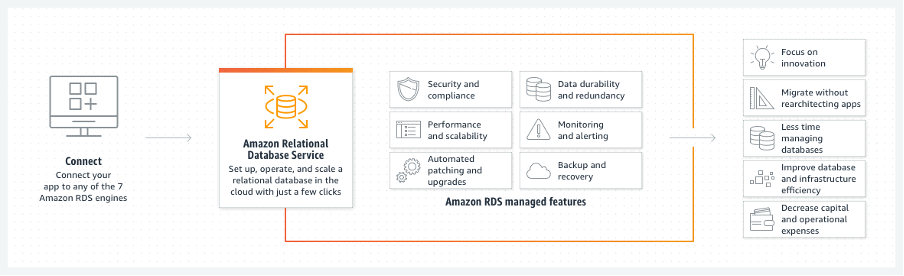
Connecting Mendix with Amazon RDS can offer several benefits. Firstly, it allows you to incorporate external data directly into your Mendix application easily. With the ability to connect to various relational databases, Amazon RDS can provide a cost-efficient and scalable option for your data storage needs. The Multi-AZ (multiple availability zone) deployment option offered by Amazon RDS also provides high availability and built-in automated failover, making it a reliable option for mission-critical workloads.
Database connector
The Mendix Database connector can be used to seamlessly connect to external databases without limiting your choice of database or SQL dialect, enabling you to incorporate external data directly into your Mendix application. The Mendix Database Connector integrates using the JDBC protocol, which coincidentally is also offered as a means of integration by Amazon RDS.
Before we start
To follow the steps described below, you need to have an AWS account and a Mendix account. Your AWS account provides access to the AWS services, while your Mendix account gives you access to the Mendix Platform. You also need to have Mendix Studio Pro installed on your machine.
- To create a Mendix account, sign up here.
- To download Mendix Studio Pro, see Mendix Marketplace – Studio Pro 9.24.1 – Download.
- To create a simple Mendix application, follow the Build Your App Using a Template tutorial on Mendix Academy.
- To create an AWS account, see AWS Management Console.
Next, we are going to create a new Amazon RDS PostgreSQL database. To do that, log in to the AWS Management Console. In the search bar, type Amazon RDS.
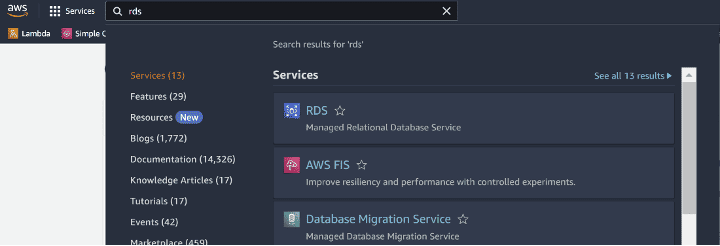
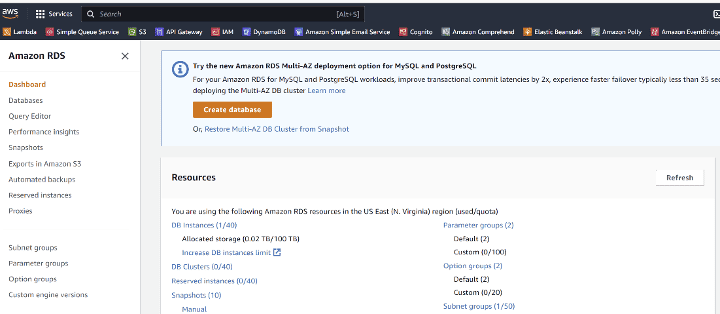
Click Amazon RDS. Once in the Amazon RDS Console, click Create Database.
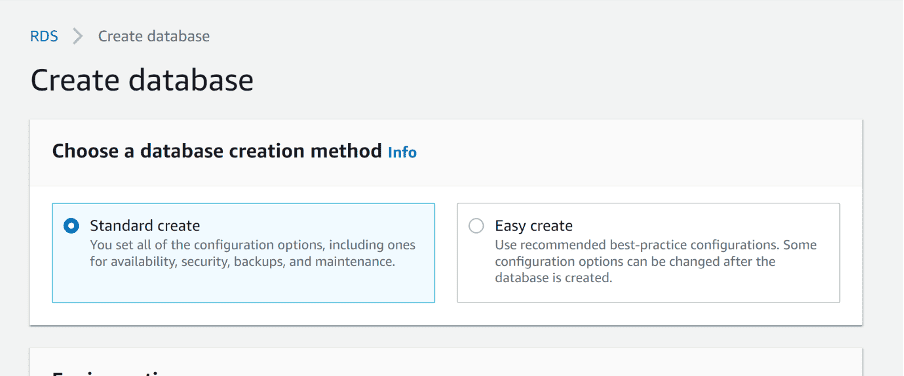
For the database creation method, select Standard create.
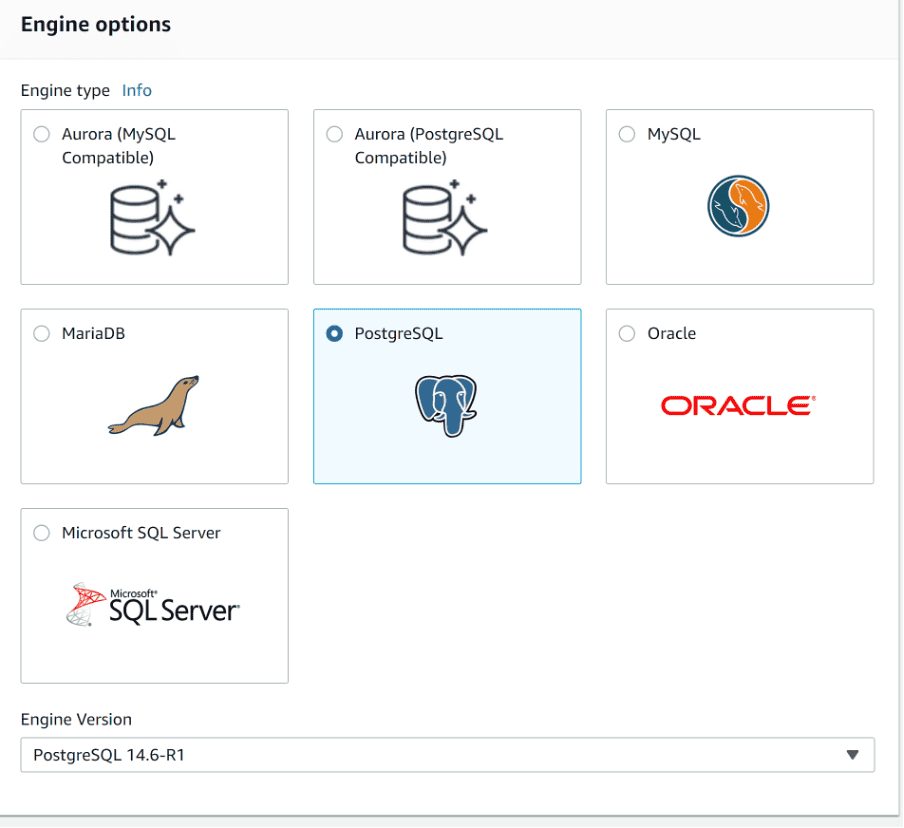
For the engine option, select PostgreSQL. Leave the engine version at the default setting.
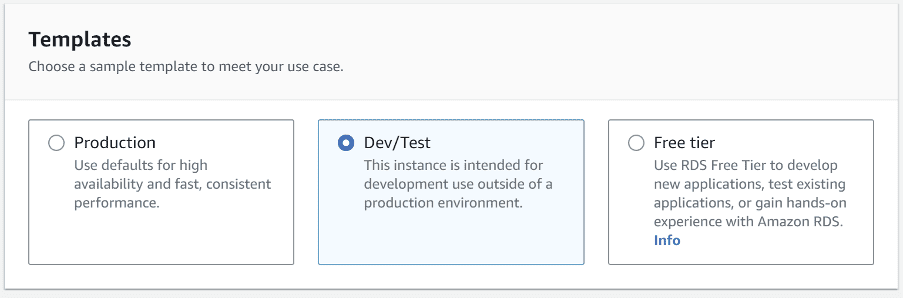
For a template, select the Dev/Test.
For availability and durability, select Single database instances.
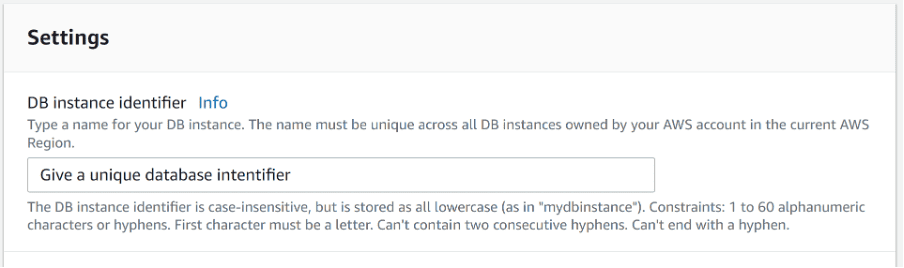
Scroll down until you reach Settings and give your database a unique DB instance identifier.
Create the Master Username and Master Password.

Scroll down to Connectivity and enable public access.
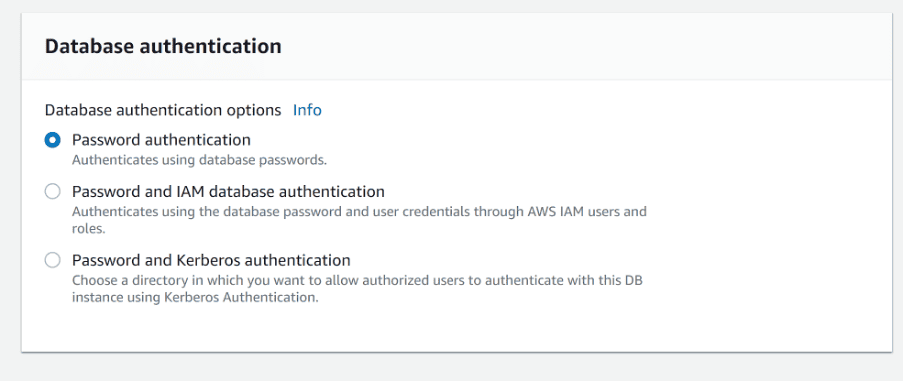
Scroll down to Database authentication and make sure Password authentication is selected.
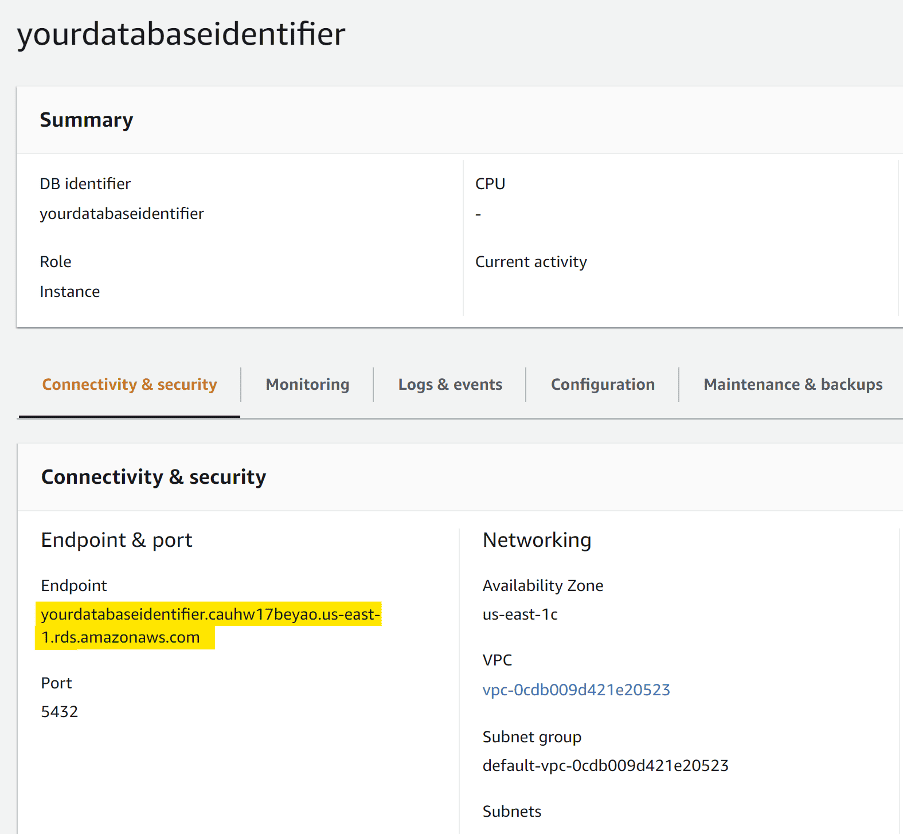
Leave everything else at the default settings, scroll to the end of the page, and then click Create database. Once the database is ready, click to open it, then click to the Connectivity & security tab and copy the endpoint.
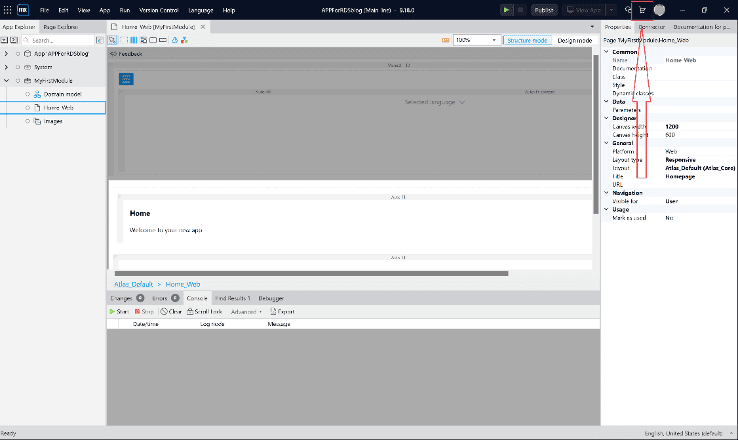
Go to Mendix Studio Pro, choose the application you want to integrate with AWS RDS, and Click the Marketplace icon.
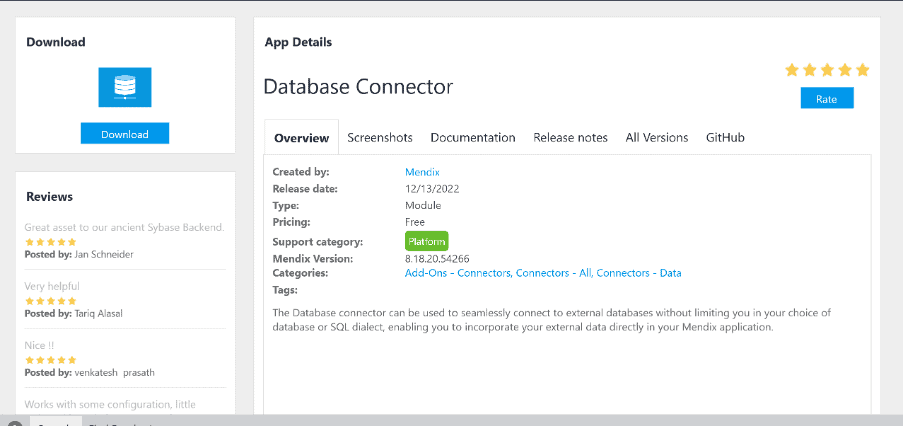
Once the Mendix Marketplace is open, at the search box, type Database Connector by Mendix.
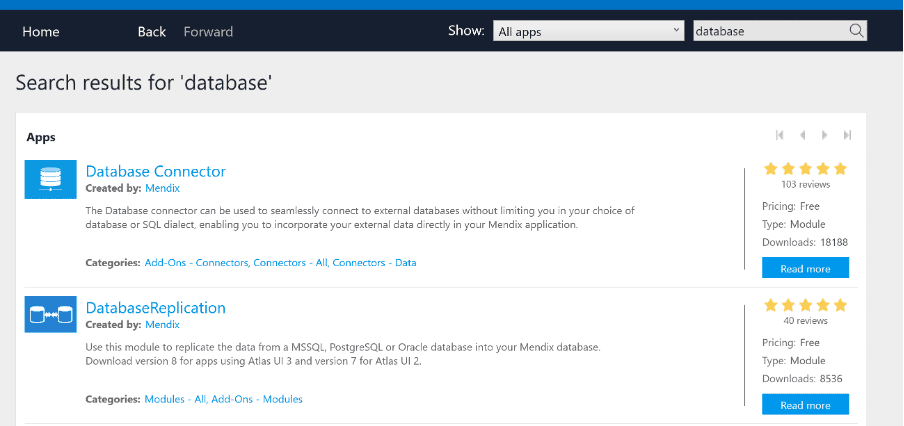
Click the Download button to download the connector module into your application…
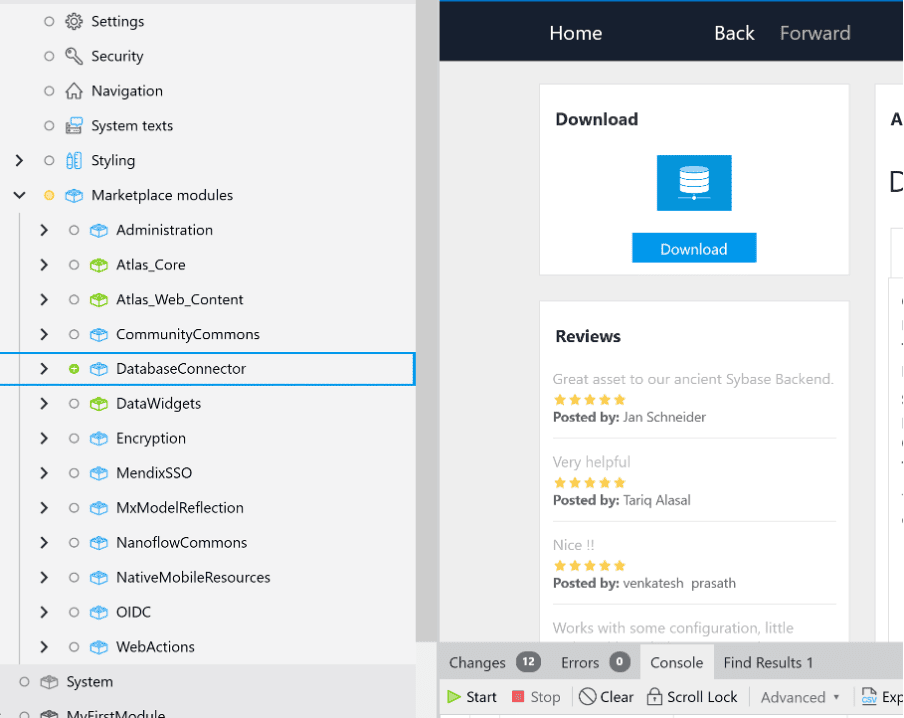
…and In the pop-up message, click Import. In Studio Pro, find the Database Connector in the Marketplace modules section of the App Explorer.
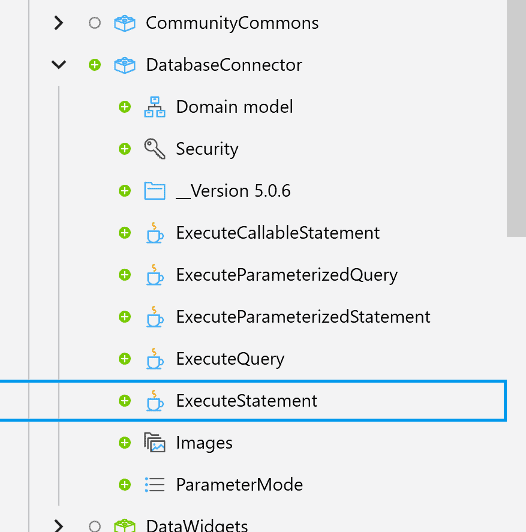
Click on the module to open it and review the actions.
If you want to know more about the database connector, see Database connector.
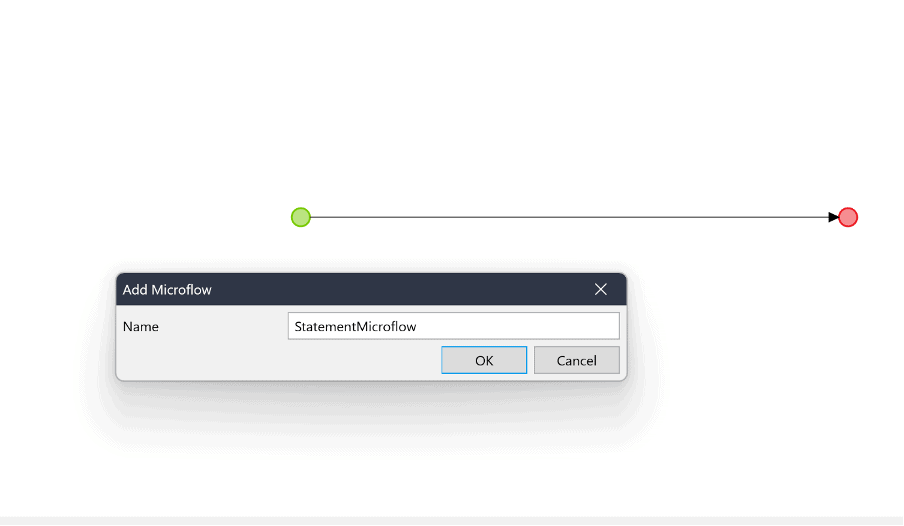
Then right-click My first module, and then select Add a microflow.

Enter a name for your microflow, and then click OK.
From the DatabaseConnector module, drag the Execute statement action and place it between the start and end events of the newly created microflow, then double-click the action to open the settings.

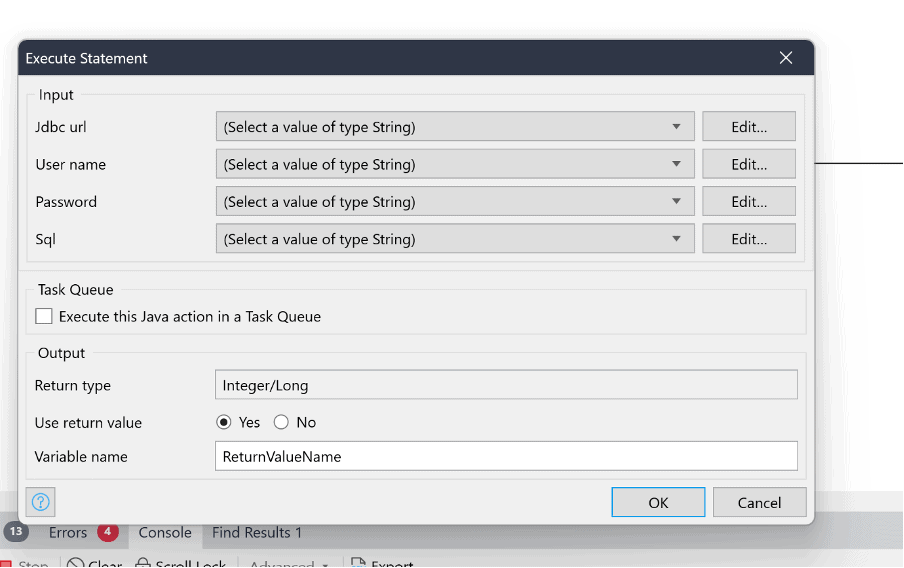
Configure the jdbcUrl parameter in the following way:
jdbc:postgresql://{endpoint copied from the AWS console}:5432/For example:
jdbc:postgresql:// yourdatabaseidentifier.cauhw17beyao.us-east-1.rds.amazonaws.com:5432/In the User name and Password parameters, enter the Master Username and Master Password that you configured in AWS RDS, or other credentials with equivalent access rights for AWS RDS.
In the Sql parameter, enter your SQL statement. For example, to create a table, you can use the following statement:
CREATE TABLE employee (
emp_id INT PRIMARY KEY,
first_name VARCHAR(50) NOT NULL,
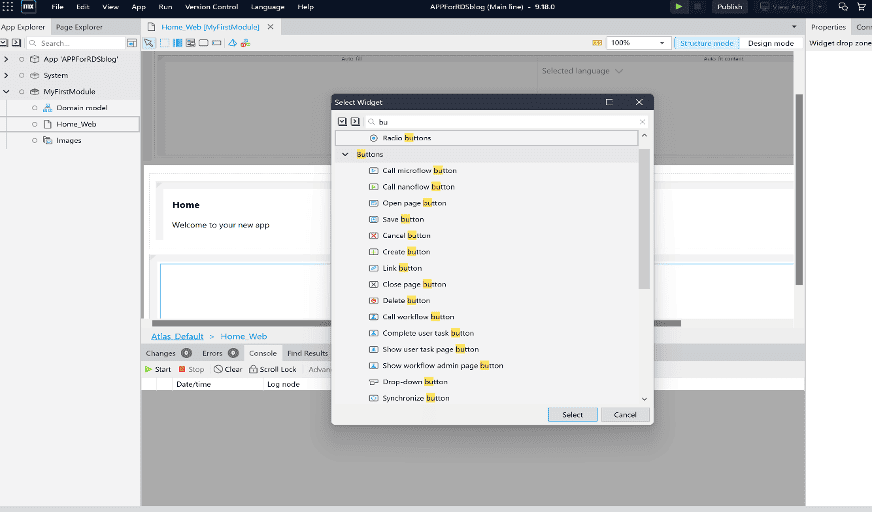
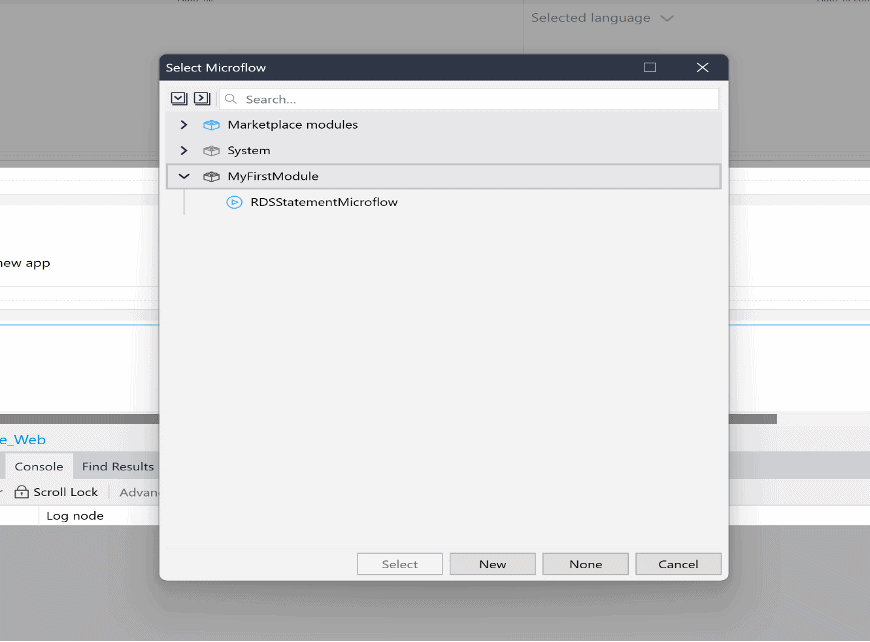
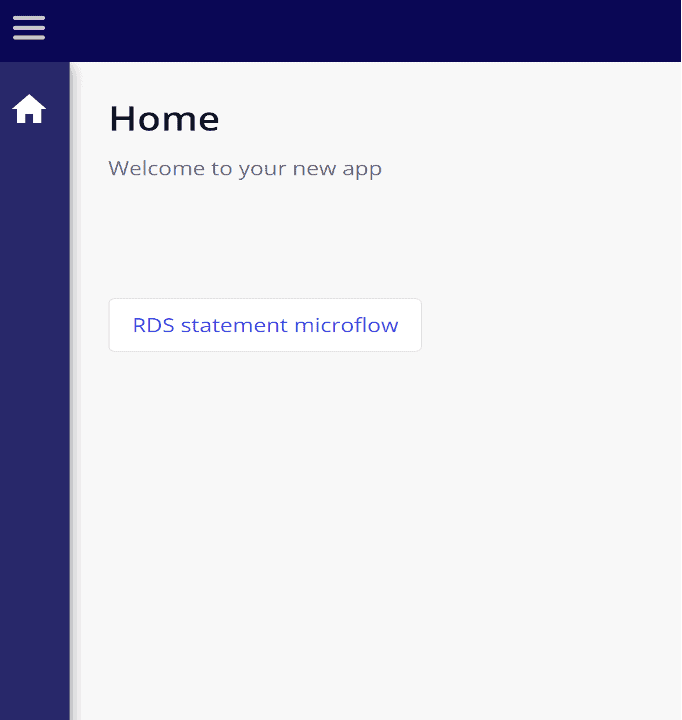
last_name VARCHAR(50) NOT NULL)Create a microflow button in the homepage and link it to the newly created microflow.
Click the Run button to run your Mendix application.
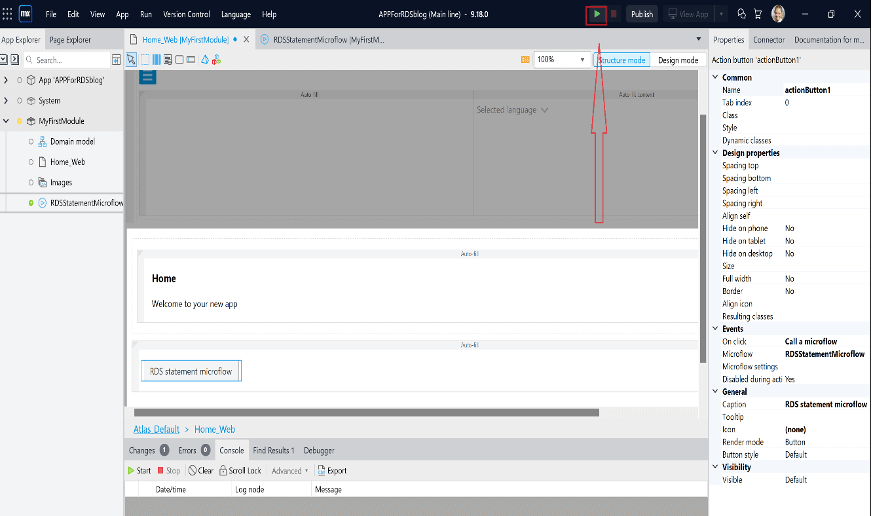
Click the new button to trigger the microflow. A new table will be created in your Amazon RDS PostgreSQL database.
Time to celebrate. Congratulations! You have successfully connected your AWS RDS database to your Mendix application.
Summary
As we conclude our blog post, we emphasize the power of integrating Amazon RDS with a Mendix app through the Database Connector module. This integration opens a world of opportunities, allowing developers to harness the strengths of both platforms and create robust, scalable, and high-performing applications. By following our comprehensive guide, you will be well-equipped to embark on this exciting journey of connecting Amazon RDS with your Mendix app, unlocking the full potential of your application’s data management capabilities.