Zero Trust Networking: Service Mesh Integration with Mendix for Private Cloud
Modern microservices-based applications can quickly become complex to manage, especially when it comes to traffic routing and security.
To address these challenges, service meshes have emerged as a powerful solution. Fortunately, Mendix for Private Cloud seamlessly integrates with Linkerd and Istio.
While Transport Layer Security (TLS) is a vast topic, we’re going to keep it simple and explore how to combine these technologies while embracing the principles of zero trust networking. We will go through enabling Linkerd, deploying a couple of Mendix apps, and see traffic flowing in a nice dashboard. As a bonus, we’ll include the Ingress controller into the mesh for encrypting external traffic, too!
Ensuring data security
Mendix for Private Cloud ensures data security through the implementation of TLS in multiple ways:
- “Ingress TLS” – is used to encrypt traffic between a web browser (or another HTTP client) and the Mendix Runtime.
- “Client TLS” – Client Certificates (as you can configure them into the Runtime) are used by the remote server to validate the identity of the Mendix Runtime. Simultaneously, the Mendix Runtime uses the certificate presented by the remote server to validate its identity.
- “TLS trust” – which is used to trust a private root CA when connecting to a database, a file storage, or a registry. The trusted root certificates validate the authenticity of the remote server and are used while connecting to other external services, too (e.g. any REST or SOAP service consumed inside a Mendix app).
So then, what do we need Service Mesh for? Actually, what is it? Let’s begin by understanding the foundation of secure communication.
What is TLS?
TLS (Transport Layer Security) is a cryptographic protocol that ensures secure communication between two devices over a potentially untrusted network by encrypting data, verifying identities, and maintaining data integrity.
The main components are:
- Two keys, called Public and Private keys.
- Both keys come with a set expiration period.
- Data encrypted by the Public key can only be decrypted by its Private key.
- Data encrypted by the Private key can only be decrypted by its Public key.
How does TLS work?
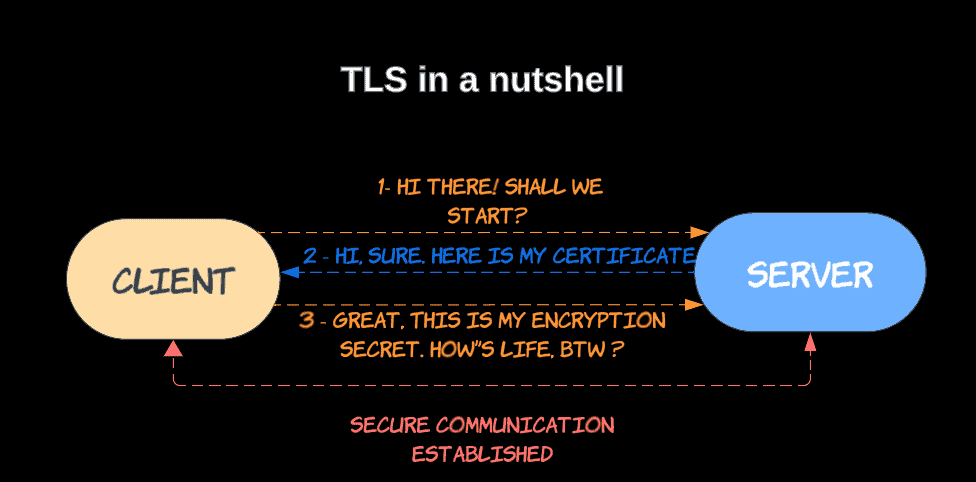
In a nutshell, the server has a TLS certificate and the key pair as well. The process then goes like this :
- The client connects to the server.
- The server sends its TLS certificate.
- The client verifies the server’s certificate (TLS handshake).
- The client and server exchange information over an encrypted TLS connection.
The key here is to understand that in TLS, only the client verifies the server identity.
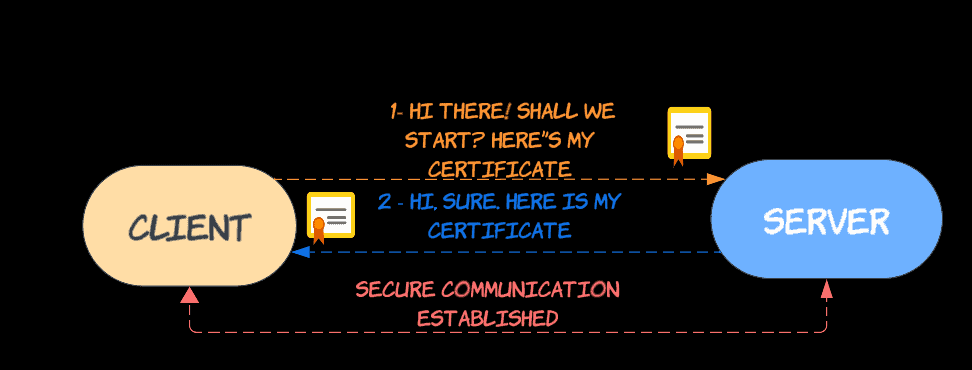
Ok, so what is mTLS?
Mutual Transport Level Security (mTLS) is built on top of TLS. The process is very similar, but with the addition of the client bringing its own certificate and key pair to the picture. In other words, the client and the server verify each other’s identities.
This is how mTLS works:
- The client connects to the server.
- The server sends its TLS certificate.
- The client verifies the server’s certificate (TLS handshake).
- The client sends its TLS certificate.
- The server verifies the client’s certificate (TLS handshake, again).
- Then, the connection is established over a secured channel.
So then, what are service meshes?
A service mesh is a networking infrastructure that operates within a microservices architecture. Its primary goal is to enhance the security and manage the encryption of data as it moves between these services.
For the purpose of this post, I will only focus on three of the many features a service mesh can offer:
- Service-to-Service Encryption: A service mesh employs TLS and mTLS to encrypt and authenticate these inter-service communications.
- Certificate Management: A service mesh simplifies managing TLS certificates by automating certificate issuance, rotation, and distribution.
- Zero Trust Networking: Service meshes often adopt a “zero trust” approach, which means that communication between services is not trusted by default. TLS and mTLS play a crucial role in this approach, as they verify the identity of communicating parties and encrypt the data, even within trusted networks.
Service mesh in Mendix for Private Cloud
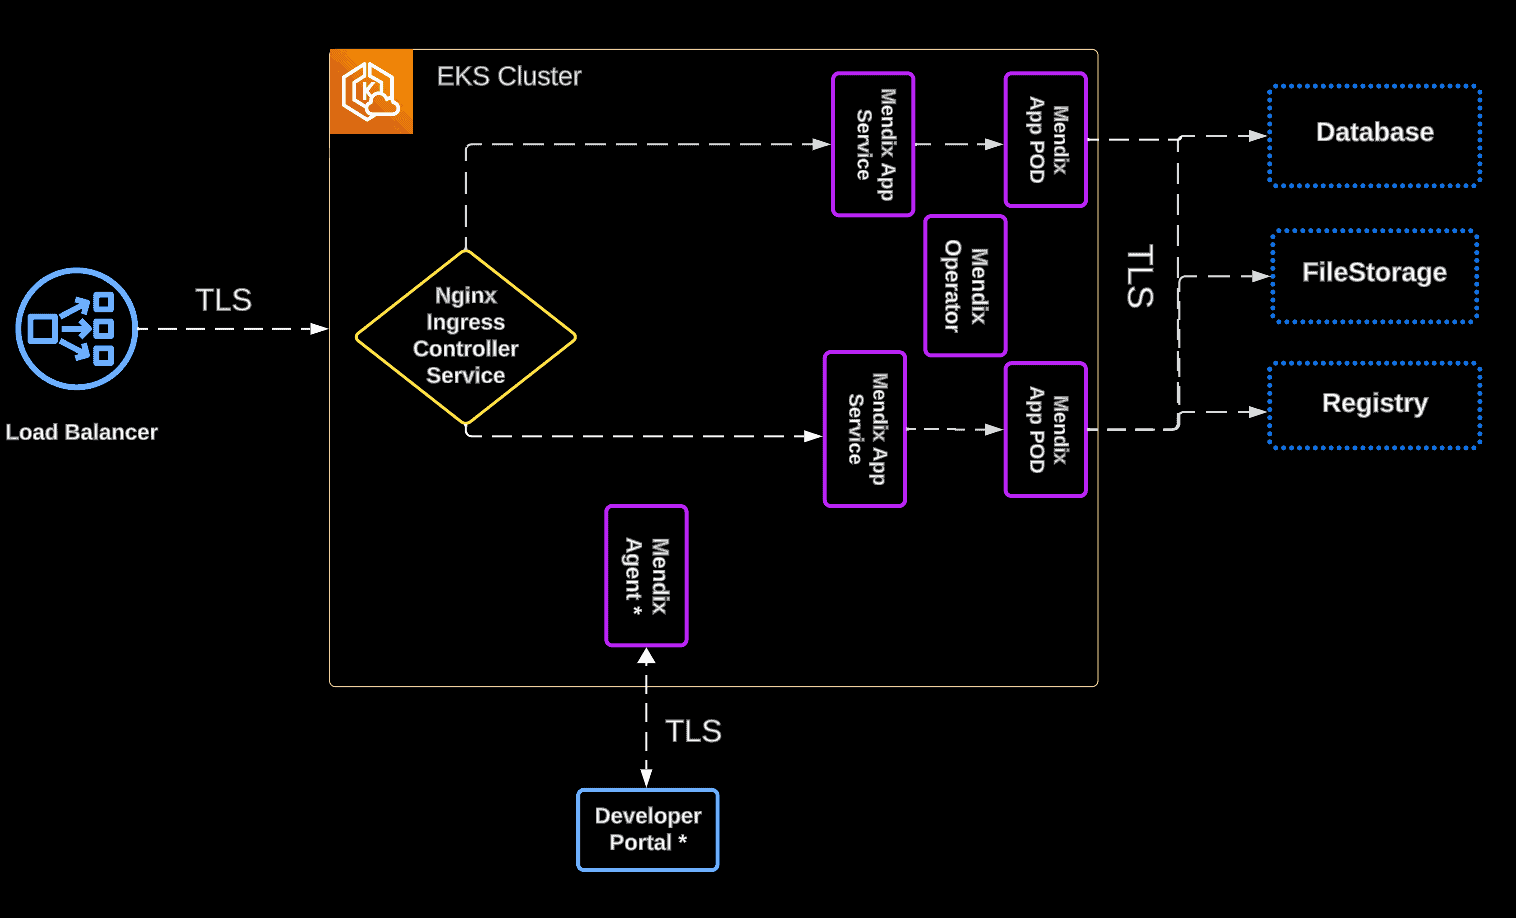
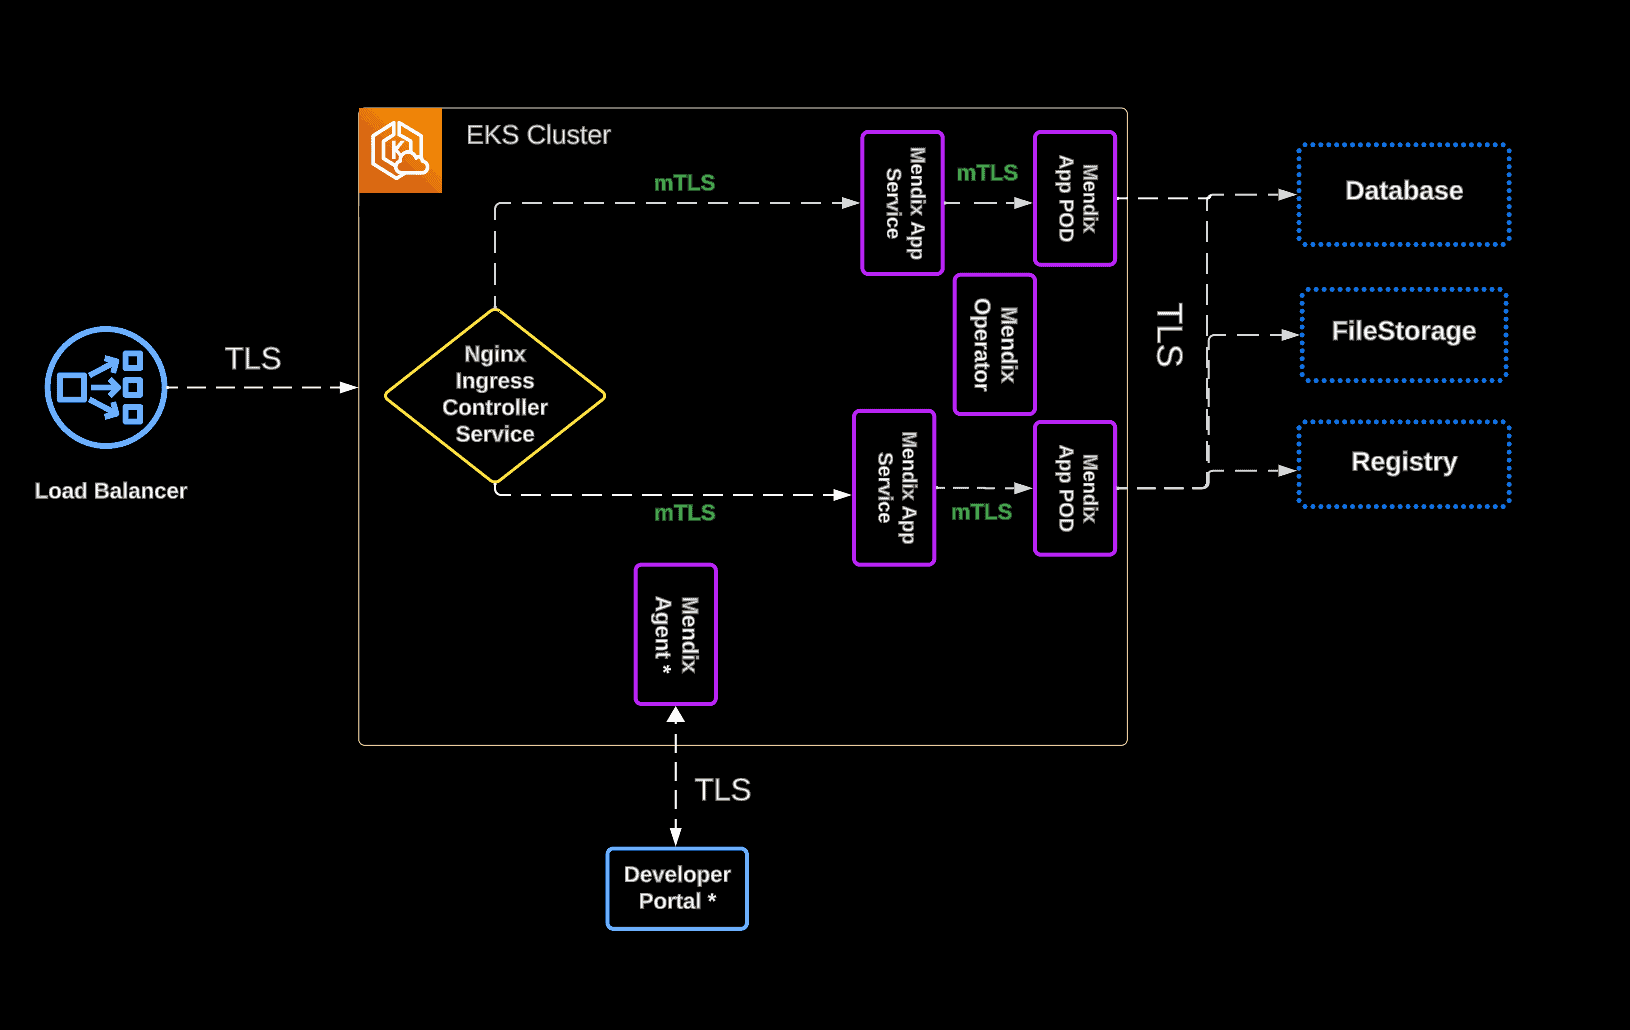
For this demonstration, the official Terraform deployment module for AWS EKS was used to provision the Kubernetes cluster. As a result, the configured infrastructure offers the following key features right from the start:
- A Mendix Operator and Agent configured within a namespace called “mendix.”
- A secure connection established (TLS) between Mendix applications and essential components like the Database, Storage, and Registry.
- A secure connection that is established between the Load Balancer and the Mendix workloads.
So, the goal here is to enable a Service Mesh to guarantee Zero Trust Networking: All pods will communicate to all internal Kubernetes services in a secured way with mutual TLS.
Anything else? Yeah, we will include the Ingress controller in the “mesh” as well to secure all the external traffic being routed to the Pods.
Sounds exciting?
Maybe confusing?
Perhaps a few diagrams would help:
This is where we are now…
Note: The Mendix Agent and Developer Portal are only applicable to Connected Mode
…and this is our desired end state:
From version 2.5 onwards, Mendix Operator is compatible with Istio and Linkerd, for both Connected and Standalone offerings.
To keep this simple, I will explore and enable only Linkerd, but the process for Istio is very similar.
Installing Linkerd
Follow the official documentation to install:
- Linkerd CLI, depending on your operating system.
- Linkerd CRDs
- Linkerd extensions (viz and dashboard are both highly recommended)
Mendix for Private Cloud mesh injection
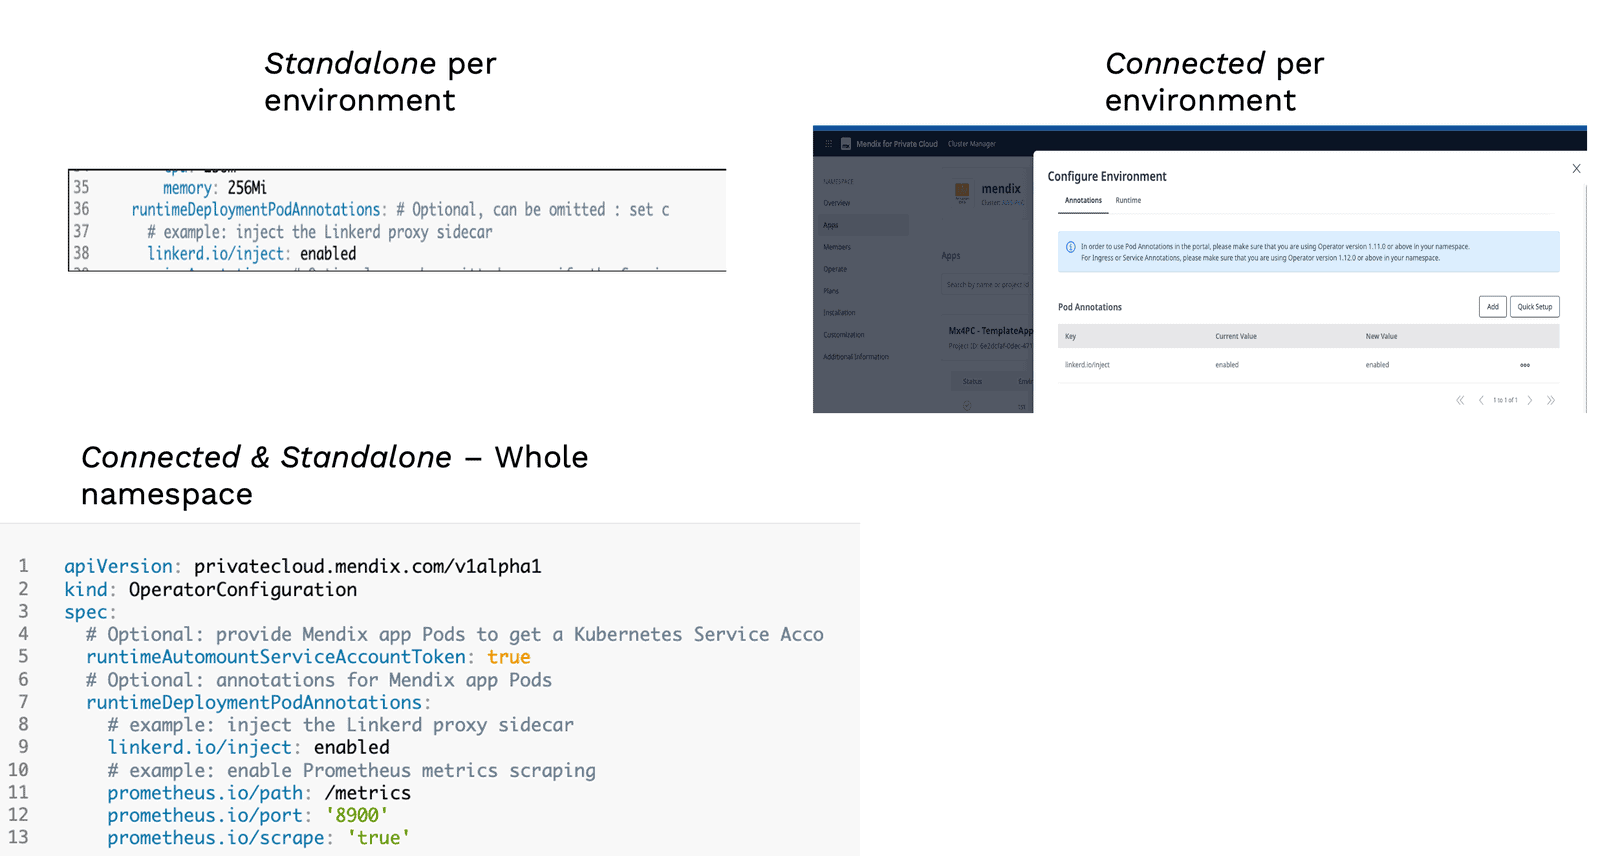
A pretty cool feature in Mendix for Private Cloud is that the mesh “injection” can either be enabled per environment (great for a quick validation test or isolation) or for the whole namespace.
See the image below for a quick reference on how to enable Linkerd, but check out the official documentation for Connected and Standalone for more details.
Enabling Linkerd for one environment
First, Linkerd annotation will be enabled directly from the Developer Portal for an application called terrapp1.
As you can see, once enabled and changes are applied, the Mendix Pod will restart, and Linkerd dashboard detects the annotation and marks the Pod as meshed:

Great, so now our first app has been successfully added to Linkerd and mTLS is already in action.
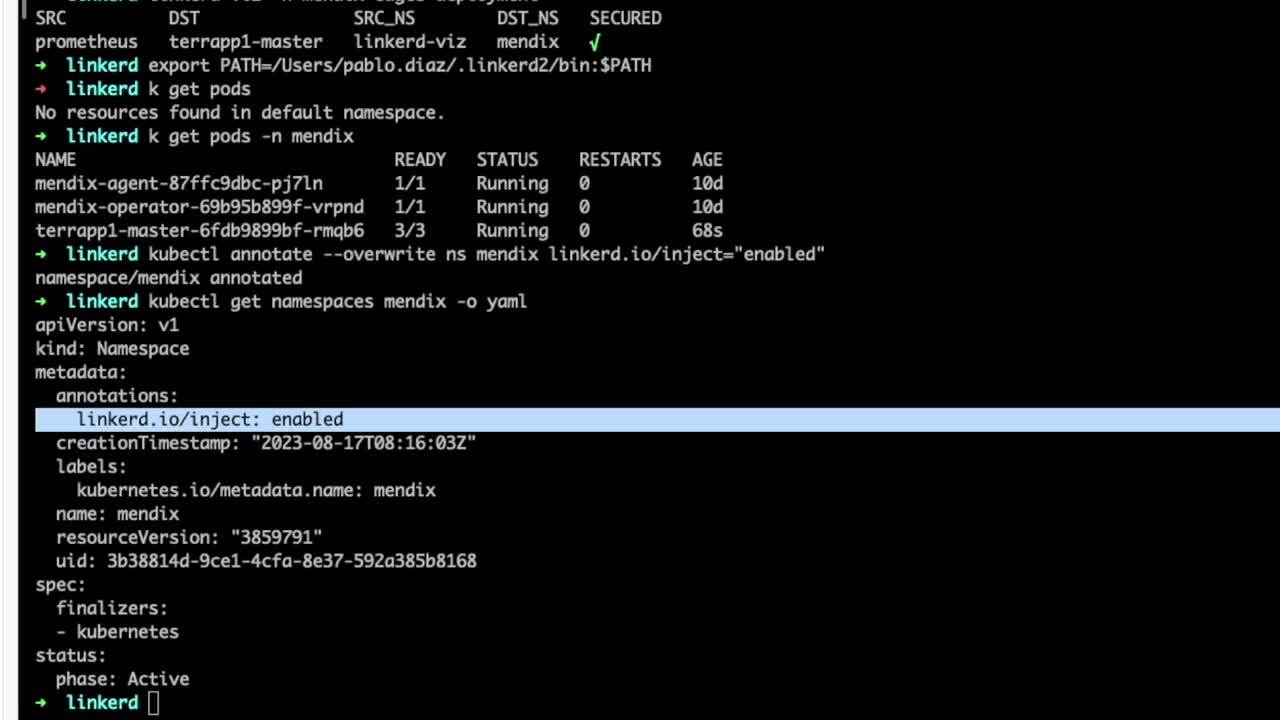
Enabling Linkerd for the whole namespace
Let’s move to the next step, which is adding the whole Mendix namespace to the mesh, securing the connection between Operator, Agent and the application!
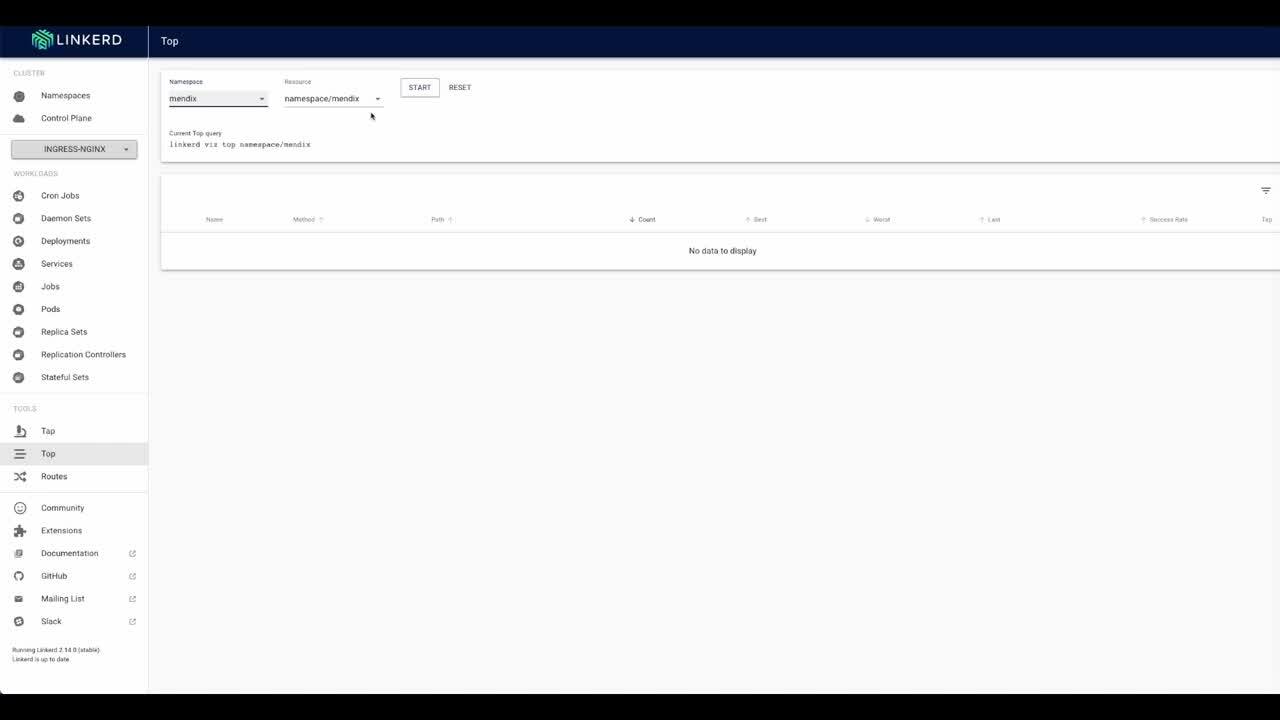
As shown in the below video, we need to:
- Annotate the whole namespace ( called “mendix”) for Linkerd injection
- Confirm that the annotation has been added to the namespace, by looking at the configuration.
Note: If Pods are not automatically added to the mesh, it’s recommended to scale down and up each deployment:
-
- kubectl scale deployment mendix-operator —replicas=0
- kubectl scale deployment mendix-agent —replicas=0
- Repeat the above adding replicas=1
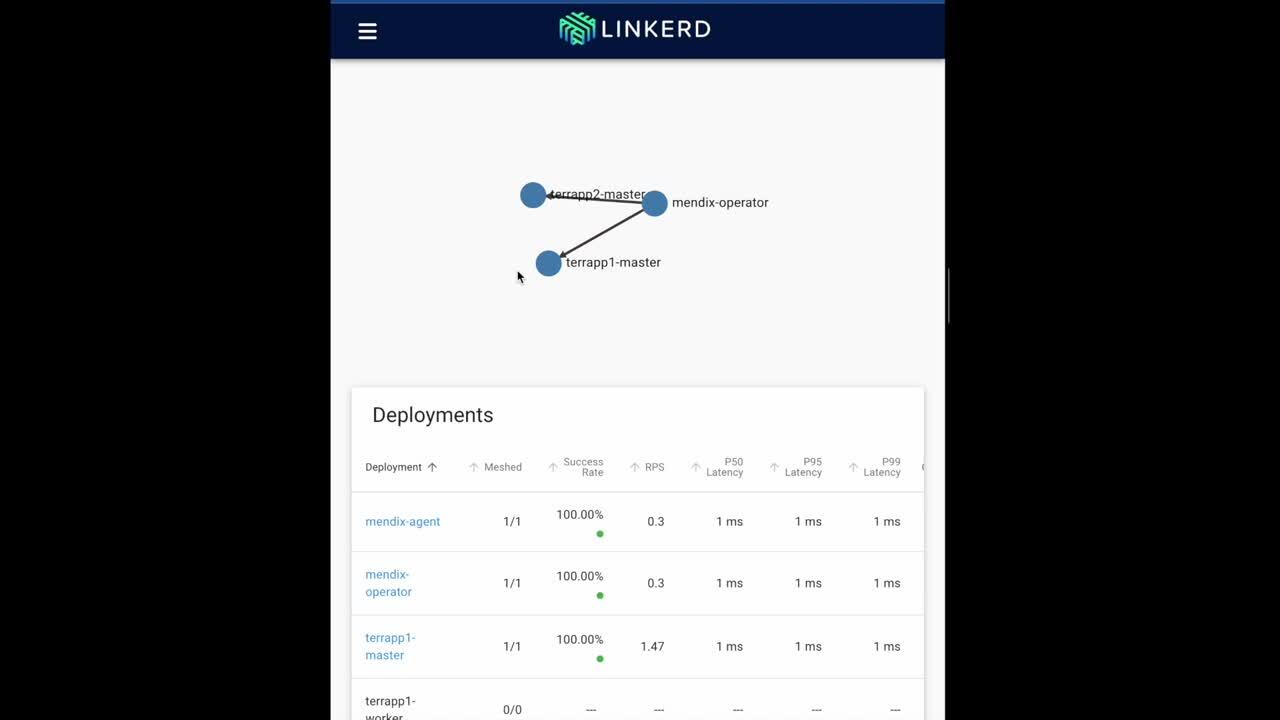
Wohoo! So now we are getting closer to the zero trust networking goal. Let’s deploy a new application from the Developer Portal and see how it’s automatically added to the Mesh!
Adding NGINX ingress to the mesh
In most customer setups, TLS termination is configured in the ingress controller that lives within the Kubernetes cluster. In simple terms, this means that external inbound traffic arrives to the Ingress Service encrypted (TLS), and it’s served to the Pod unencrypted (plain http).
Our last step here is to also ensure mTLS between the ingress controller and all the services within the Mendix namespace. To do that, we need to:
- Add NGINX ingress controller deployment into the mesh. Follow the instructions depending on how you’ve installed NGINX in your cluster (helm or from YAML).
- Make sure you add
thenginx.ingress.kubernetes.io/service-upstreamannotation properly to ensure the controller doesn’t use the Pod endpoints, and instead uses the service’s Cluster IP and port.
Now it’s time to confirm that once Nginx is added to the mesh, all traffic to the pods is using mTLS:
NGINX is meshed and securely sending traffic to Mendix Application
Conclusion
The importance of a robust service mesh architecture cannot be overstated and its ability to provide granular visibility, secure communication, and policy enforcement within a microservices environment is paramount for safeguarding data and systems.
Leveraging Mendix for Private Cloud’s seamless integration with Istio and Linkerd allows organizations to achieve a harmonious blend of agility and security. Mendix’s rapid development capabilities complement the stringent security measures of a service mesh, enabling enterprises to innovate without compromising their defense posture.
In this era of ever-evolving threats, the fusion of service mesh and Mendix for Private Cloud exemplifies a forward-looking approach to information security.
Happy meshing!