Mendix, AWS, and the Internet of Things
You might have seen the recent announcement of our expanded strategic relationship with AWS and recently, Mendix and AWS have been working together to create a range of demonstrators and templates. We wanted to show how these great platforms can work together, like our accelerators for financial services and insurance.
One of the things we are keen to demonstrate to you is the integration between Mendix and AWS. This blog describes the demonstration we have built and how we did it.
This post is written in conjunction with Simon Black (Senior Manager of Evangelism and Technical Enablement), Alistair Crawford (Solutions Evangelist), and Adrian Preston (Solutions Evangelist).
The scenario
As discussed in our Cold Chain Logistics blog, we were given the scenario of cold chain logistics and how to track the transport of temperature-controlled goods. To achieve this, we used Mendix to create a web application frontend supported by AWS services. Using these tools, we wanted to build:
- A web application for office-based users
- A mobile version for field-based staff
- The supporting AWS cloud architecture to process and provide the data
Building the demo part 1: IoT and AWS
To simplify the demonstration of real-life data (and to remove the need for a physical truck with sensors) we decided to build a data simulator which we would then use to feed data into the AWS services.
To handle the IoT data in AWS we chose to use AWS Timestream so that’s where we started. We created a data feed from Timestream that represented the sensor data for the temperature and humidity. We would also need the journey data and data from the final IoT devices; the locks, and the backup compressor.
The locks are a simple Boolean value to store whether they’re engaged or not. The backup compressor is also an on or off Boolean value but it would be fed back into the simulator for the Timestream data so the temperature data would trend downwards when the compressor was turned on.
One additional AWS feature we decided to implement was image recognition. In the scenario we were given the trucks would be transporting fresh produce, in this case fruit, and it needed to be inspected upon delivery. Once the delivery was complete and the person inspecting the goods at the other end took a picture, we could run it through AWS Rekognition and detect whether the product is good or bad.
Here is a brief overview of how each of these data sets and functions was created in AWS.
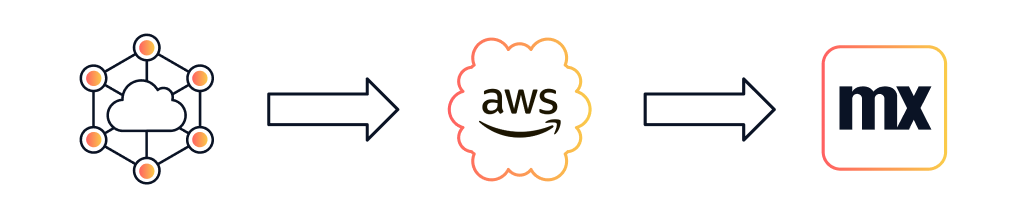
Setting up AWS IoT
To receive data from the devices we leveraged AWS IoT Core. We first needed to setup our devices also known in IoT as ‘Things’. We setup a “Thing” for our vehicle data from the Truck and another Thing for each container in the truck. This will help us track the vehicle and monitor the condition of the containers.
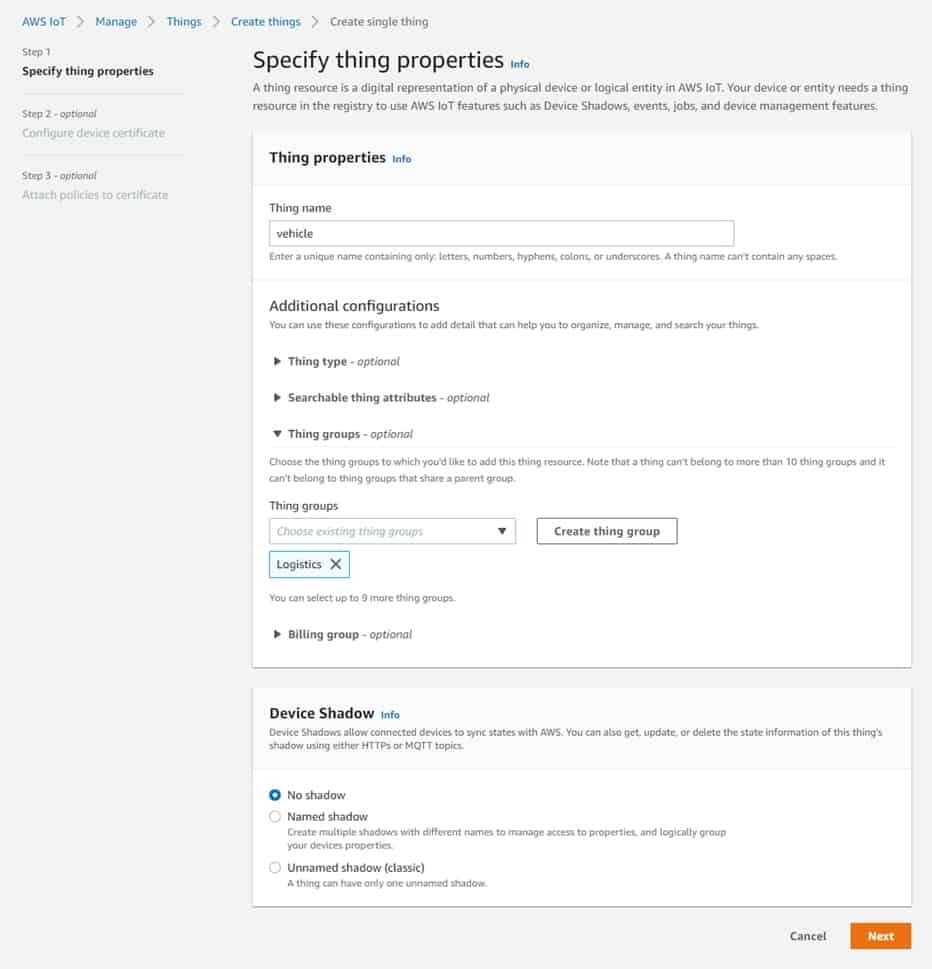
Once these are setup with the correct security policies, we automatically have access to the MQTT Publish & Subscribe mechanisms used to send and receive data.
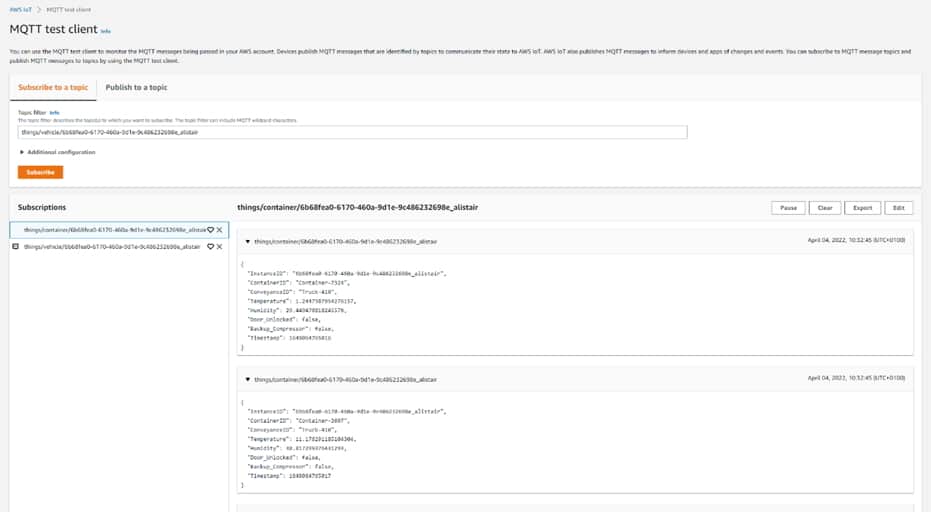
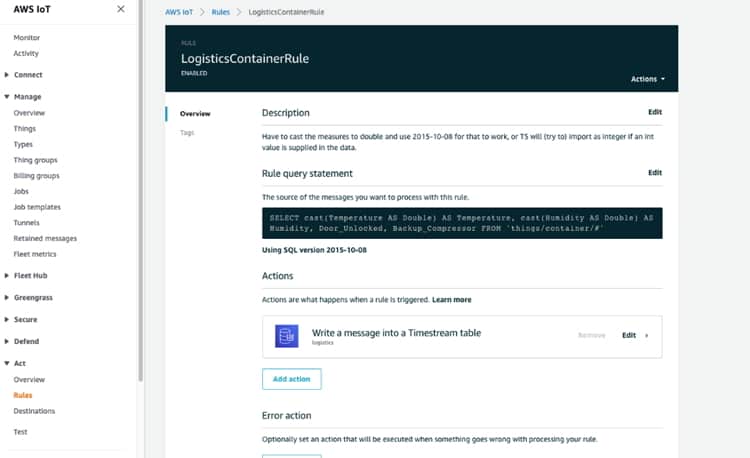
Lastly, we can configure a Rule in AWS IoT Core which will store the incoming data from our vehicles and containers inside a TimestreamDB for further use.
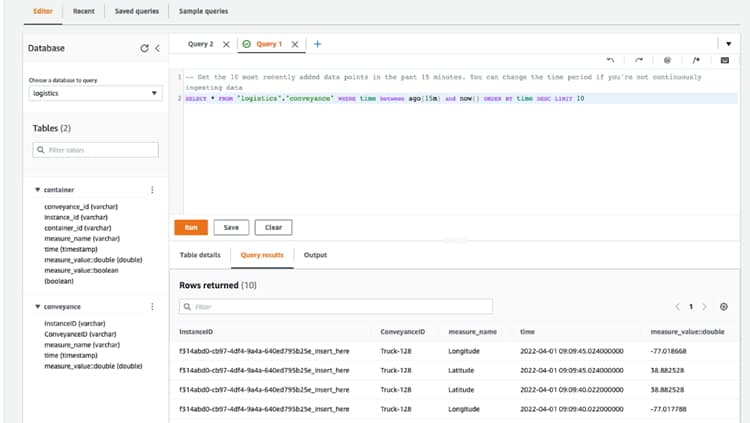
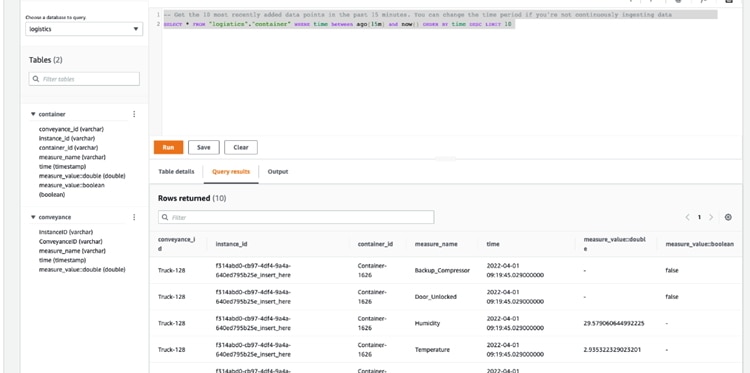
Setting up Amazon Timestream Database
Amazon Timestream Database is straightforward to set up. We created a database called ‘logistics’ and within that a table called ‘container’ to hold the container sensor data and a table called ‘conveyance’ to receive the truck data.
So that there is some historic data available in the Amazon Timestream Database soon after the app is started, the app initialises “Things” by adding a set of randomly generated records to the database. This is done using a java action which interfaces with the AWS Java SDK to access the Timestream record writing function.
Subsequently new data is added to the database tables by Rules in the AWS IoT Core. Rules take selected messages that have been published by the sensor/simulator through the AWS IoT Core and writes them into the specified database table.
Once we had the AWS Timestream Database feed up and running, we needed to create some journey data.
Generating journey data
In a real scenario with journey and device tracking, our truck device would typically have a GPS module to send location, heading and speed data. This would give us the latitude, longitude, MPH (or KPH) and acceleration data.
For our simulation of the journey, we made use of some existing simulation routes that are available to the public thanks to AWS. They have a great set of static routes that have origin, destination and then an array of stages or points that fall between them in a realistic pattern. This is all in a JSON format and easily digestible.
For most of the other sensor data, we made use of some simple math to generate random values that fall within our thresholds – for example temperature and humidity.
Having generated the journey data so we could simulate tracking the truck, we then needed to implement the image recognition functions and build the data set.
AWS Rekognition
To make the process of inspecting the quality of products (in our case fruit), simpler we decided to implement some AI. AWS has a range of Machine Learning and AI solutions designed for several types of scenarios. For image and video recognition AWS provides AWS Rekognition. Rekognition provides a range of pre-trained machine learning models, as well as allowing you to train your own. For our use-case we wanted to allow the user to take a photo of some fruit and inspect the quality of it.
First, we needed to train our Rekognition Model to understand what good and bad fruit looks like. To build an effective model it’s important that you have a good dataset. The more images we’re able to provide for training the model, the better results we’ll get. Luckily for us there were many free open datasets to help accelerate our development. We found this dataset which had thousands of images representing rotten and fresh fruit:
https://www.kaggle.com/datasets/sriramr/fruits-fresh-and-rotten-for-classification
We took this dataset and uploaded it to AWS S3, so that AWS Rekognition could use these images to train and test itself. Building a model to detect custom labels is quick and easy to do. In 6 steps you can build a model detecting labels:
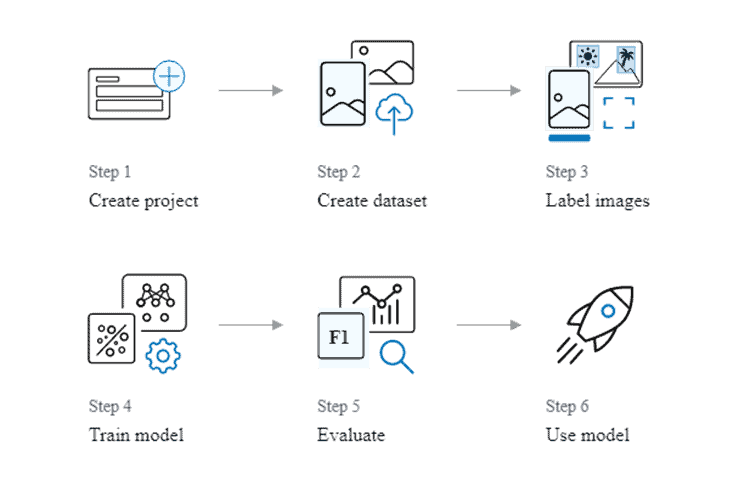
When training the dataset, AWS Rekognition can auto label your images based on the folder names used in S3 or you can add labels manually. Because of the large dataset we decided to use the auto label assignment. This meant that when building the dataset, we didn’t have to manually add labels to every image. This saved us a lot of time and effort. When building a dataset, it’s important to provide both a training dataset and a testing dataset. This enables AWS Rekognition to train itself and to then test how accurate the model is that it’s built by using the training set.

Once the model has been trained using the datasets, which can take around 30 minutes, the model needs to be started. Once trained and the model is started it’s ready to accept request via the AWS API, details of which can be found later on in this post, and detect labels based on an image input.
Building the demo part 2: Mendix
To start the build we mapped out some wireframes and process flows and our UX designer came up with a Figma design to guid the look and feel of the application.
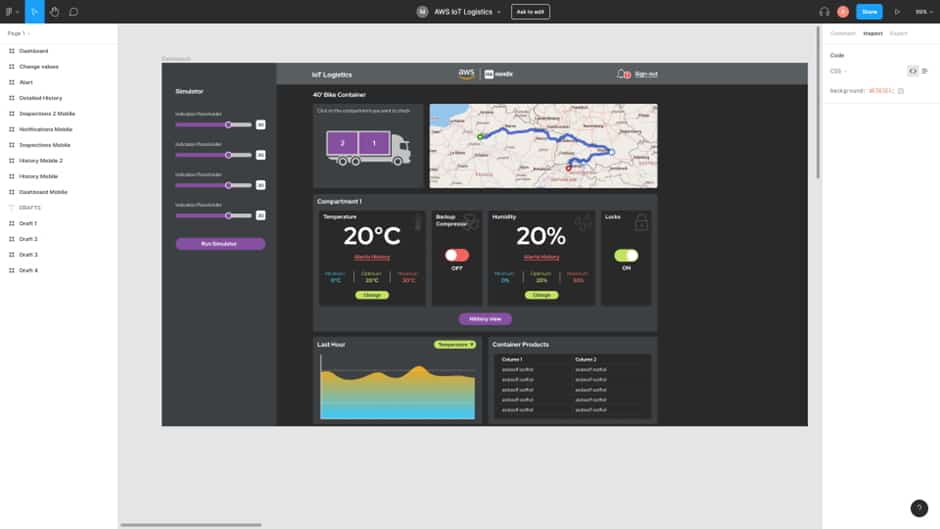
Now we knew roughly what it would eventually look like, we could start putting together the various pieces.
- Integrations
- Domain models
- Applications
The build started with the admin tools to support the system and a way to prepopulate the system with data. We created the domain model entities to store the information we needed for the trucks, their containers, the drivers, and the goods that would be transported. Then we created routines to prepopulate this with sample data for the demonstration and to make it easy for other people to use it in the future.
The trucks were then linked to journey data and the containers were hooked up to the Timestream data source.
| Integrating Mendix with AWS Timestream | |
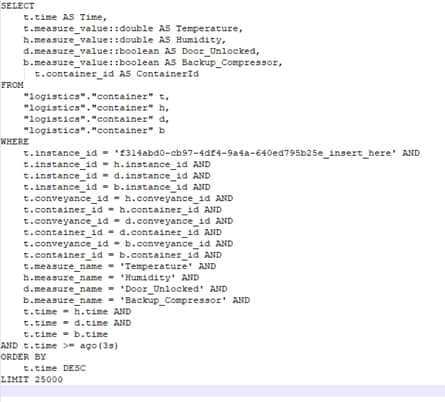 |
When the Logistics app needs to retrieve the historic IoT data from Timestream, this is done by setting up a SELECT statement and running that through the Timestream query java action. This is a java action that was built to use the AWS java SDK to execute queries against the Timestream database and return the results. |
To support the data generation and to check it was all working, we created a few admin pages to preview, modify and export the data. The export is particularly useful as the JSON files we created could then be used as the data source for pre-population within the demo application.
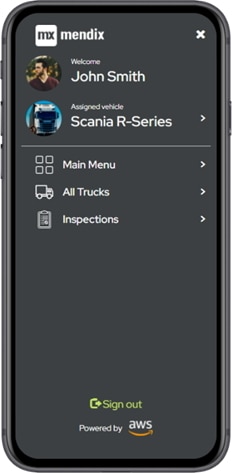
Next, we presented on an overview page the truck and driver information we’d built. This gives a back-office user the chance to pick which vehicle they want to look at. Only one vehicle was set in motion for the demo, but had there been several, it would have been easy to choose.

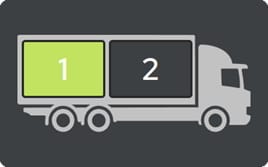
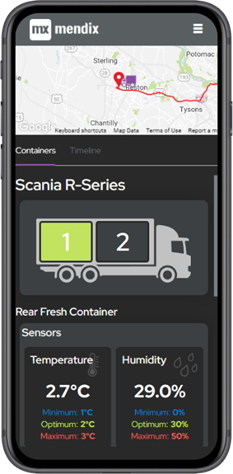
Clicking into a truck gives you a view of that truck’s details and current status. This is where the simulated information comes in. Working from the top to the bottom we started with the container selector, as every truck in our system has two containers, and this controls the view of the monitors in the section below.
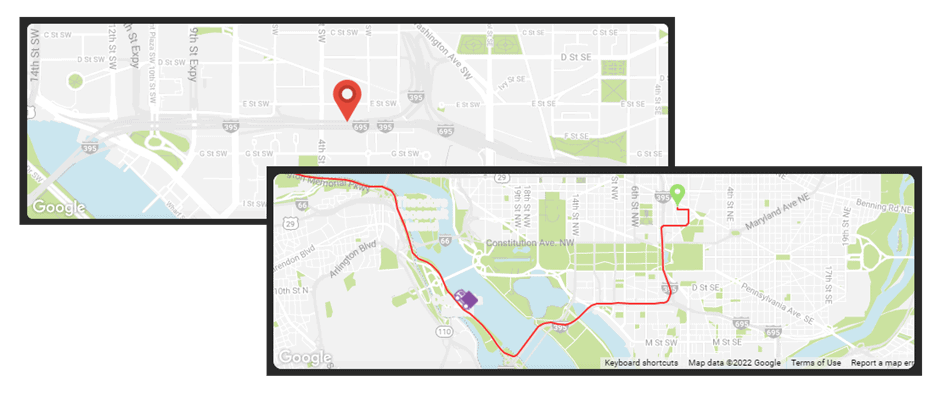
The map in the top right came next. Mendix’s default widget is perfect for showing locations but at the time didn’t have a built-in option for drawing the route line or easily showing the moving truck. A quick scout on the marketplace didn’t turn up anything that quite did what we wanted either, so we created our own pluggable widget using React and JavaScript. This new widget shows the route line, the truck moving along the line and the direction in which it’s heading.
The bottom section shows updates to the temperature and humidity within the selected container and the products they are transporting. Also, the toggles for the back-up compressor and the locks. All this needed hooking up to our Timestream data.
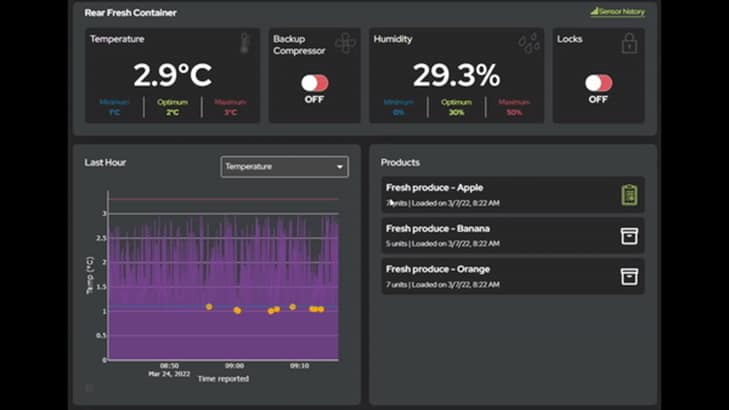
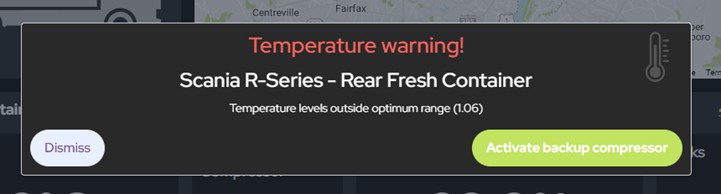
The data is then periodically refreshed to provide up to date information. Any alerts triggered by the temperature or humidity breaching threshold are passed to the client via a web socket for an almost instant update. We extended this feature with Amazon SNS to offer SMS and email notifications too.
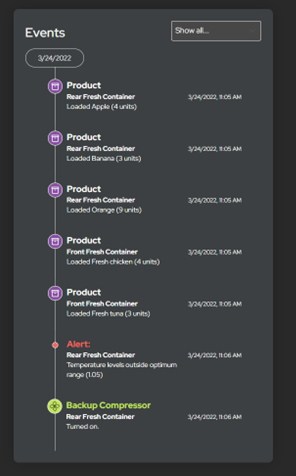
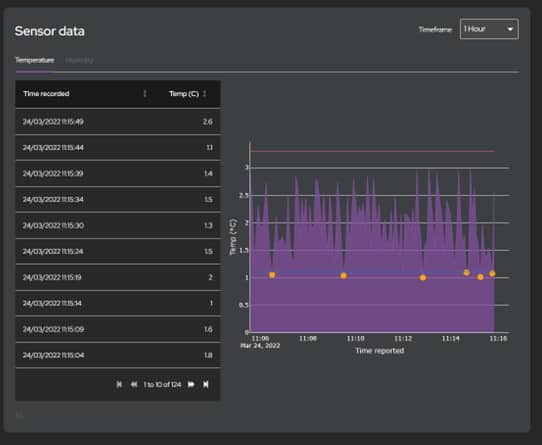
All actions are logged and presented in a time line showing the key events in the truck’s journey, from alerts to when the doors are locked, through to when they are unlocked. All the sensor data is also presented in a detailed view.
The final piece of the puzzle is the mobile application for field based users. For this demo we decided to use a responsive web application, rather than native mobile, so a lot of the design was re-usable between the back office system and the mobile version.
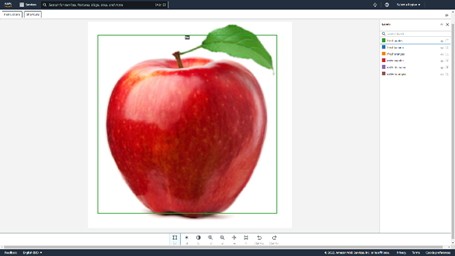
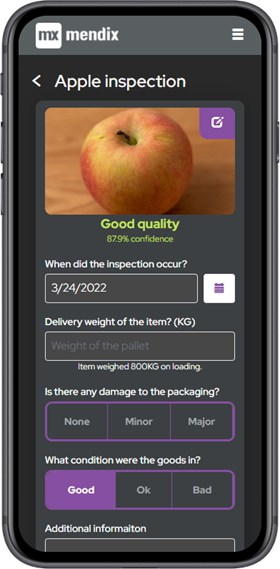
The last thing to implement was the inspection form and the Rekognition API. The form is simple enough; a picture of the goods, the date it arrived and some assessment of its condition. Once the picture is taken it’s submitted to the Rekognition API, which we trained to recognise good and bad apples based on a large sample of images. It returns a quality assessment of good or bad and how confident it is in the result.
Integrating Mendix with AWS Rekognition
It’s easy to integrate Mendix with AWS Rekognition. AWS often provides several ways of integrating into their platform. You can either use the SDK using the language of your choice or choose to use the underlying API. With Mendix we had two options: either use the AWS Java SDK or integrate to the APIs using the Mendix REST Microflow actions. We chose to go down the REST route, to minimize our Java dependencies and use as much native Mendix as possible (Mendix being by far the simplest and speediest route as integrating with a REST API is a straightforward process as opposed to integrating with an SDK with which we are unfamiliar.)
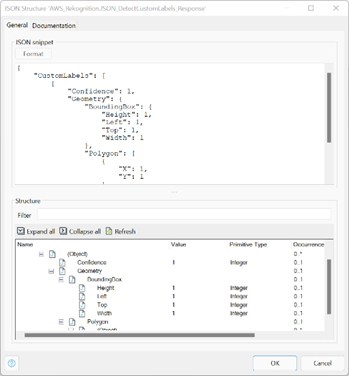
We first focussed on implementing the main activity, which was to detect the custom labels. Using this API, we were able to build the mapping in Mendix: https://docs.aws.amazon.com/rekognition/latest/APIReference/API_DetectCustomLabels.html
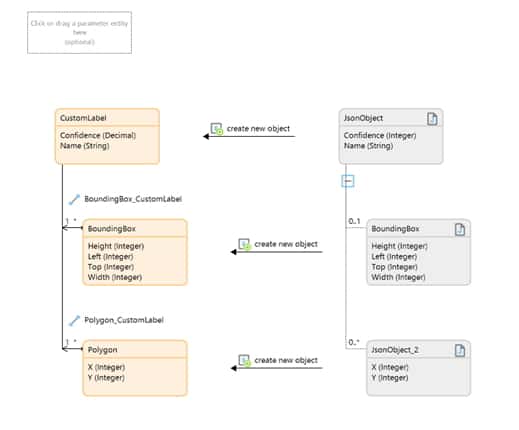
First, we built a JSON snippet for the response and an import mapping to process the response.
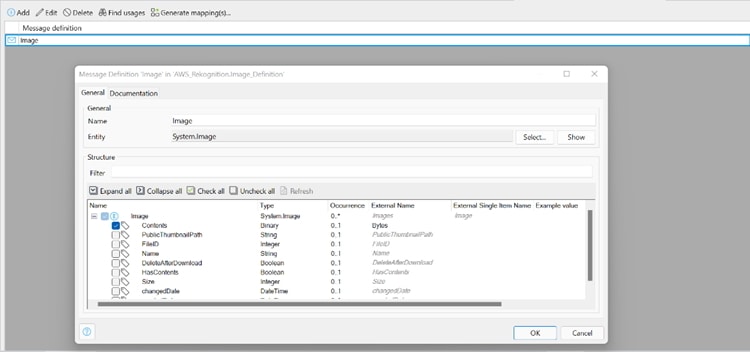
Next, we needed a way to send the image to AWS in a “Bytes” attribute as a Base64 encoded string. To do this we created a message definition for the Mendix System.Image, selected the Contents attribute and changed the external name to: “Bytes”.
Then we used an export mapping and the above message definition, allowing us to convert the image into the right JSON format.
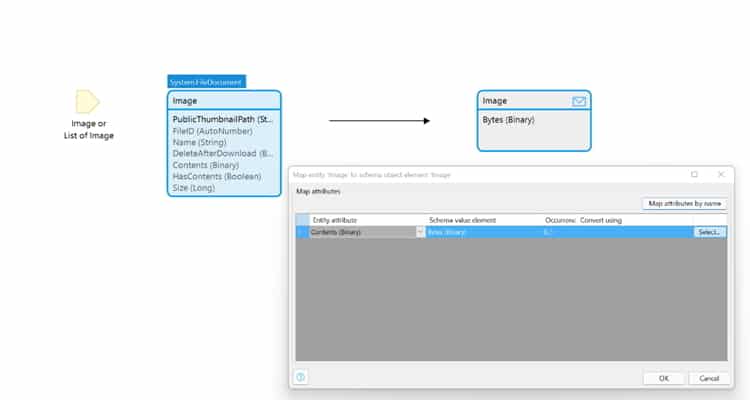
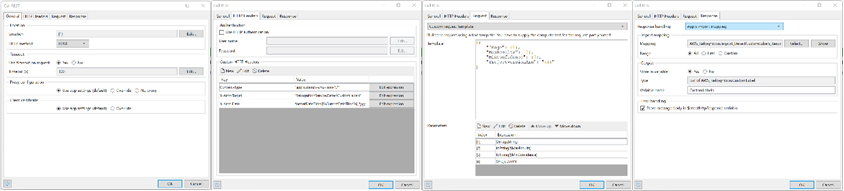
Finally, a Microflow call is required to send the image to AWS recognition and return the labels detected by the Machine Learning Model. Inside this microflow call we have a series of parameters required by AWS Rekognition. First the Microflow exports the image to a JSON object string with one attribute called “Bytes”. This is then used along with the other parameters inside the payload for the REST action.
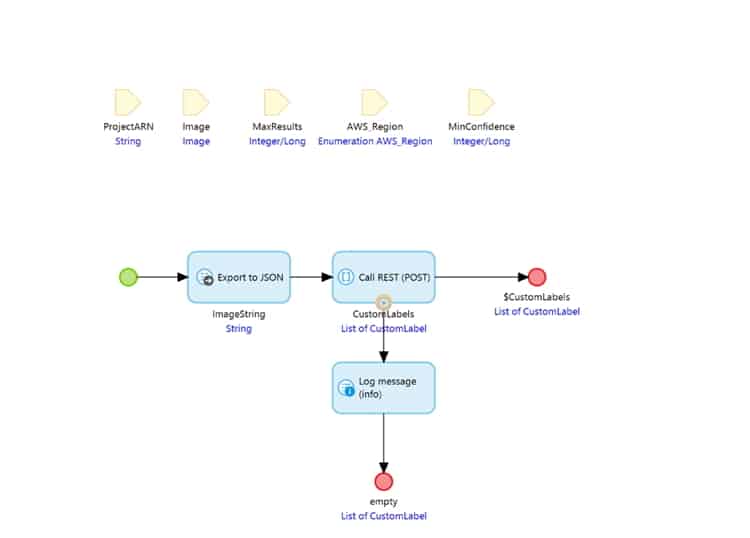
Inside the REST action we define the location by using the AWS region passed in the parameter. Add HTTP headers that are required by the API. Add the necessary request payload, and the Response mapping.
The final piece of magic we built for our demonstrator is a little bit more technical. under the covers. The AWS APIs require every API call to be signed using a process called Sig4. It uses the AccessKey and SecretKey to sign the HTTP request before it’s sent to ensure that it’s authentic. On the After Startup Microflow we added a Java Action to intercept all calls to AWS Rekognition and add the additional required Sig4 headers before sending.
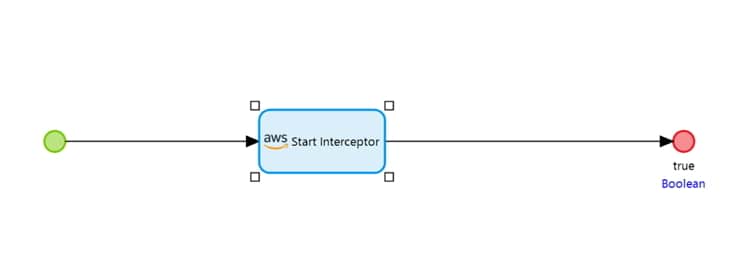
All the integration to AWS Rekognition and the Sig4 Interceptor will be made available on the Mendix Marketplace shortly. This further simplifies integration to AWS Rekognition, allowing you to use AWS Rekognition as demonstrated in the video.
Wrapping it up
Our demo applications show how a product can be tracked and monitored during transport from source to store. We used AWS IoT Core to monitor temperature, humidity, and location with AWS Timestream services and analysed images with Rekognition. Then we used Mendix to rapidly build a responsive front end to connect to those services and offer up the data, in real time, to multiple device types.
If you’d like to learn more about how you can use Mendix and AWS, register for our webinar on June 30th where we’ll showcase the possibilities of the Mendix platform powered by AWS services. We have prepared a demo in which you’ll see a smart app being created to improve the logistics of transporting perishable goods. Sign up here!