Working with Inheritance – saving you time and sanity!
Have you ever modeled several entities and realized that they are very similar, with many shared attributes? Using inheritance can save you time and make your project more maintainable! In this post, I’ll show you what inheritance is and how to work with it most effectively.
Basic Understanding
Let’s start with the newly created domain model shown below. As you can see, there are many attributes shared between entities:
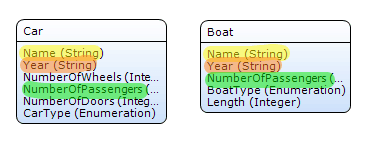
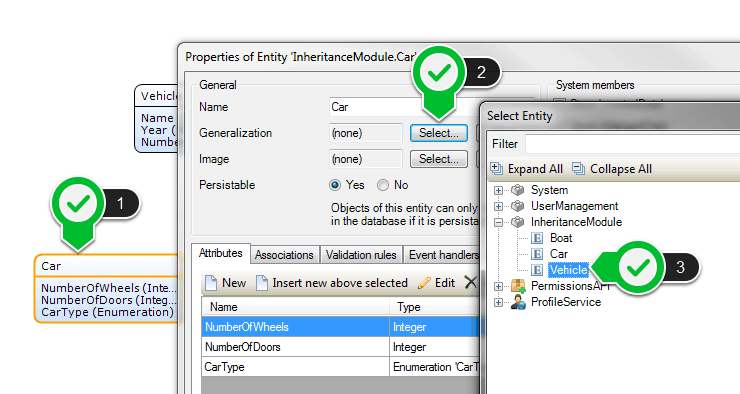
Here I duplicate three attributes – Name, Year, and NumberOfPassengers. Since these three attributes are common between the Car and Boat entities, I can move them to a new entity, which I’ll call Vehicle. I’ll use this new entity as my ‘generalized’ entity. After the Vehicle entity is created, it’s easy to set the generalization by opening the Car and Boat entities and selecting the Vehicle as my generalization.
Now that I’ve set this relationship, my Car and Boat entities (the ‘specialized’ entities) have access to all of the Vehicle attributes! This allows me to set the Name of my Car and Boat and manage it in one place. But it’s important to note that this doesn’t mean my Vehicle has access to the attributes of my Boat and Car. It’s a one way relationship.
Creating Specialized Entities
In the previous section, I set the domain model, creating the Vehicle entity and setting the inheritance relationship. Now, I need to allow the entities to be created. There are two common ways to do this:
- Create one button for every specialization of Vehicle
- Create one button for the Vehicle where I specify the specialization
The first option is the simplest to implement, but does not offer the best user experience. Here’s the UI for that implementation:
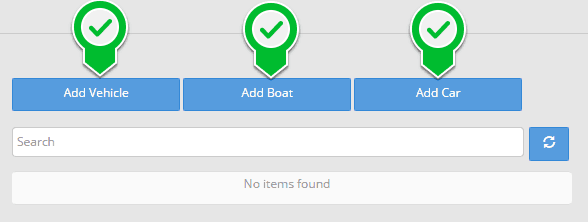
Each of these buttons calls a very similar Microflow that creates the specialized object – either a Vehicle, Car, or Boat (note that I can still create vehicles that are not cars or boats – like a motorcycle).
This method is very simple – but there are a lot of redundant Microflows and buttons. Imagine if you had ten specializations and therefore, ten buttons which called ten different Microflows. This would create a confusing and cluttered page.
This is where option two becomes interesting!
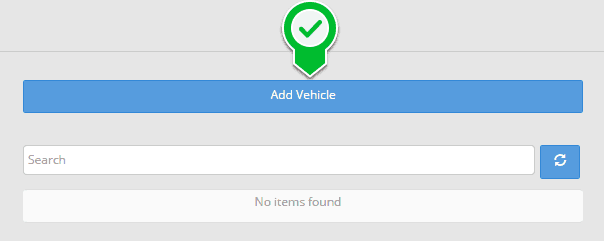
With just one button, this page is much nicer. This button creates the generalized Vehicle entity, and from that page I can select which specialization I want to create.

When the Vehicle Type is selected, hit ‘Next’ and create the specialized entity.
From here, it’s easy to create the proper specialized entity and copy over any relevant details. But make sure to delete the generalized entity (Vehicle) so that you don’t create any duplicate or dirty data. Now that I’ve got my entities created, I need a way to display and manage my vehicles.
Displaying and Managing
One easy way to display and manage a list of vehicles is using a List View. This is particularly useful when using inheritance, as you can set a different template for each specialization.

Using templates allows me to show information specific to a Boat or Car in one place, rather than having to create a complex page. It also allows you to specialize for some types, and not for others. The ‘Default template’ will be used by all specializations that do not have a specific template created.
Now that I can view these items, I will need to create Edit and Delete buttons. While doing so I need to consider the inheritance as well and optimize reusability. Since a Boat is also a Vehicle, my Edit and Delete buttons for Boat can have either a Boat or Vehicle parameter – but only using the Vehicle parameter allows for reuse on all three entities. When editing, I will need to use an Inheritance split.
The green diamond is my inheritance split. After performing my split, I have to cast my Vehicle to the specialized entity, if applicable. Once I have done that, I can start using the entity as its specialized version. For deleting, I do not need to do an inheritance split. Since I am deleting the entity, the specialized version is not relevant – it doesn’t matter if I’m deleting a Boat or a Car, I am simply deleting it.
This is a good lesson to learn, and can be difficult to understand. Unless I need to use the specialized version – i.e. editing fields on the specialized entity or showing a page that requires it – I do not need to perform an inheritance spit.
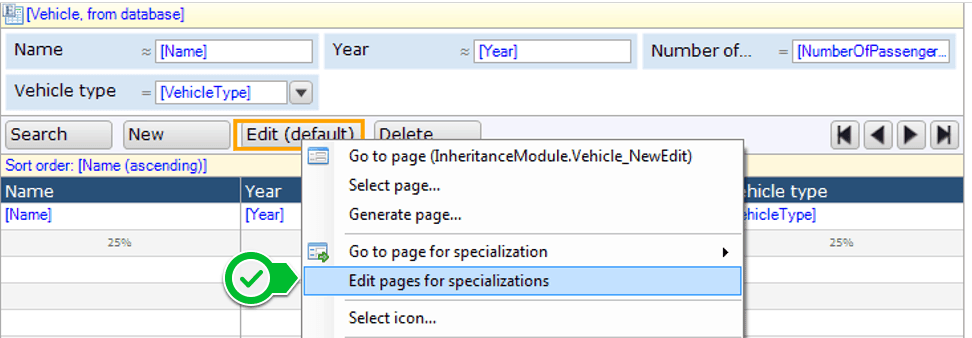
Data Grids and Template Grids natively support the above Edit functionality. Similar to how we set up the templates on the List View, we can select pages for specializations using the default ‘Edit’ button.
In addition to the normal trade-offs of Data Grids, Template Grids, and List Views, I now have inheritance-specific trade-offs. The List View allows for displaying specific data, but I must manage more logic. For the Data Grids and Template Grids, the platform manages some of my logic, but I can only display information that is stored on the generic entity.
Now that I’ve gone over how to create and manage entities using specializations, go out and give it a try! Remember that using inheritance has its pros and cons, so be sure to weigh these out before using it. A couple general rules of thumb:
- Never use more than two layers of inheritance, as it can cause performance issues.
- Only use inheritance in a logical place – I may have a building, car, and person, which all have a Name, Age, and Address field, but this can get confusing if they are taken out into a generalized entity!