Our community is constantly adding cool new widgets to the App Store. If you’re unsure what exists, check out our previous reviews on UI building blocks, the feedback widget, and other top favorites and monthly reviews.
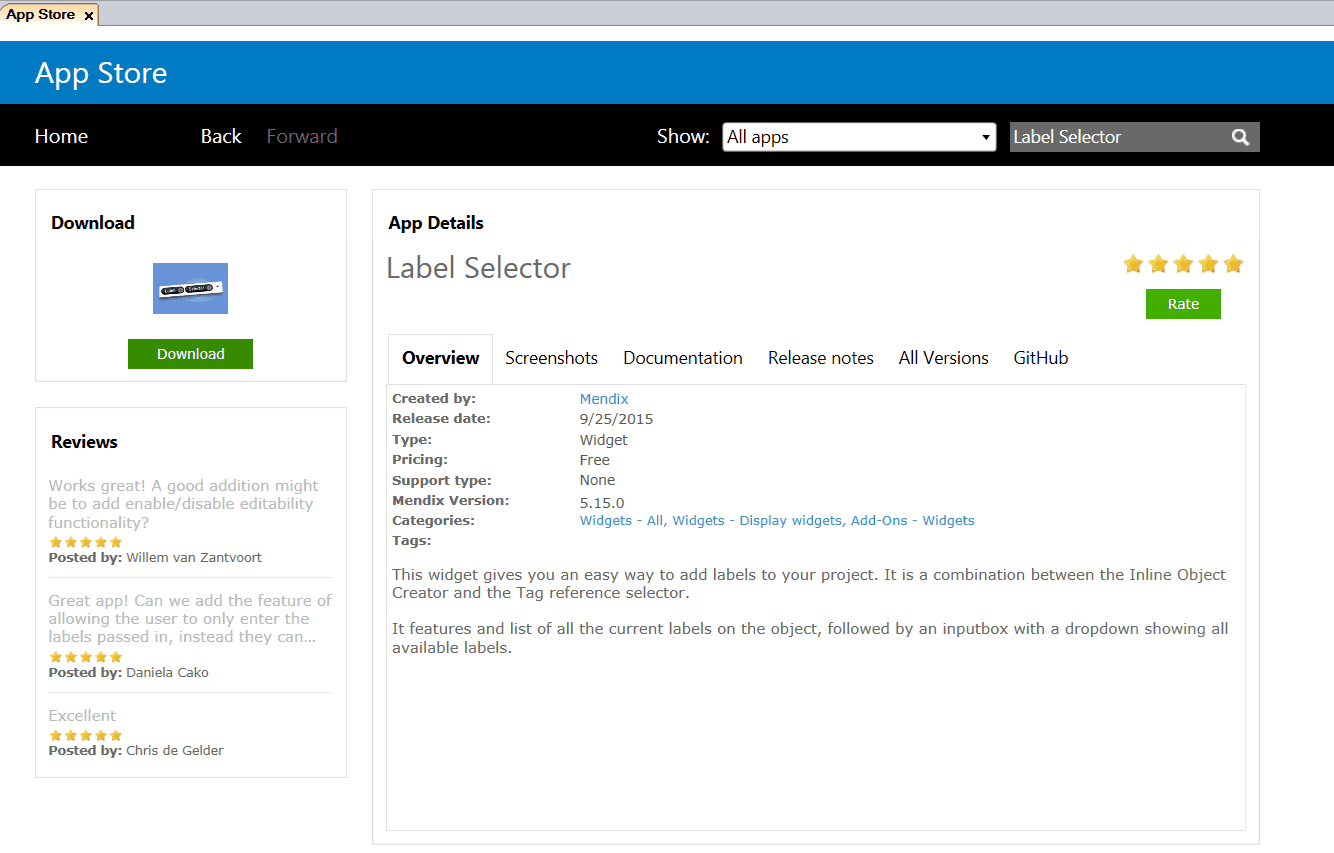
This week, I’m highlighting the Label Selector, a very useful widget that just updated on September 25th. The widget uses the Tag-it library to combine the Inline Object Creator and Tag Reference Selector. You end up with a useful tool that lets you quickly label entities for later reference. I’ll run through how to get the widget, how to configure it in your model, and some helpful use cases to get you tagging faster.
Why use the Label Selector?
Users often want to refer back to information they entered or retrieved at an earlier date. But this can be challenging when the application involves large data sets that require a variety of combination filters to yield your results. With this in mind, it’s helpful to have the ability to tag an entity up front, so you can find your information in a snap.
Setting up the widget
The first step of using any widget is to download it from the App Store. From the in-Modeler App Store, search for Label Selector and select ‘Download’ to automatically import the widget into your project.
Configuring the domain model
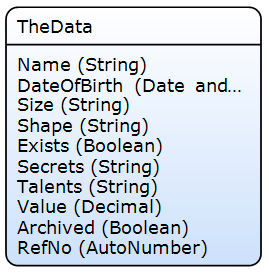
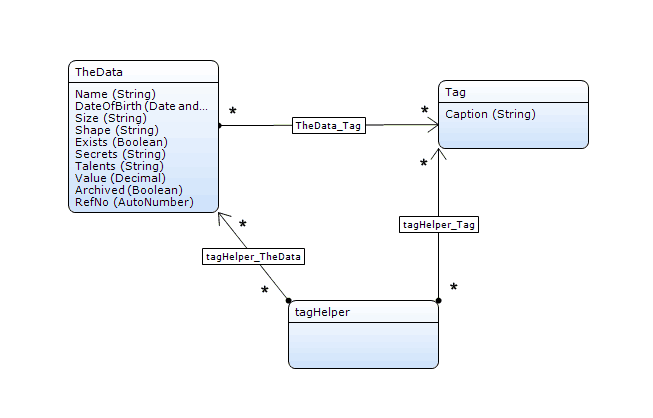
Let’s use the following simple domain model to configure our tags. I have a single entity called TheData with some attributes. The sample application is used by a team that enters a lot of ‘TheData’ records every day. They frequently need to refer back to the existing data.
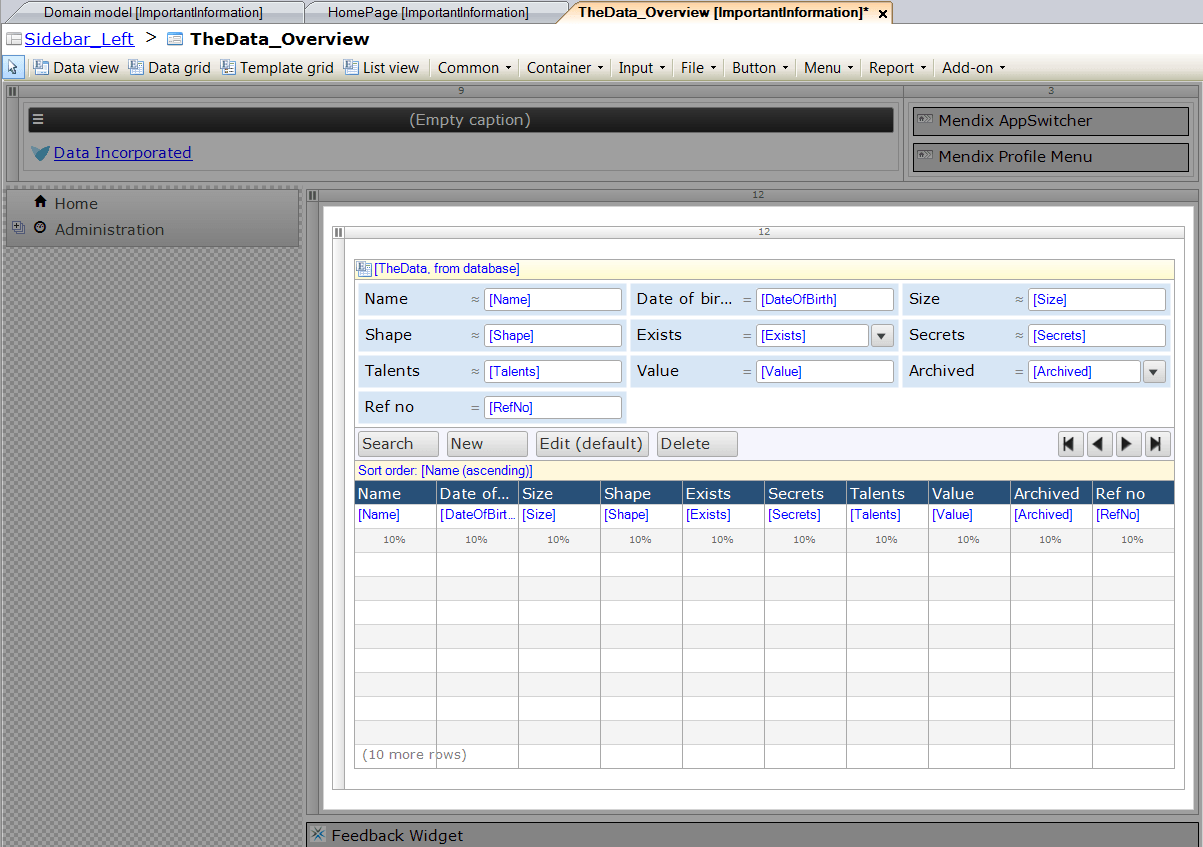
Our application consists of a few pages that let us filter, create, and edit records. We have an overview page and a NewEdit page that lets us edit object details.
Now that we have our basic model, it’s time to integrate the tagging. Before we update our pages, we need to create the entity that represents our Labels. This is added to our domain model and associated with any objects that we want to tag. Note the direction of the association here. In the updated domain model below, the Tag entity will contain the tag in the Caption attribute. I recommend that you store the owner and created date for tags.

Updating the UI
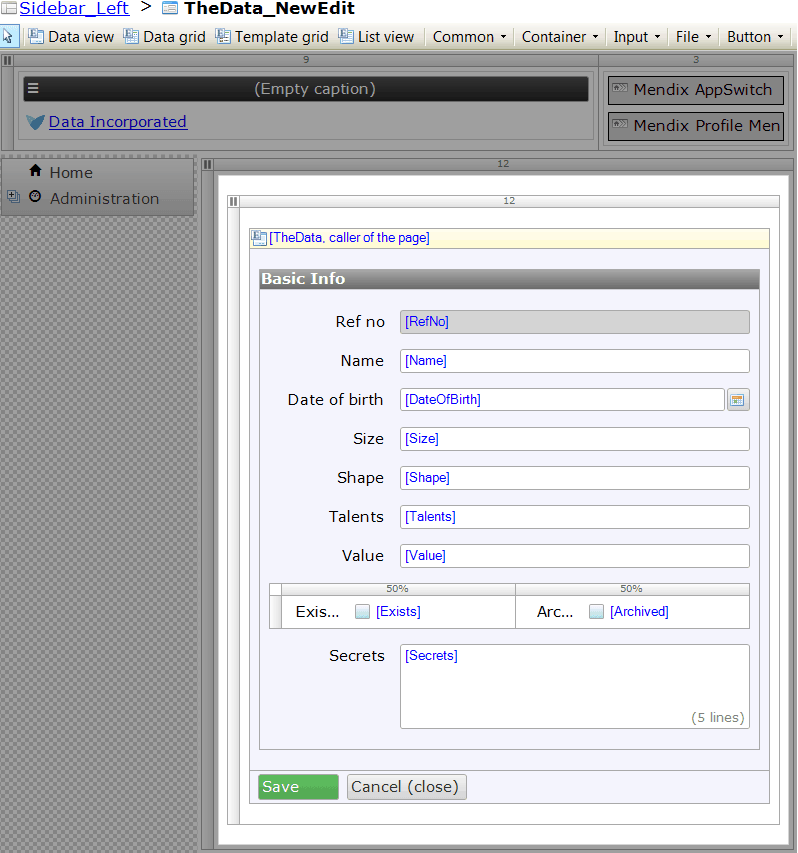
After the domain model is established, we must present users with a UI to create and view tags. The Label Selector package can be dropped onto any page to help create the right interface. We will add this to our Data_NewEdit page and configure it to use the Tag entity as a Label.
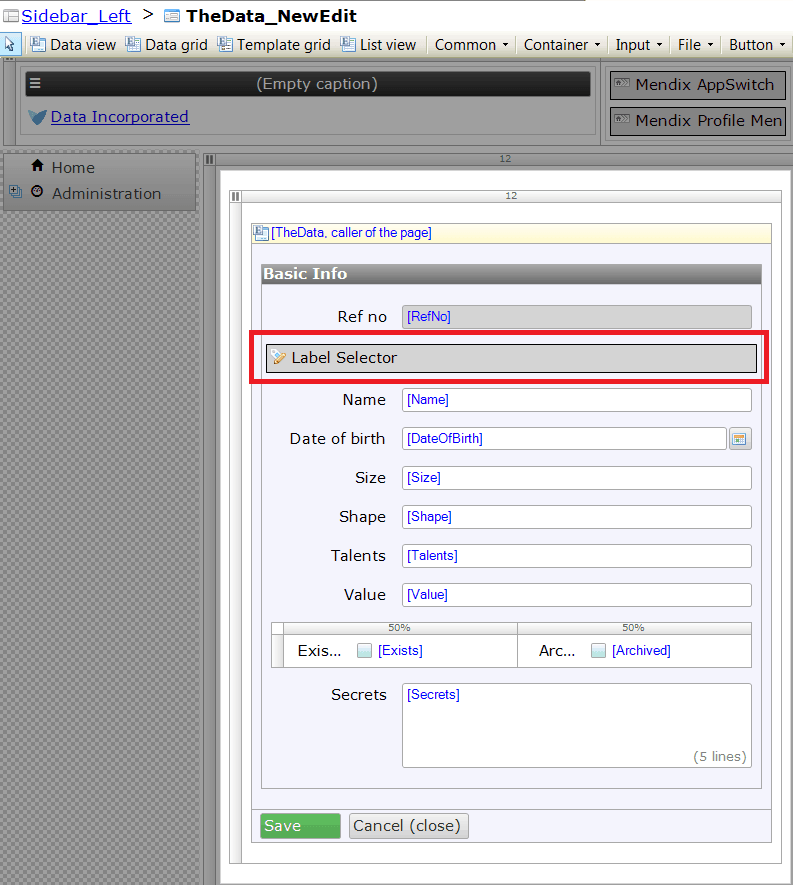

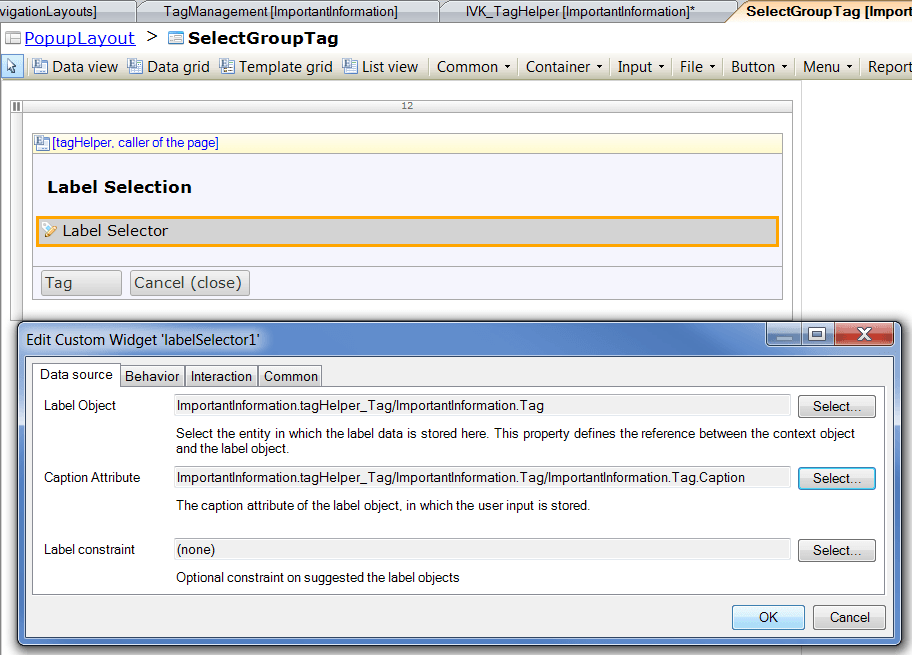
In this configuration window, you have a number of properties available. You can configure whether users create new labels or only use existing options. You can also trigger Microflows after a label has been created. For a full list of the properties and how you can use them, check out the README here.
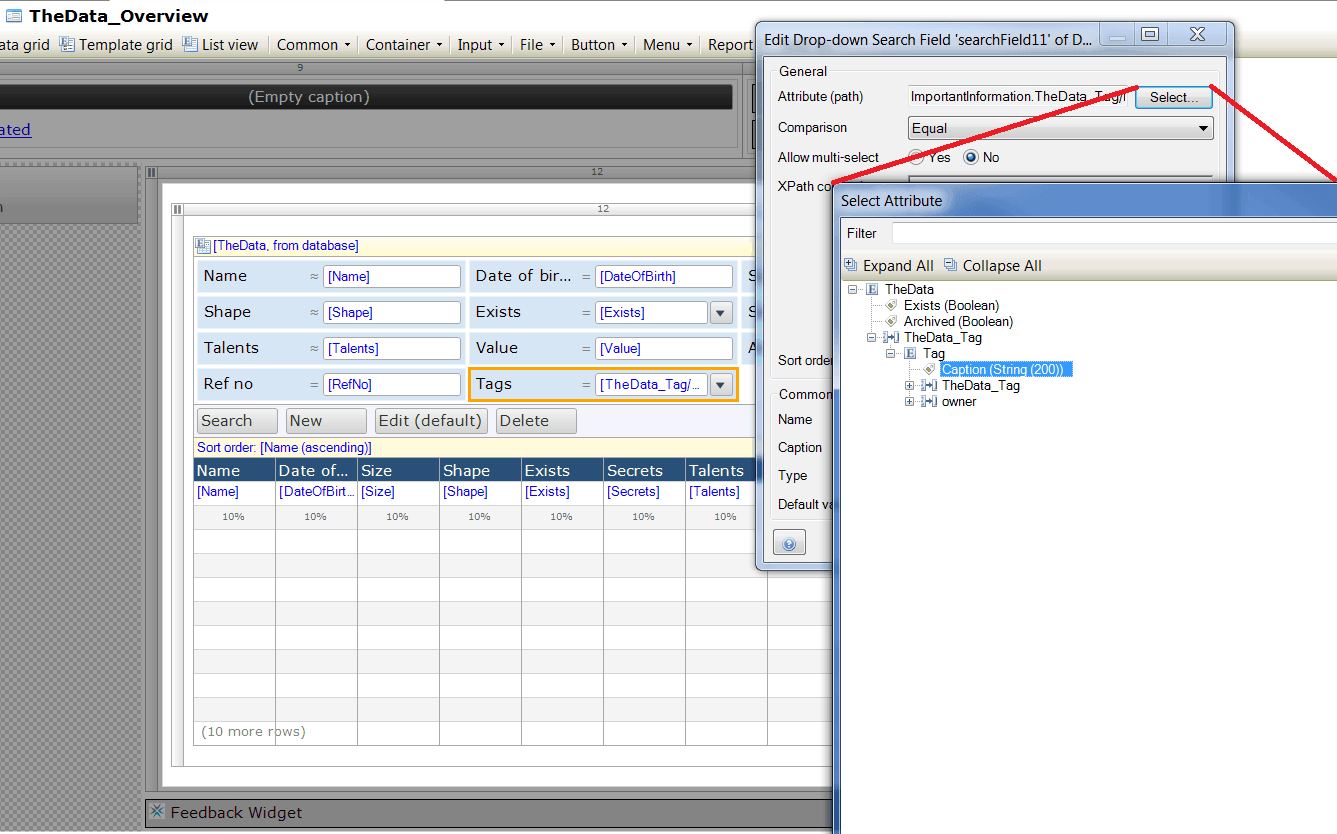
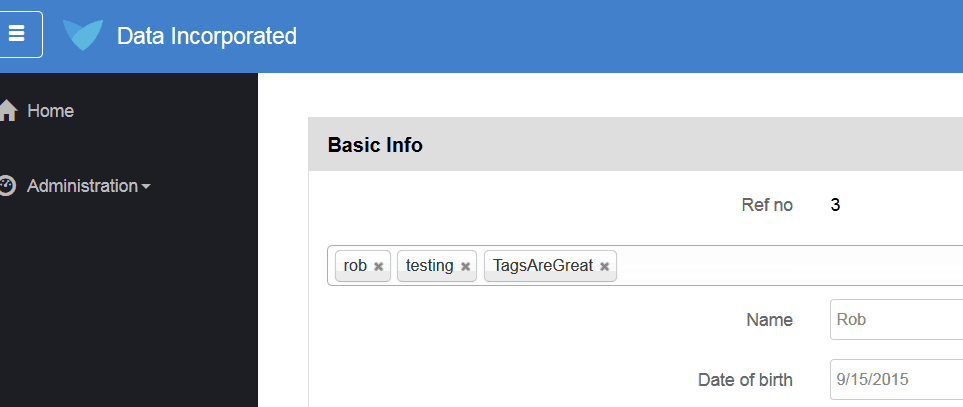
To enable users to search for tagged items, you could add in a filter to the Data_Overview pages as shown. This will allow users to quickly find anything they have tagged.
Extending your application with label sets
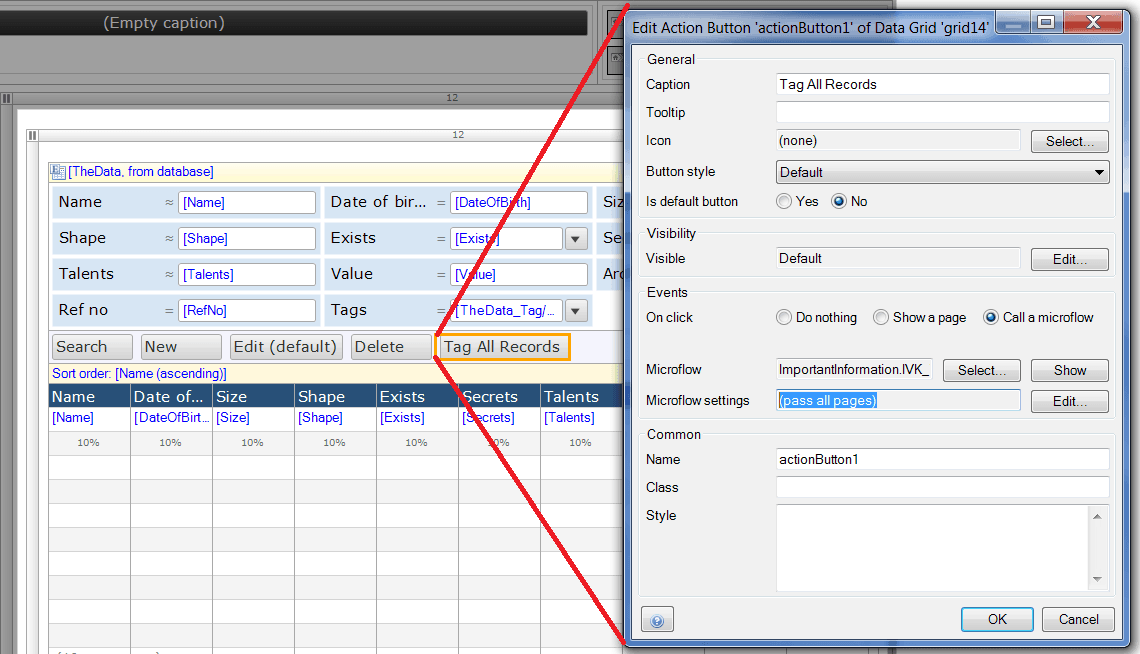
Users commonly find a collection of records through a series of filters and then use the label selector to make this collection a ‘Set.’ Instead of re-creating the complete set of filters that led to the collection, users simply need to filter on the created tag. To facilitate this, we need to provide a Microflow that allows users to tag an entire group of entities at once. Here is one solution to that problem:
1) Create an entity called TagHelper that has a reference set association to the data and an association to a Tag entity.
2) Create a Microflow that takes in a list of Data and associates the list to a new TagHelper object.
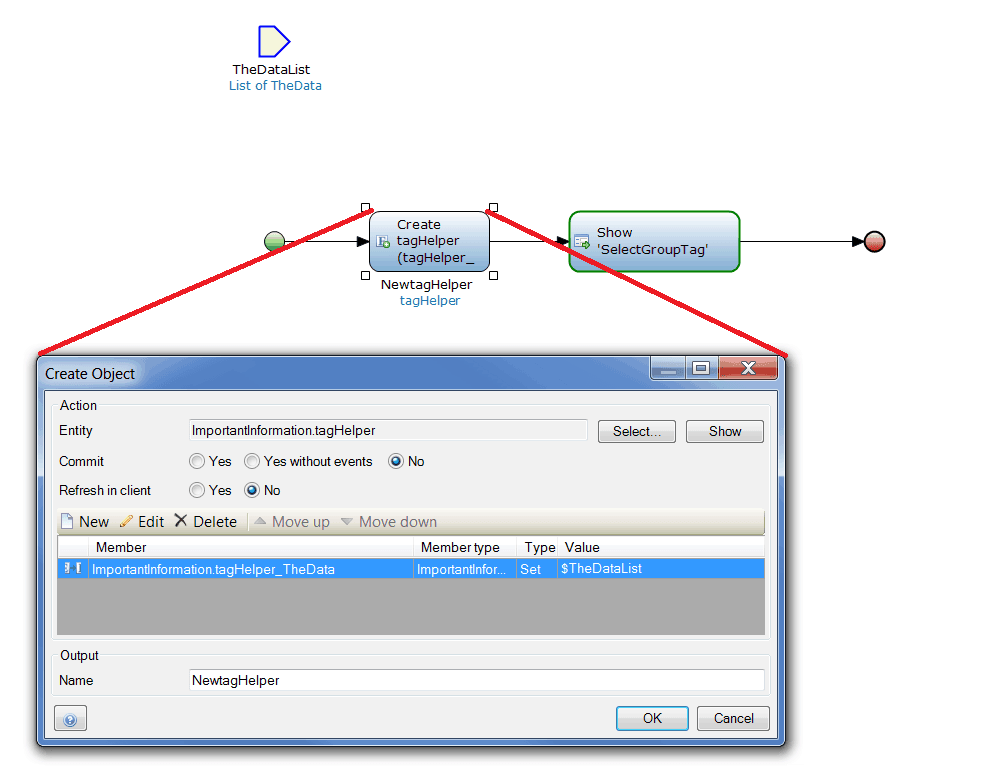
3) Pass this new TagHelper object to a page that contains the Label Selector Widget. The widget should use the association TagHelper_Tag to set the labels
4) Finally, create a Microflow on the page that retrieves the collection of Data objects, retrieves the tags, and then sets the association between Data and Tags.

Make an action on your Data_Overview page that calls the Microflow in step 1. You can choose to pass a user’s selection with multi-select or simply pass the entire list content.
Once that is in place, every item in your list will all have the same tag!
Tag housekeeping
Now that your application is set up to utilize the Label Selector, there are some housekeeping items you might want to consider. I recommend creating a tag Management page where admins can create, delete, or update tags that were created in error. This is necessary if you don’t allow users to create their own tags and instead force them to choose from a list.
Find it on GitHub
Like much of our new App Store content, the Label Selector widget has a GitHub repository. Our active open-source community is constantly working to enhance existing widgets and create great new content together. Keep an eye on this widget in the future as additional functionality is on the way. If you are feeling full of initiative, download the repository and add new features yourself!
Happy Modeling!