Build Widgets in Mendix with React Part 2 - Timer

The Mendix Platform enables Developers to extend their apps using React, through the Pluggable Widgets framework. This framework allows developers to leverage powerful libraries and extend the UI by building React components that can then be used in the Mendix Studio Pro.
In this blog, we are going to learn about Typescript and I am going to show you how to use attributes from your Mendix model in your widget, how to leverage the browser API and we will even touch on conditional rendering in React.
This is the second blog in a multipart series, blog 1 can be found here: Build widgets in Mendix with React — Part 1 — Colour Counter
When to use Pluggable Widgets
There are a few litmus checks I use when deciding whether to create a new Pluggable Widget:
- Does it need a UI component? — if you need to use Javascript but there is no UI component, a JS action might be better suited to your use case
- Is it available in the Mendix Marketplace?
- Does it use the Browser API or an NPM package?
What we are building
This time we’re going to be building a timer for refreshing a page at a fixed interval. “Why don’t I just do that with JavaScript?” I hear you ask. That’s because we’re also going to have a visual component that tells you how long it will be until the next refresh.

This was based on a real use case, where a dashboard was displayed on a shop floor and needed to be updated every 30 seconds
Getting Started
For this widget we will be using Typescript, the strongly typed wrapper around Javascript, as although it initially makes code slightly harder to write, the inbuilt linting and extensive documentation are very useful when creating Pluggable Widgets. These elements of Typescript also make it much easier to collaborate in large teams and integrate with complex APIs.

We begin by scaffolding our widget, as in Blog 1 but this time select Typescript as our programming language.
A quick note on functional components vs class components in React. Throughout these blogs we will use functional components, however, you may also come across React written using class components. This is because, until the release of hooks in React 16.8, class components were the only way to manage state, and functional components were mainly a presentation layer for the frontend. Now the React community is moving towards using functional components as they are syntactically simpler and more lightweight.
Dev time
For an explanation of the Pluggable Widget folder structure and how to set up your development environment see my previous blog.
One thing first
To speed up the development process we are going to remove our editor preview file. This file creates the preview for our widget in Design mode in Studio Pro, or Studio, and we’re not worried about that for this guide. It would just be one more thing to update. So let’s go ahead and remove the file: Timer.editorPreview.tsx.
The Brief
We can break down what we are trying to achieve with our widget into 3 main sections:
- Step 1: Set the timer to an initial value defined in Mendix
- Step 2: Decrease the timer in 1s intervals
- Step 3: Execute an action
Step 1: Set the timer to an initial value defined in Mendix
Let’s start by creating the interface between our Mendix model and the widget. We could use a simple Integer but by using an attribute we have more flexibility to dynamically change the timer value at runtime.
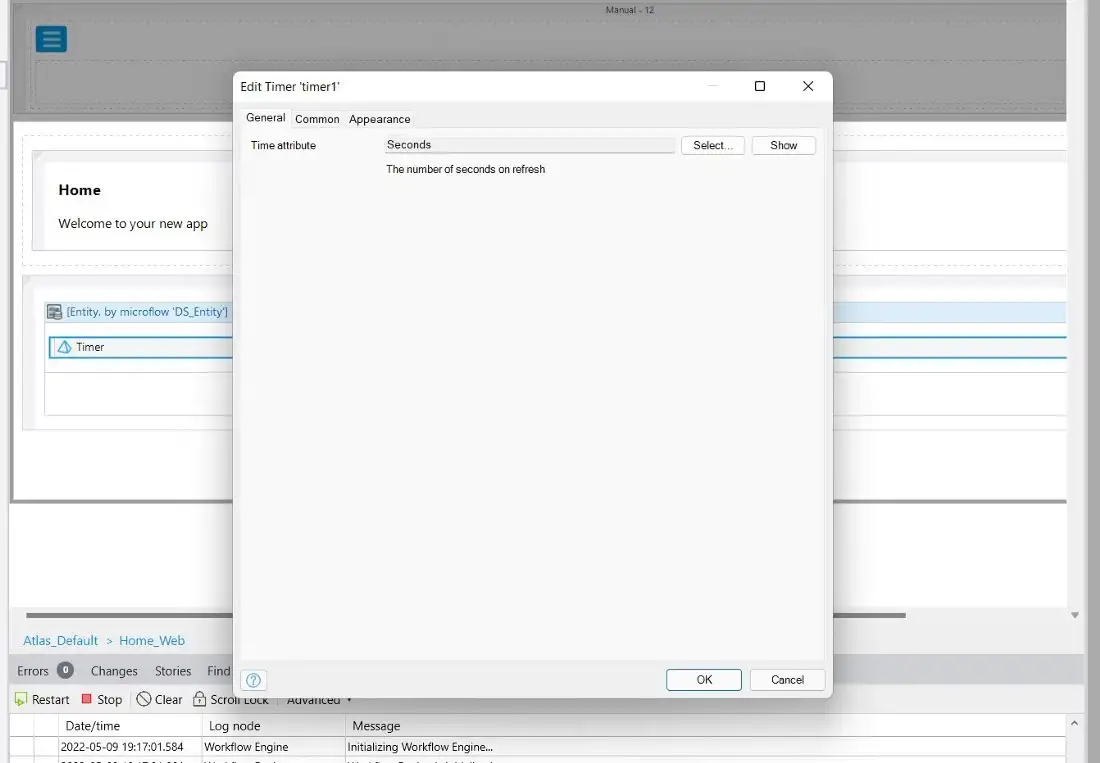
We update our Timer.xml to contain:
<property key="timeAtt" type="attribute" required="true
    <caption>Time attribute</caption>
    <description>The number of seconds on refresh</description>
    <attributeTypes>
         <attributeType name="Integer"/>
    </attributeTypes>
</property>
While we are at it we should also rename the child component to TimeText, and the interface to TimeTextProps. When we save the file and run the command :npm run build, we will see errors, this is good!

It shows that the sampleText property has been replaced by the timeAtt. Let’s update our Timer file with timeAtt in place of the default sampleText.
If we highlight the timeAtt in our Timer.tsx file, we can see that it is of type EditableValue<Big>.
EditableValue is the generic type that Mendix uses to represent all attributes, and it allows us to read and write the values within the Mendix model.
The ‘<>’ part, is determined by the attribute type. For integer or decimal attributes we use the Big.js library. This is to ensure that the numbers used in your application are not constrained by default JavaScript number limitations.
Using State
So far we have created a link between Mendix and the widget, through the props of the container component. Now we need to pass down an easily readable value to our TimeText component, to display on the page. To do this we will process our EditableValue<Big> and store a simple integer in the state of our container component.
We use state here rather than props because we are going to change our timer value over time and props should never be directly changed:
Let’s start by importing useState from ‘React’ and initialising a state called time with the following:
const [time, setTime] = useState<number>();
This gives us a state variable (time) and a setState function to change that state(like props, the state must never be directly mutated, and instead can be changed via this function).
Using useEffect
Next, we need to pass our attribute value into our state. The easiest way to do this is by passing a value into our useState:
const [time, setTime] = useState<number>(timeAtt.value.toNumber());
But because our value could be empty, we are not going to do that. Instead, we will use another central concept of React ‘useEffect’.
So what is useEffect? Essentially it executes a function after every render. We can use it to set our time like this:
export function Timer({timeAtt}: TimerContainerProps):ReactElement {
const [time, setTime] = useState<number>();
useEffect(() => {
if (timeAtt.value) {
setTime(timeAtt.value.toNumber());
}
}, []);
return <TimeText sampleText={sampleText ? sampleText:"World"}/>;
}We can then pass this down to the child component, TimeText by updating the props to accept our new time state:
return <TimeText value={time}/>;And that’s our Timer component updated!
Now we just need to make a few minor changes to our TimeText component to accept the new props. Because we are using Typescript we have an interface for our component. This defines how any code using this component can interact with it. So, let’s update our display component to:
export interface TimeTextProps {
    value: number | undefined;
}
export function TimeText({ value }: TimeTextProps): ReactElement {
return <div>{value} seconds</div>;
}Interfaces might seem unnecessary here, and for a small widget like this they probably are, but for when projects get larger they are incredibly useful.
To test, we can open Mendix Studio Pro and press F4 to synchronize the updates to or widget. We then need to set up our page so that a number attribute can be passed to the timer widget.
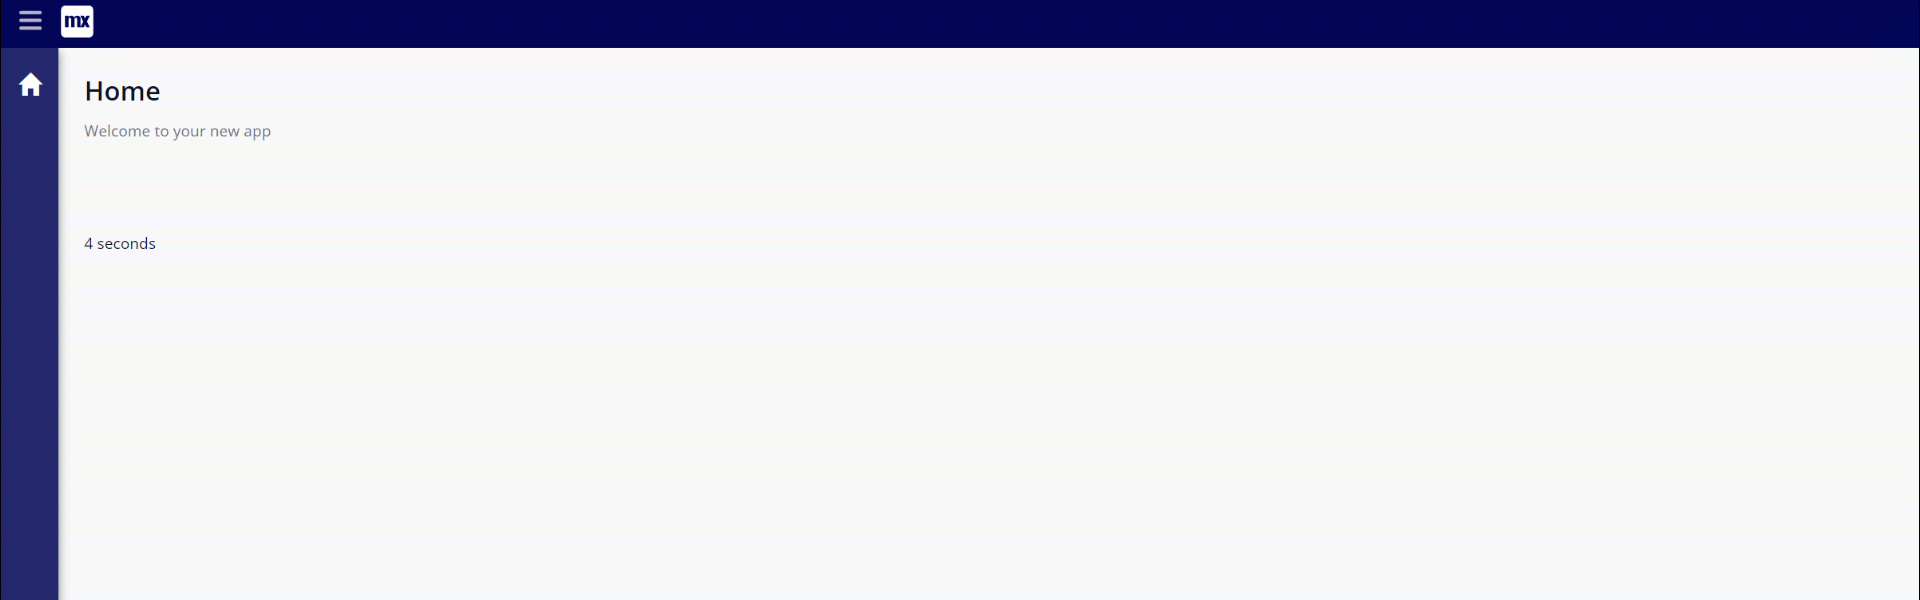
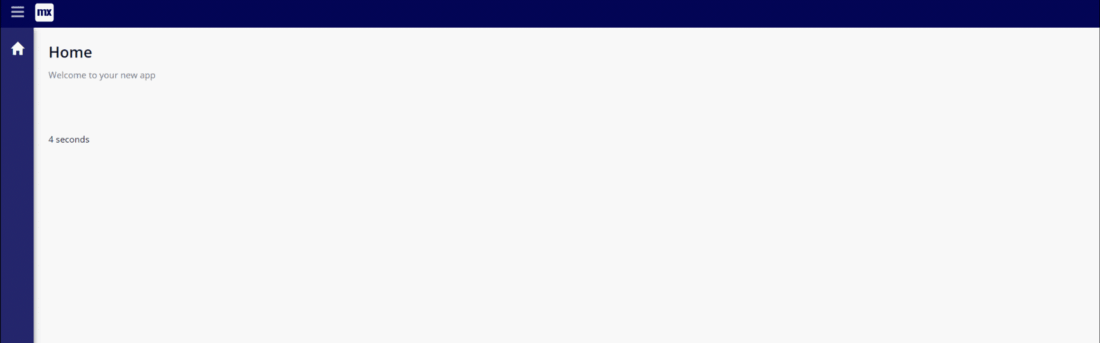
We click Run and…. our page just says ‘seconds’.

Don’t worry this is expected due to how Mendix loads attributes. The attribute values are loaded asynchronously, this is what makes the Mendix front end so fast but means that we need an extra couple of lines of code to get our widget working.
Using useEffect, but correctly
We left the second parameter of useEffect empty, this means the useEffect function runs once when the component first mounts, at which point our attribute value is not ready.
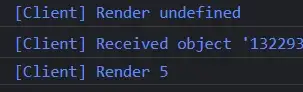
If you want to check this put an console.log(`Render ${timeAtt.value}`) above the if statement and check the browser console (‘Ctrl + Shift + i’ from the browser).
So instead we want the useEffect function to run whenever the timeAtt is updated, to do this we simply add the timeAtt to the second parameter to useEffect.
export function Timer({timeAtt}: TimerContainerProps):ReactElement {
const [time, setTime] = useState<number>();
useEffect(() => {
if (timeAtt.value) {
setTime(timeAtt.value.toNumber());
}
}, [timeAtt]);
return <TimeText value={time}/>;
}If you rerun the application from Mendix you will see your timer value appear, and if you check the console log you will see that the widget rendered twice, once when the value was undefined and once with the number.
SUCCESS! That’s part 1 done!
Step 2: Decrease the timer in 1s intervals
Cool. So we have a number displayed on a screen but there’s not much use in that, we want our timer to count down. To do that we are going to use the browser Javascript API, specifically window.setTimeout(), which executes a function after a fixed amount of time.
By combining this with our old friend useEffect, we can create a countdown. If we make our useEffect function dependent on our time state and wait 1 second to change our time state by 1 second, we essentially create a loop.
export function Timer({timeAtt}: TimerContainerProps):ReactElement {
const [time, setTime] = useState<number>();
useEffect(() => {
         if (timeAtt.value) {
             setTime(timeAtt.value.toNumber());
         }
     }, [timeAtt]);
>seEffect(() => {
        if (time !== undefined) {
             window.setTimeout(() => setTime(time - 1), 1000);
        }
    }, [time]);

    return <TimeText value={time}/>;
}
However this count will keep going forever, so we need to add one more condition to get it to stop.
useEffect(() => {
if (time !== undefined) {
if (time > 0) {
window.setTimeout(() => setTime(time - 1), 1000);
}
}
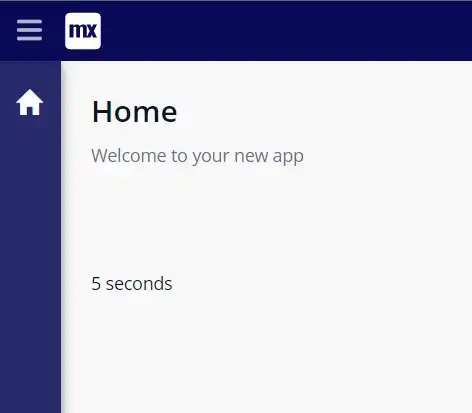
}, [time]);If we reload our widget we can see that we have our countdown.
A reminder that if you are using npm run start and watching for changes on your widget you need to clear cache and refresh (in Chrome open browser tools and right click the refresh button)
Step 3: Execute an action
We now need something to happen when the countdown hits 0!
Luckily Mendix provides a very easy-to-use API to integrate with the Model and execute an action. First, we update the Timer.xml to contain:
<property key="action" type="action" required="true">
 <caption>Action</caption>
      <description>Action to trigger when the time elapses</description>
</property>
We can then add a function to execute the action on our Timer.tsx, and update our useEffect function to execute the action at 0.
Our final Timer.tsx should look like this:
export function Timer({ timeAtt, action }: TimerContainerProps): ReactElement {
    const [time, setTime] = useState<number>();
useEffect(() => {
        if (time !== undefined) {
            if (time > 0) {
                window.setTimeout(() => setTime(time - 1), 1000);
            } else {
                execAction();
            }
        }
    }, [time]);
useEffect(() => {
        if (timeAtt.value) {
            setTime(timeAtt.value.toNumber());
        }
    }, [timeAtt]);
const execAction = () => {
        if (action && action.canExecute) {
            action.execute();
        }
    };
return <TimeText value={time} />;
}
We can test this new code in our Mendix app by pressing F4 and choosing an action to be executed.
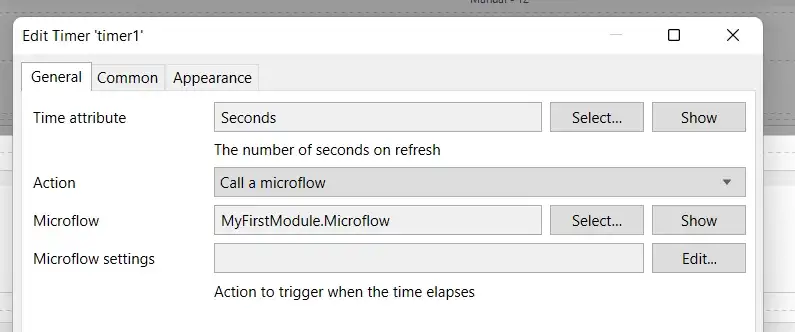
By choosing to call a microflow that refreshes the page, we get our repeating timer.
One last thing
When our component first loads there was a brief period where the time value passed to the TimeText component is undefined. This is not a major problem, as it just leads to the widget rendering ‘ seconds’, but it is best practice to give some indication that the value is loading.
To do that we will use a common pattern in React for conditional rendering.
We can use an if statement to check whether the value is not yet defined and display loading like so:
export function TimeText({ value }: TimeTextProps): ReactElement {
 if (value === undefined) {
  return <div>Loading</div>;
 } else {
  return <div>{value}</div>;
 }
}
But this is very wordy. We can use ternary operators from ES6 to shorten this to:
export function TimeText({ value }: TimeTextProps): ReactElement {
    return value ? <div>{value} seconds</div> : <div>Loading</div>;}
And VOILA!

Summary
Congratulations, you built a Pluggable Widget!
In this build we covered the Pluggable Widget API, how to get data from your Mendix model and change it; covered using Typescript to better understand how to integrate with our Mendix app, revisited key React concepts, and learnt how to execute actions from your Mendix model in a widget.
The end state of this widget can be found here: GitHub – joe-robertson-mx/timer
Up next we will build a Kanban Board using Mendix and Pluggable Widgets to learn more about how widgets can be combined to create slick end-user experiences, and how to make changes that persist in your Mendix database.